How to Create and Send Promotion Codes
Overview
Promotion codes give your buyers a discount they apply themselves at checkout, which makes them a simple way to reward followers or run a sale without lowering your listed prices. It is for sellers — artists and galleries — and activating a code requires the Growth plan or higher, so on lower plans codes stay Inactive until your account qualifies. You create and manage codes on the Promotion Codes page, where each code carries its discount, validity window, and optional redemption limits. The description you write is shown to buyers at checkout, and every order that uses a code is recorded in that code’s Transactions history. Only some fields can be changed after a code is created, and sharing is manual: you copy the code and send it through your own email, messages, or newsletter. By the end of this guide you will have created a code, shared it with your buyers, and know where to track its redemptions and edit it later.
Before you start
- You need a seller account: Promotions sits in the Growth section of your dashboard sidebar.
- Activating a code requires the Growth plan or higher: on lower plans the dialog warns you and the code is saved as Inactive even if you choose Active (see How to Subscribe to a Pro, Growth, or Premier Plan to upgrade).
- Prepare the code details in advance: the code text itself (required, up to 20 characters), the buyer-facing description, the discount type (percentage or fixed amount) with its value and currency, an optional maximum discount, the required start and end times, and any optional redemption cap or minimum subtotal.
- Only the description, start and end times, and the on/off status can be edited after creation: the code text and discount values are fixed, so check them before clicking Save.
- Viewing a code’s detail page opens a new browser window, so allow pop-ups from the site or View details will appear to do nothing.
Steps
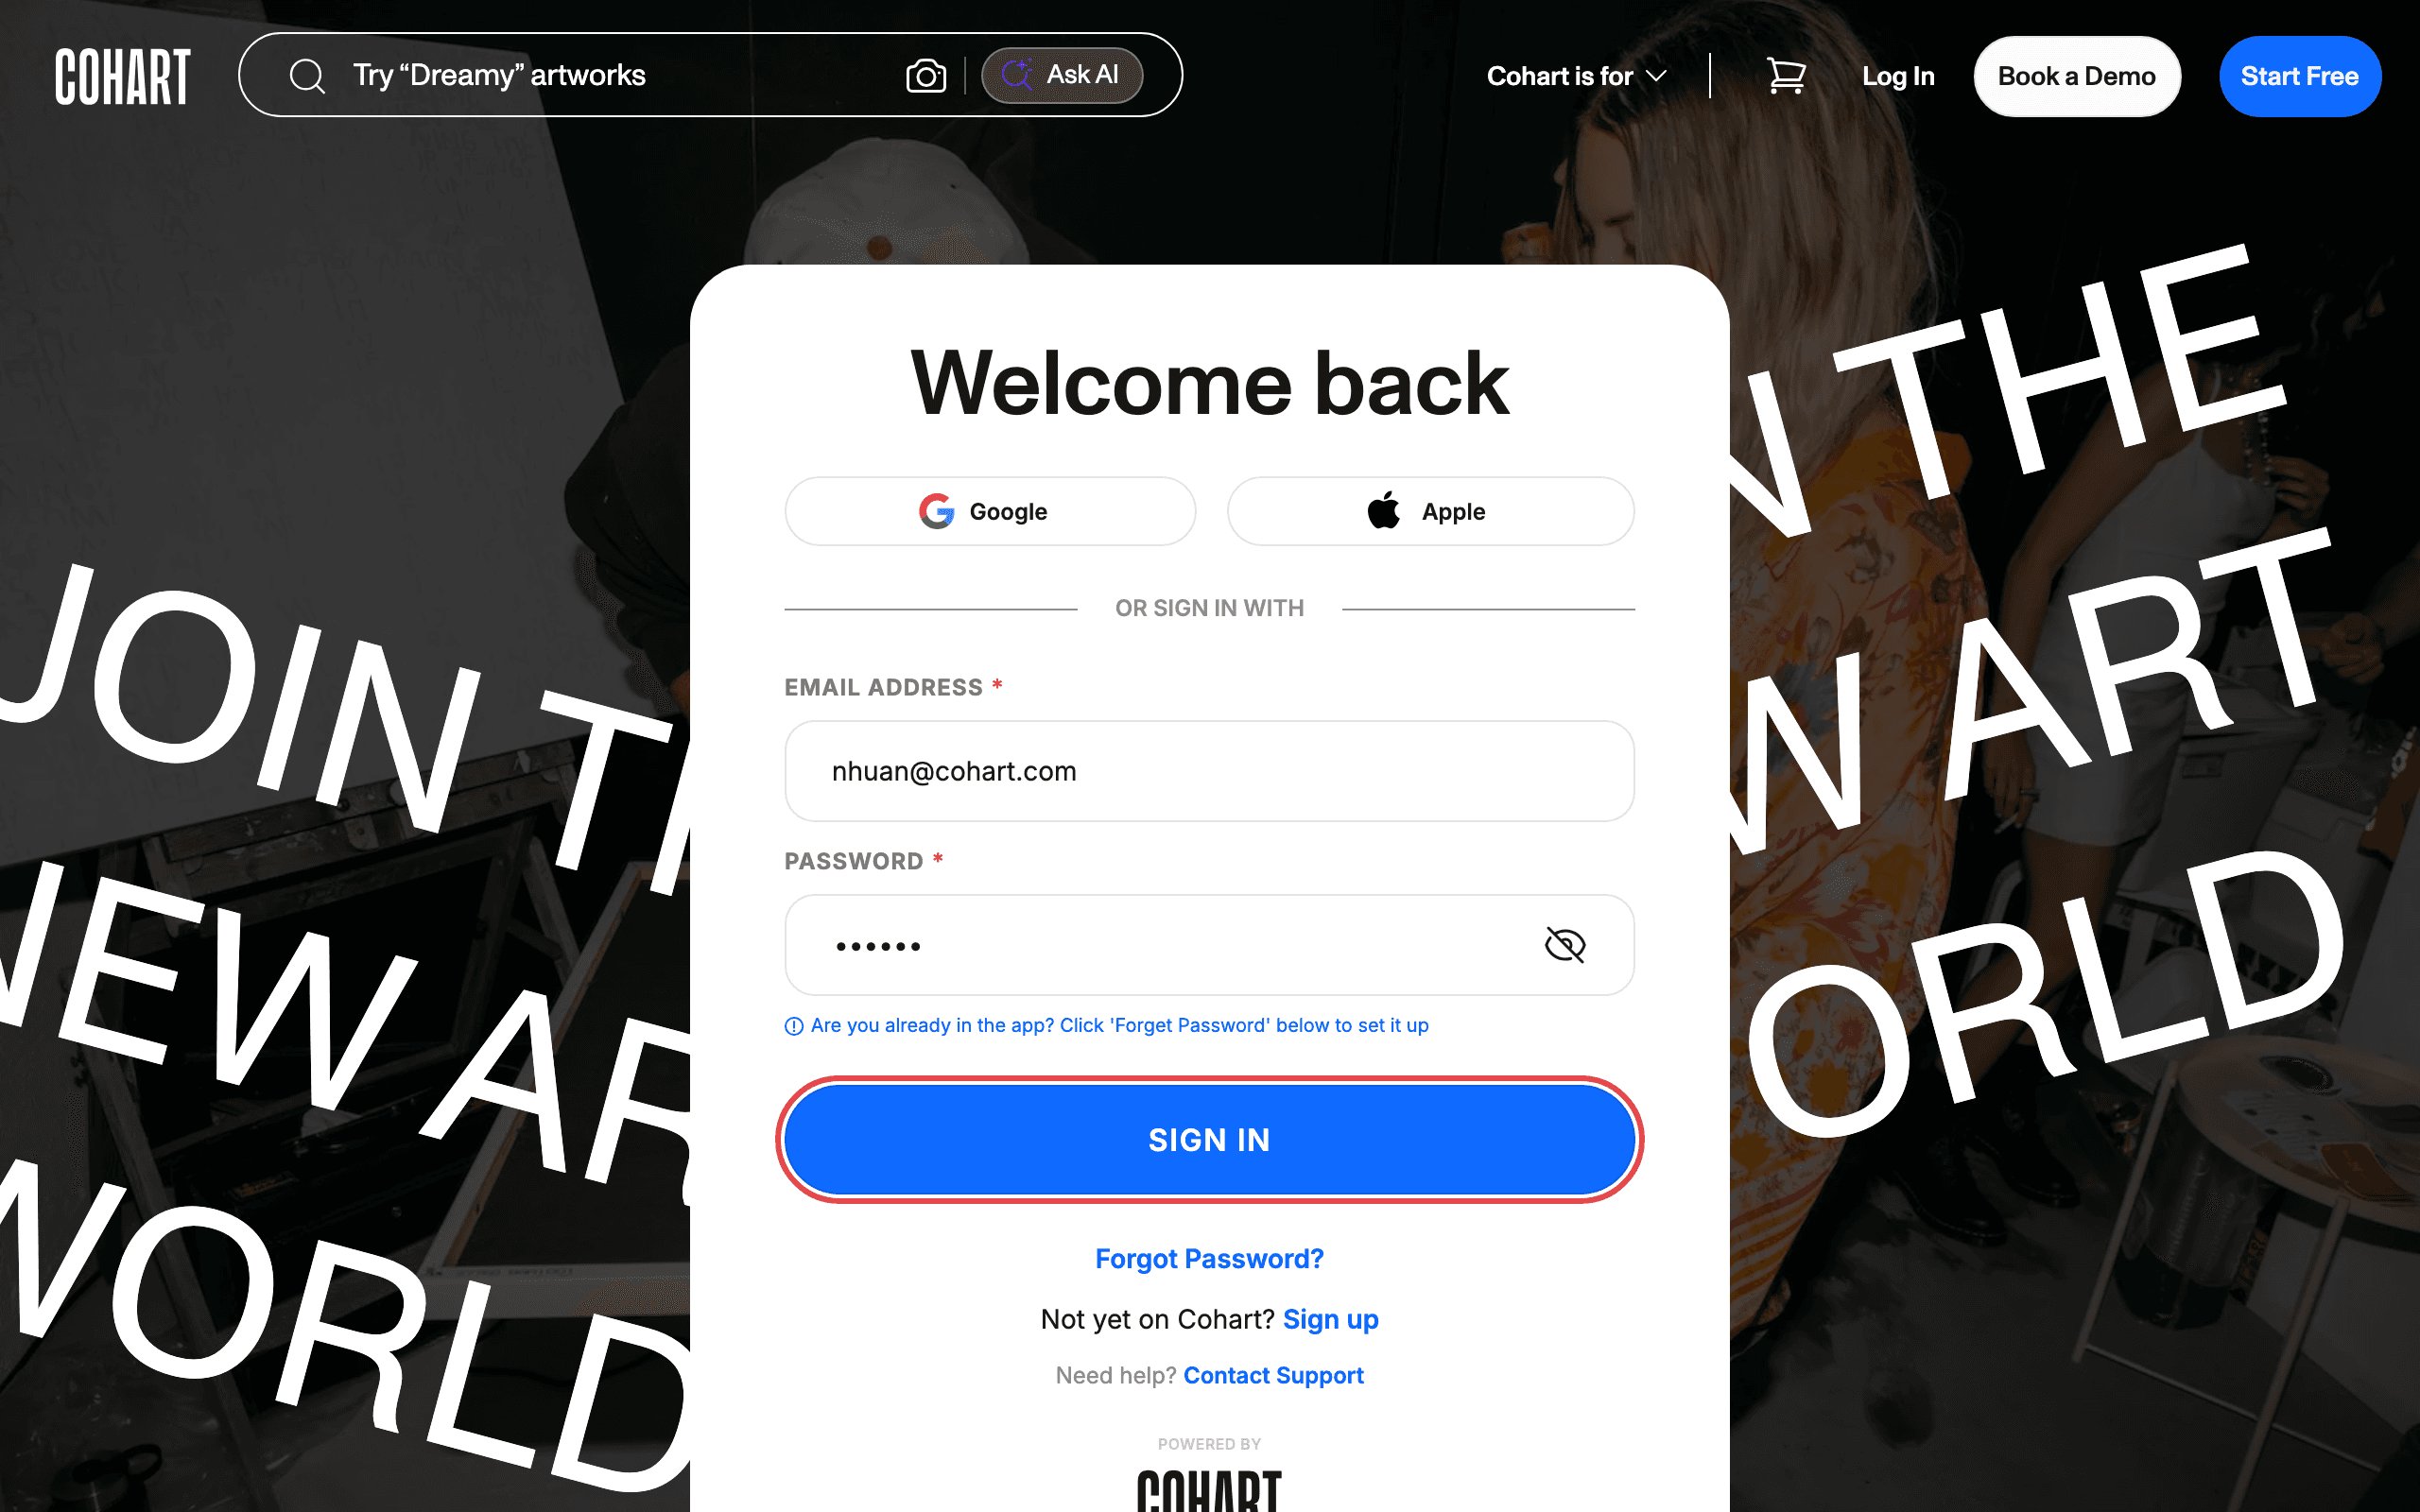
1. Sign in to Cohart
Sign in with your email address and password, or use Google or Apple.
2. Open Promotions
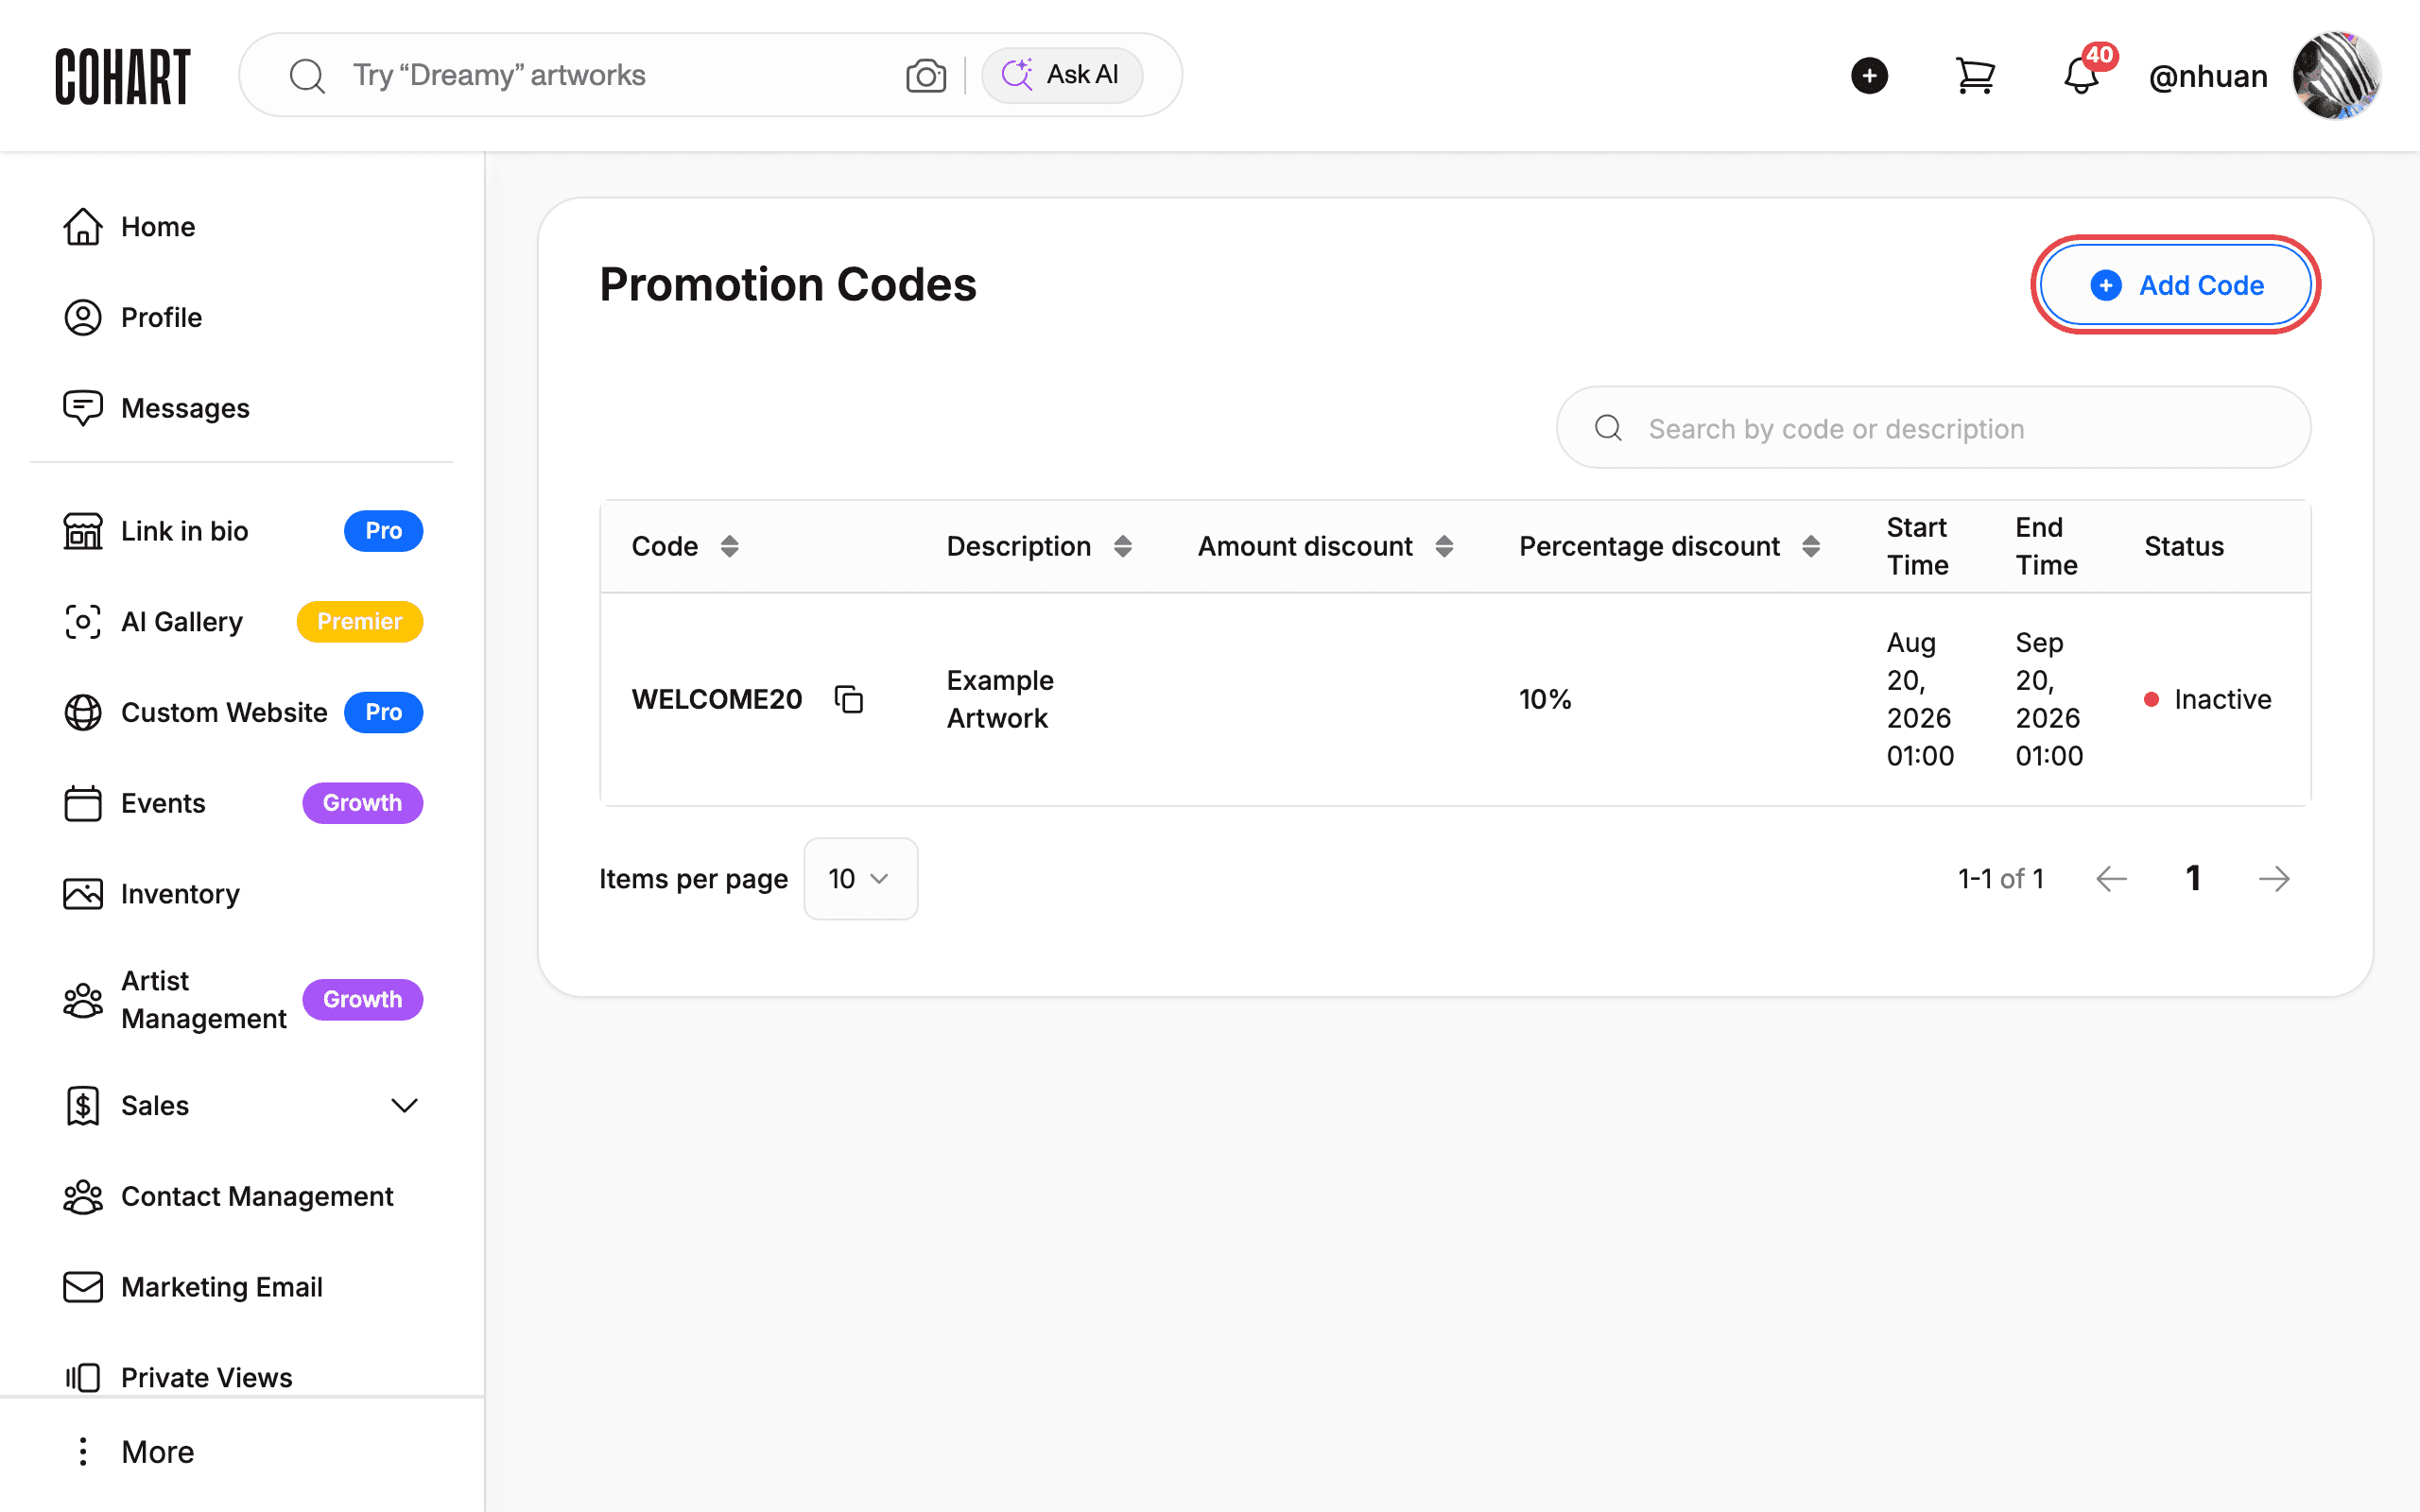
In the sidebar on the left, click Promotions (under the Growth section, below Marketing Email).
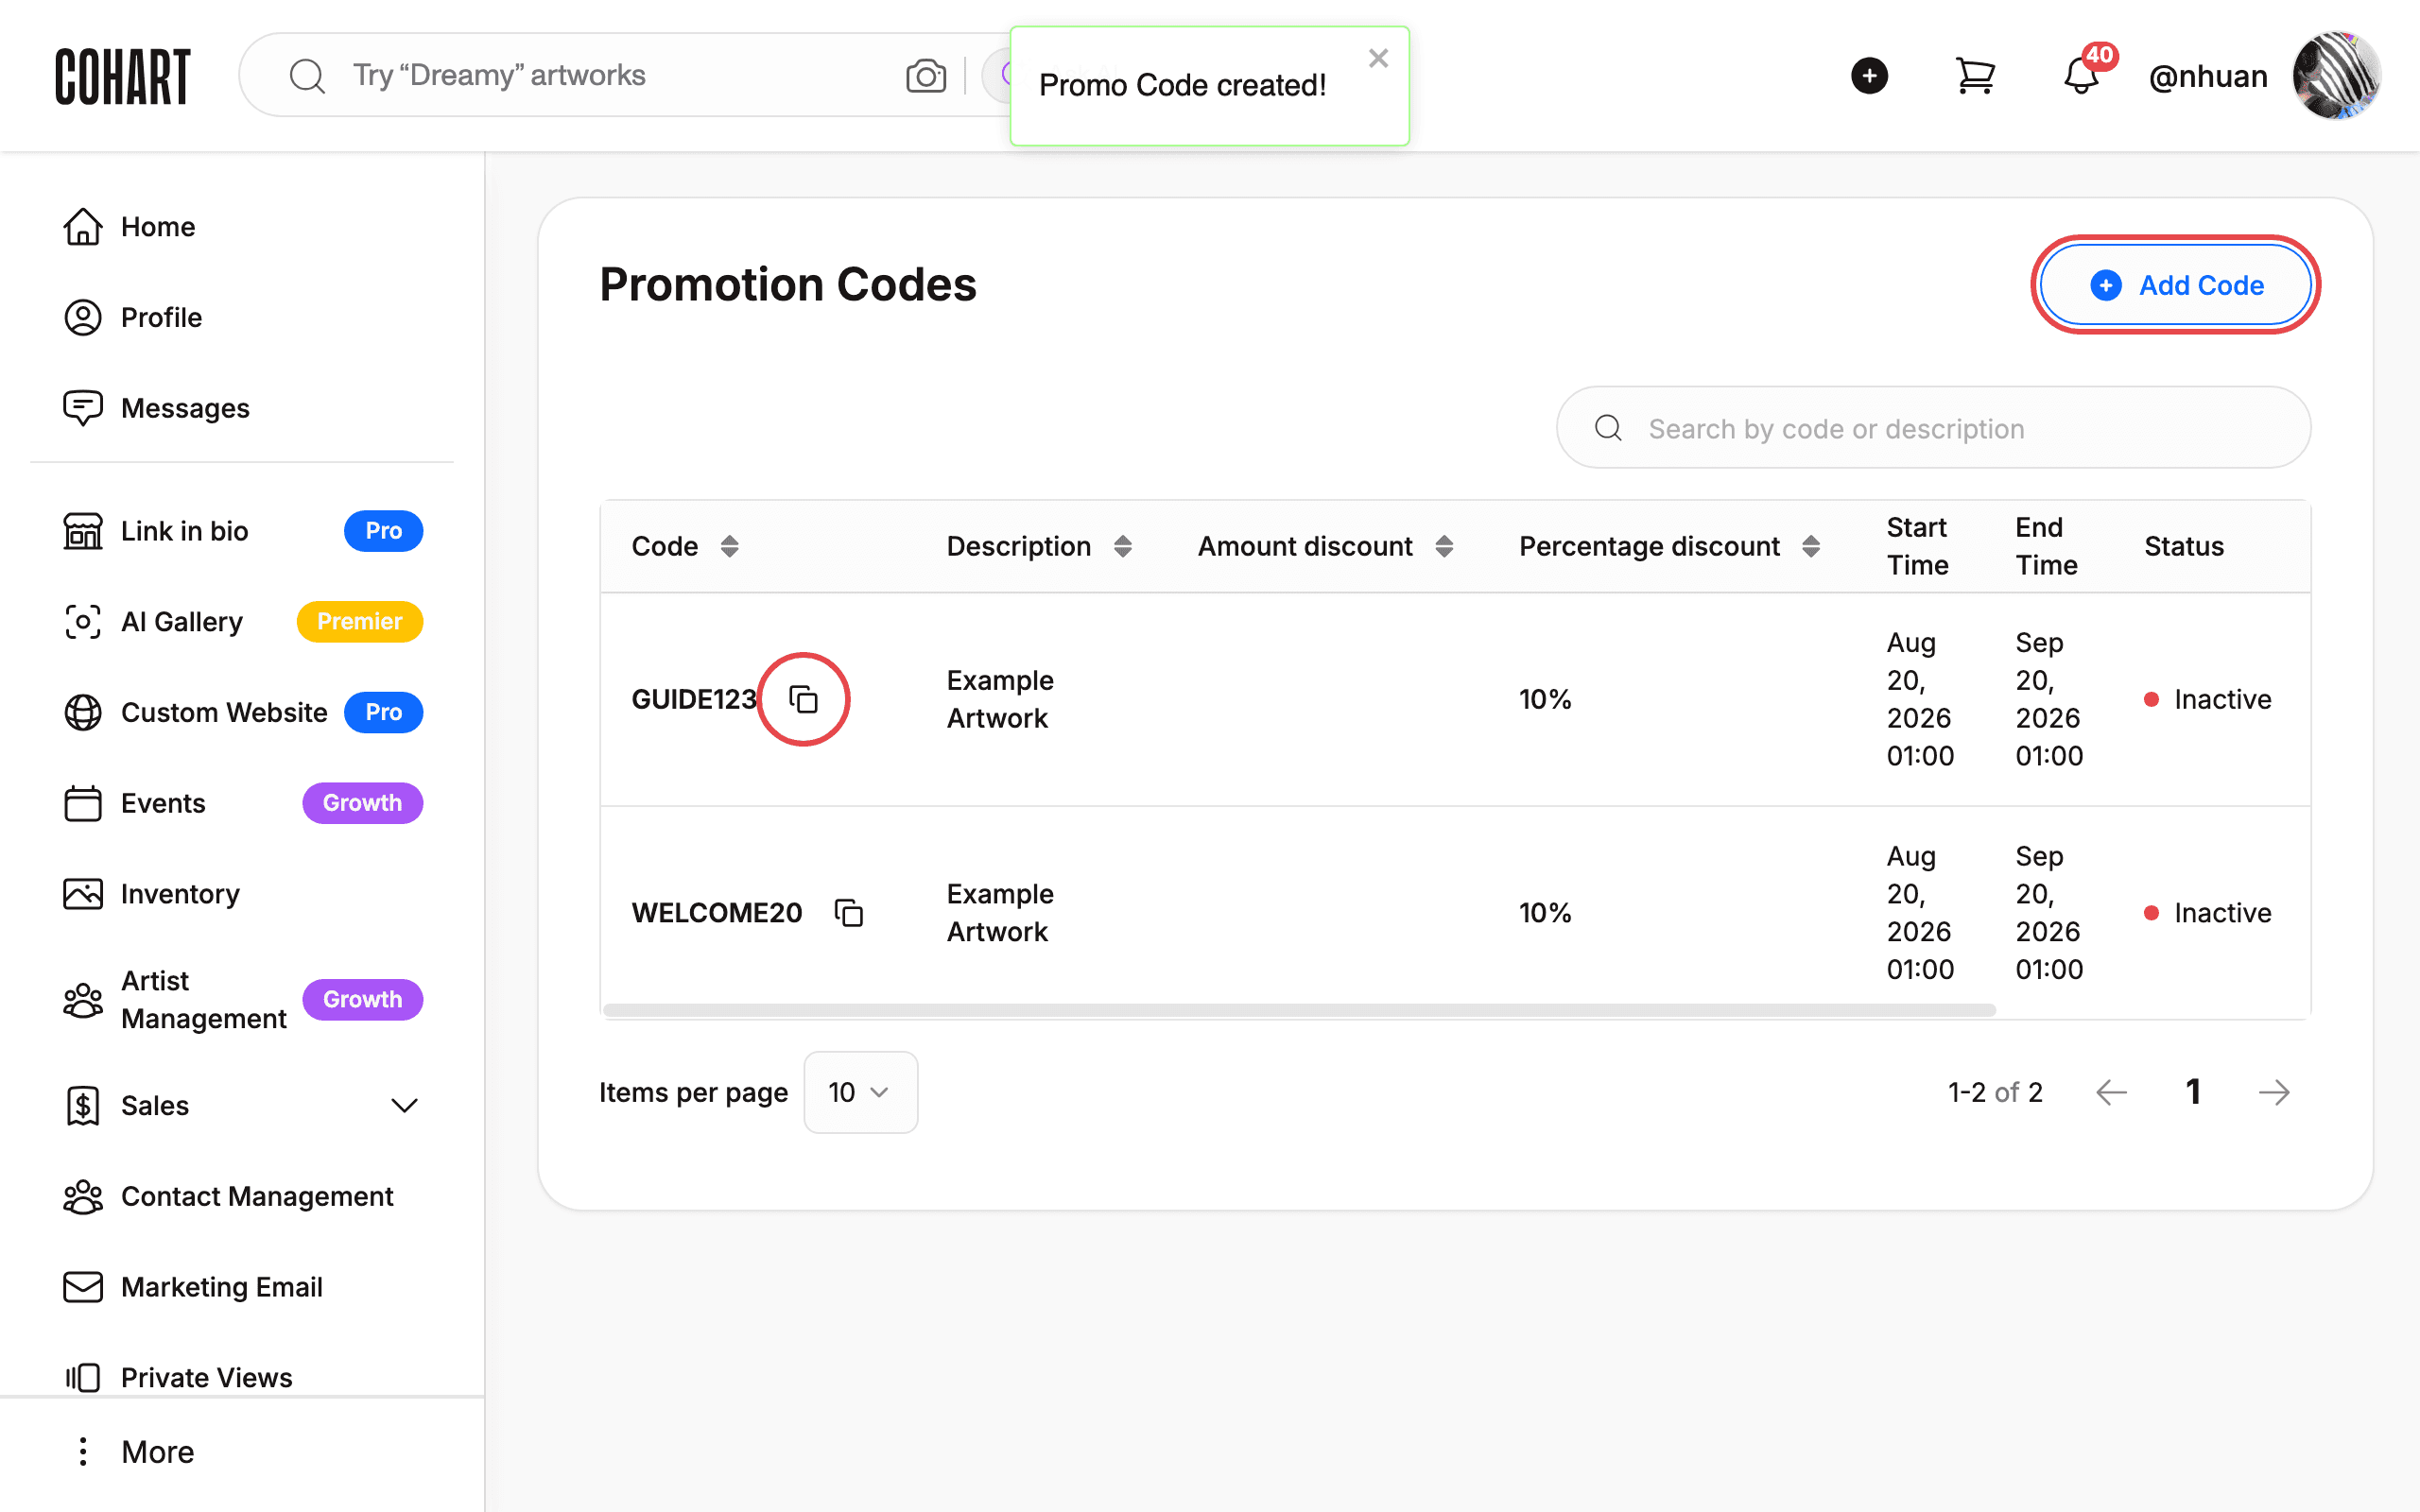
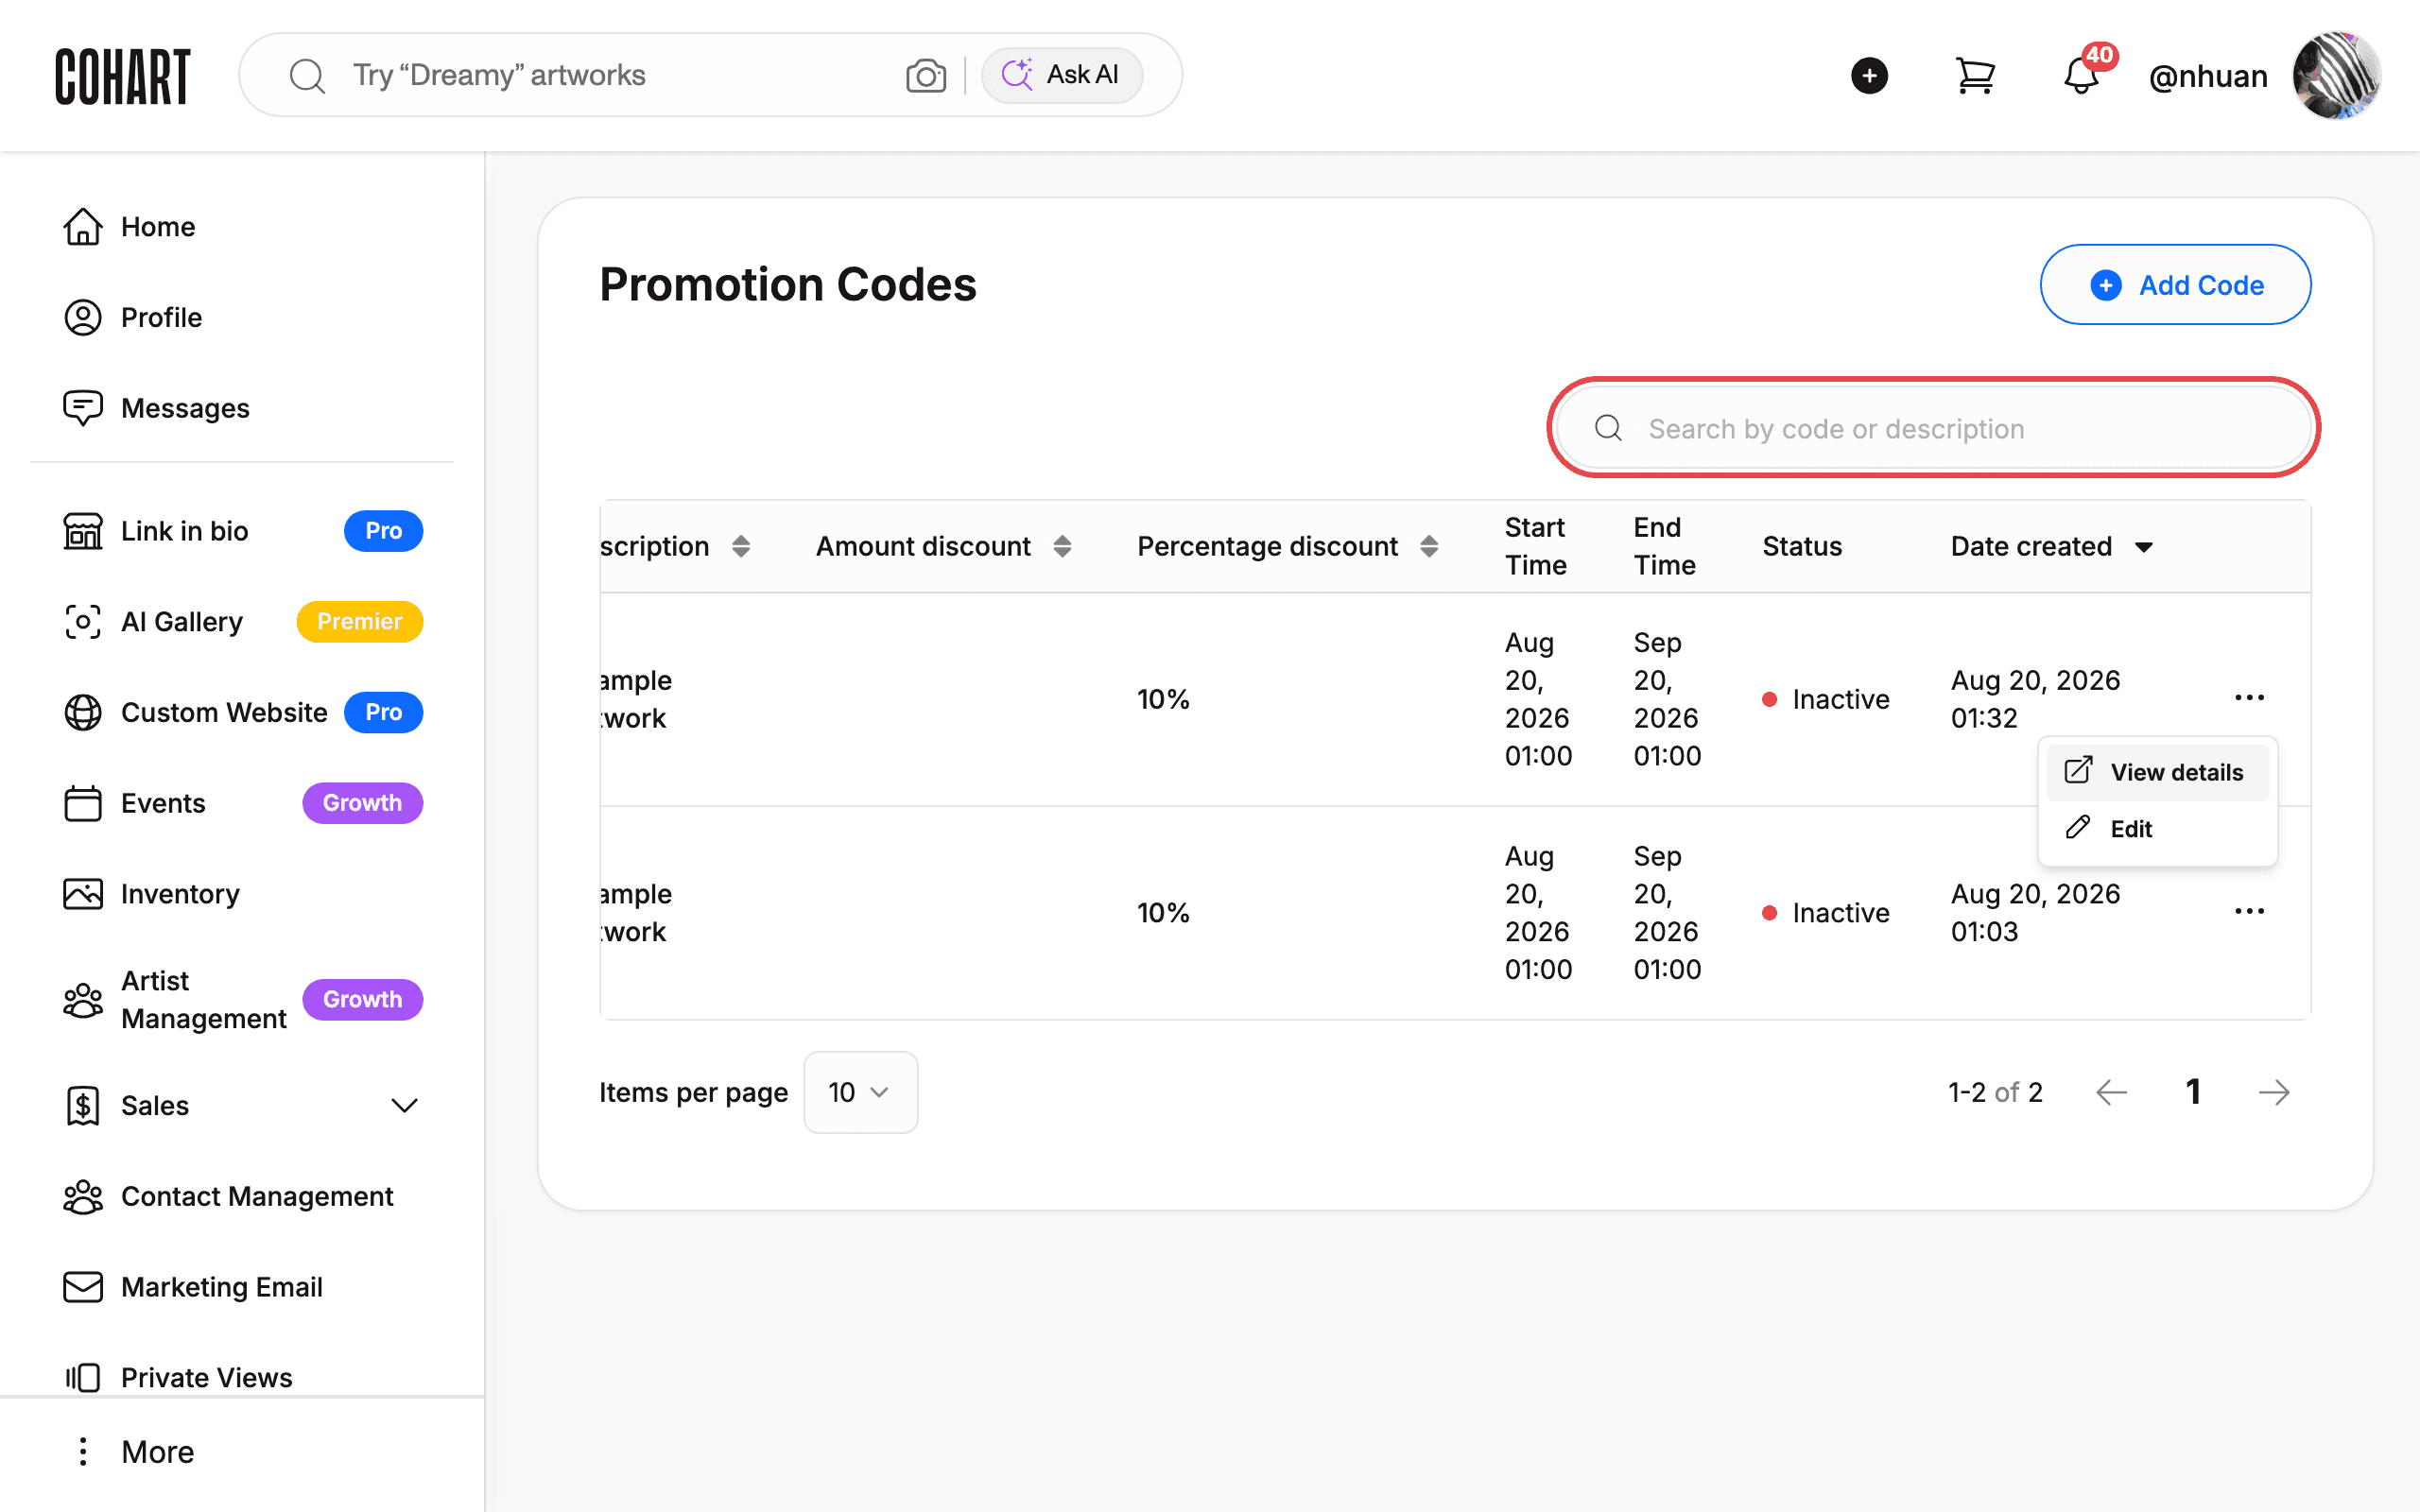
The Promotion Codes page opens with an Add Code button, a search field, and a table of your existing codes (columns: Code, Description, Amount discount, Percentage discount, Start Time, End Time, Status, Date created).
3. Click Add Code
Click Add Code to open the Add a Promo Code dialog.
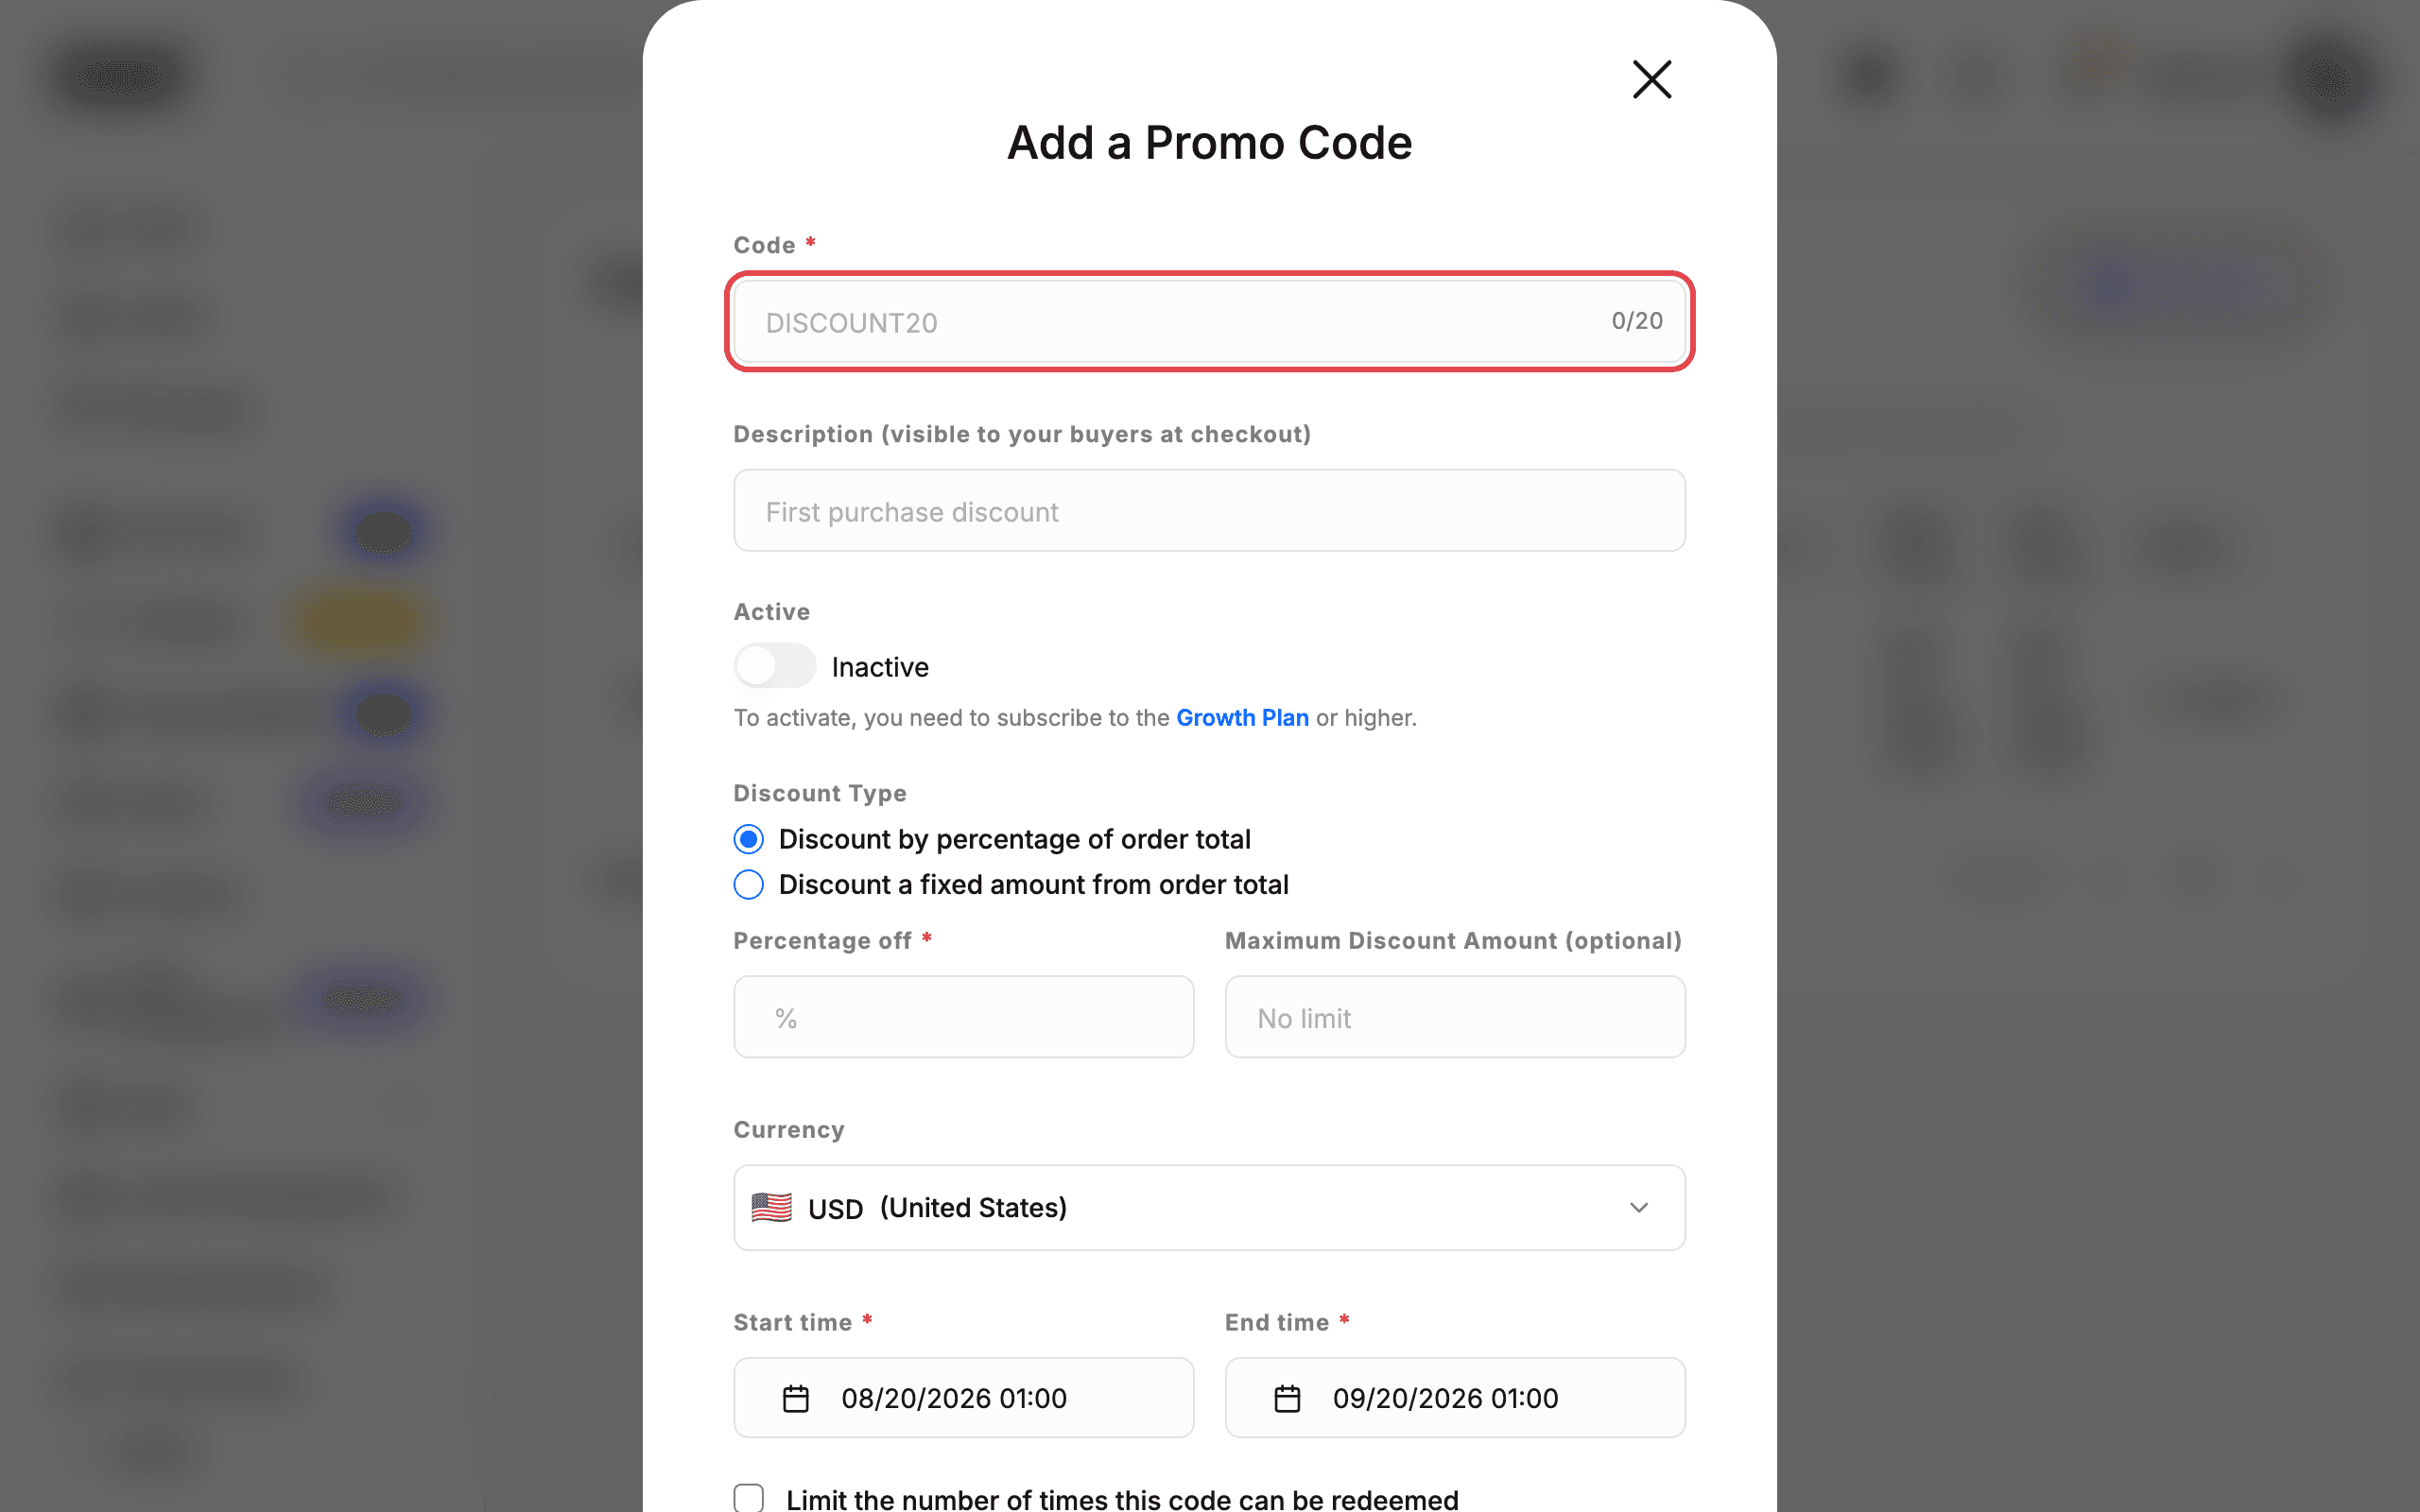
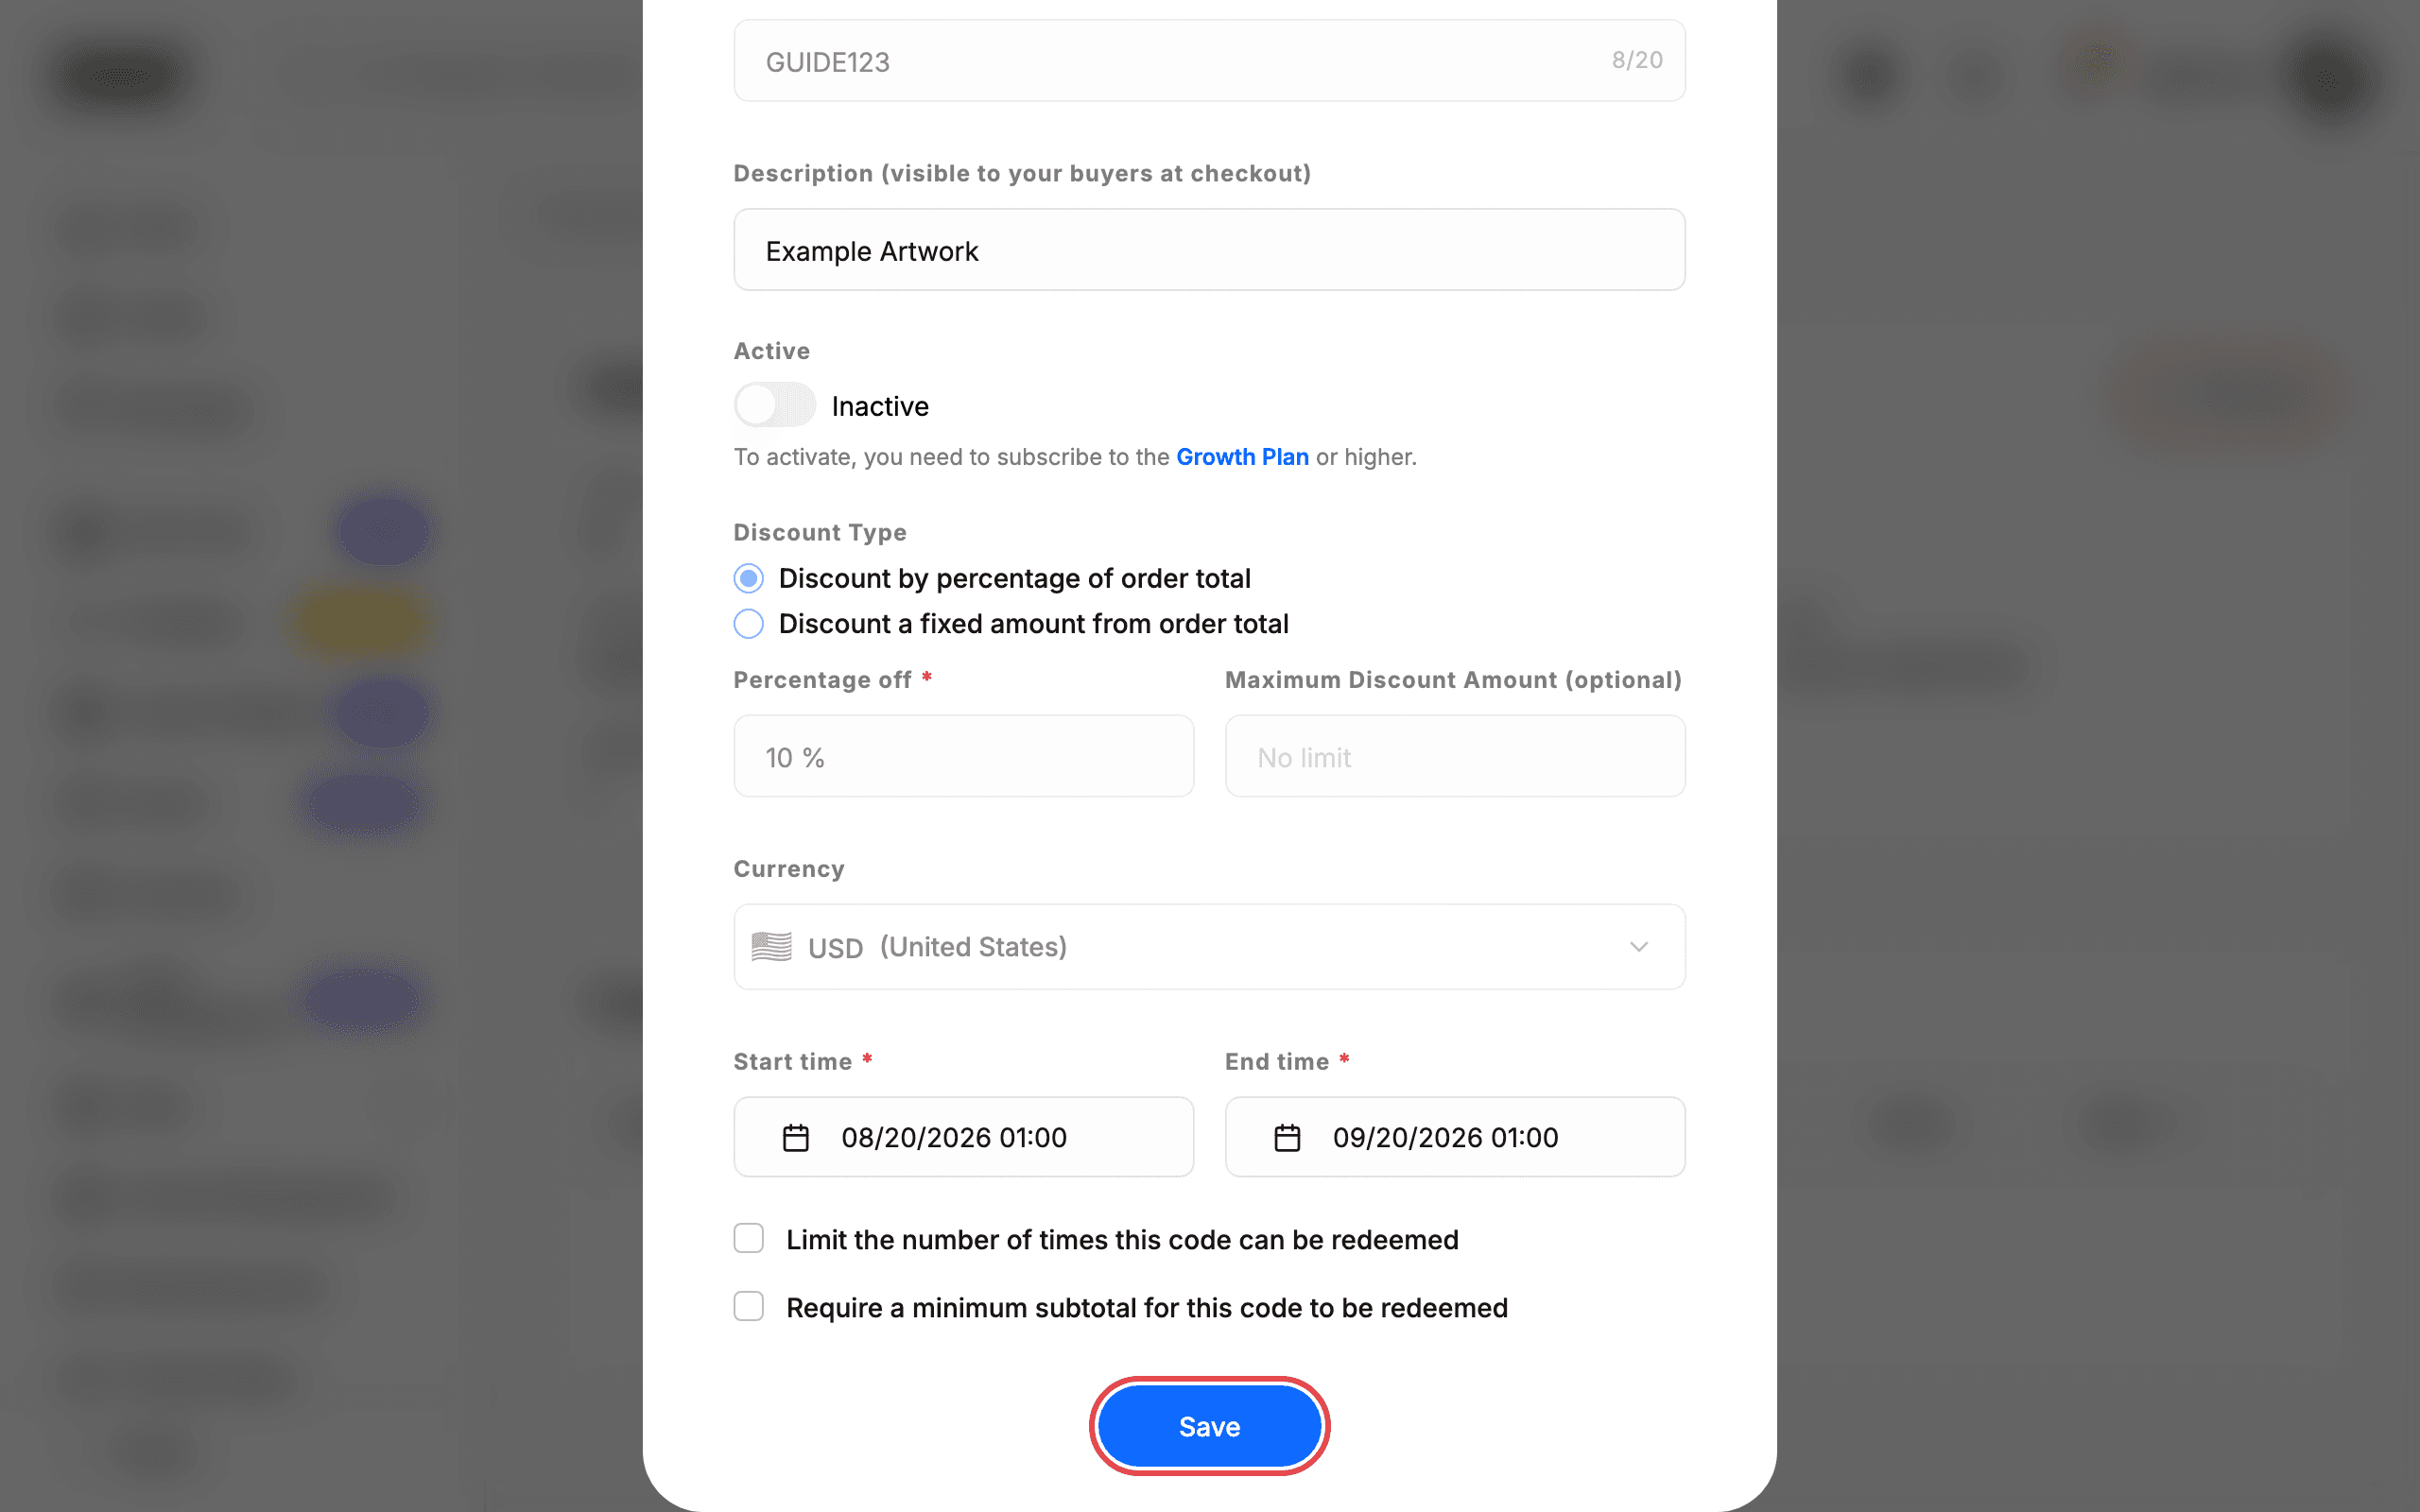
4. Fill in the promo code details
- Code* — the code buyers enter at checkout. Up to 20 characters (a 0/20 counter shows how many you have left).
- Description (visible to your buyers at checkout) — shown to buyers when they use the code.
- Active / Inactive — the code’s status. If the dialog warns “To activate, you need to subscribe to the Growth Plan or higher”, the code will be saved as Inactive unless you are on a Growth Plan or higher.
- Discount Type — choose Discount by percentage of order total (default) or Discount a fixed amount from order total.
- Percentage off* — required when using the percentage type. A fixed-amount code asks for the discount amount instead.
- Maximum Discount Amount (optional) — caps how much the discount can be.
- Currency — the currency of the discount (defaults to USD).
- Start time* and End time* — when the code is valid. Both are required and pre-filled (one month window).
- Limit the number of times this code can be redeemed — optional redemption cap.
- Require a minimum subtotal for this code to be redeemed — optional minimum order value.
5. Click Save
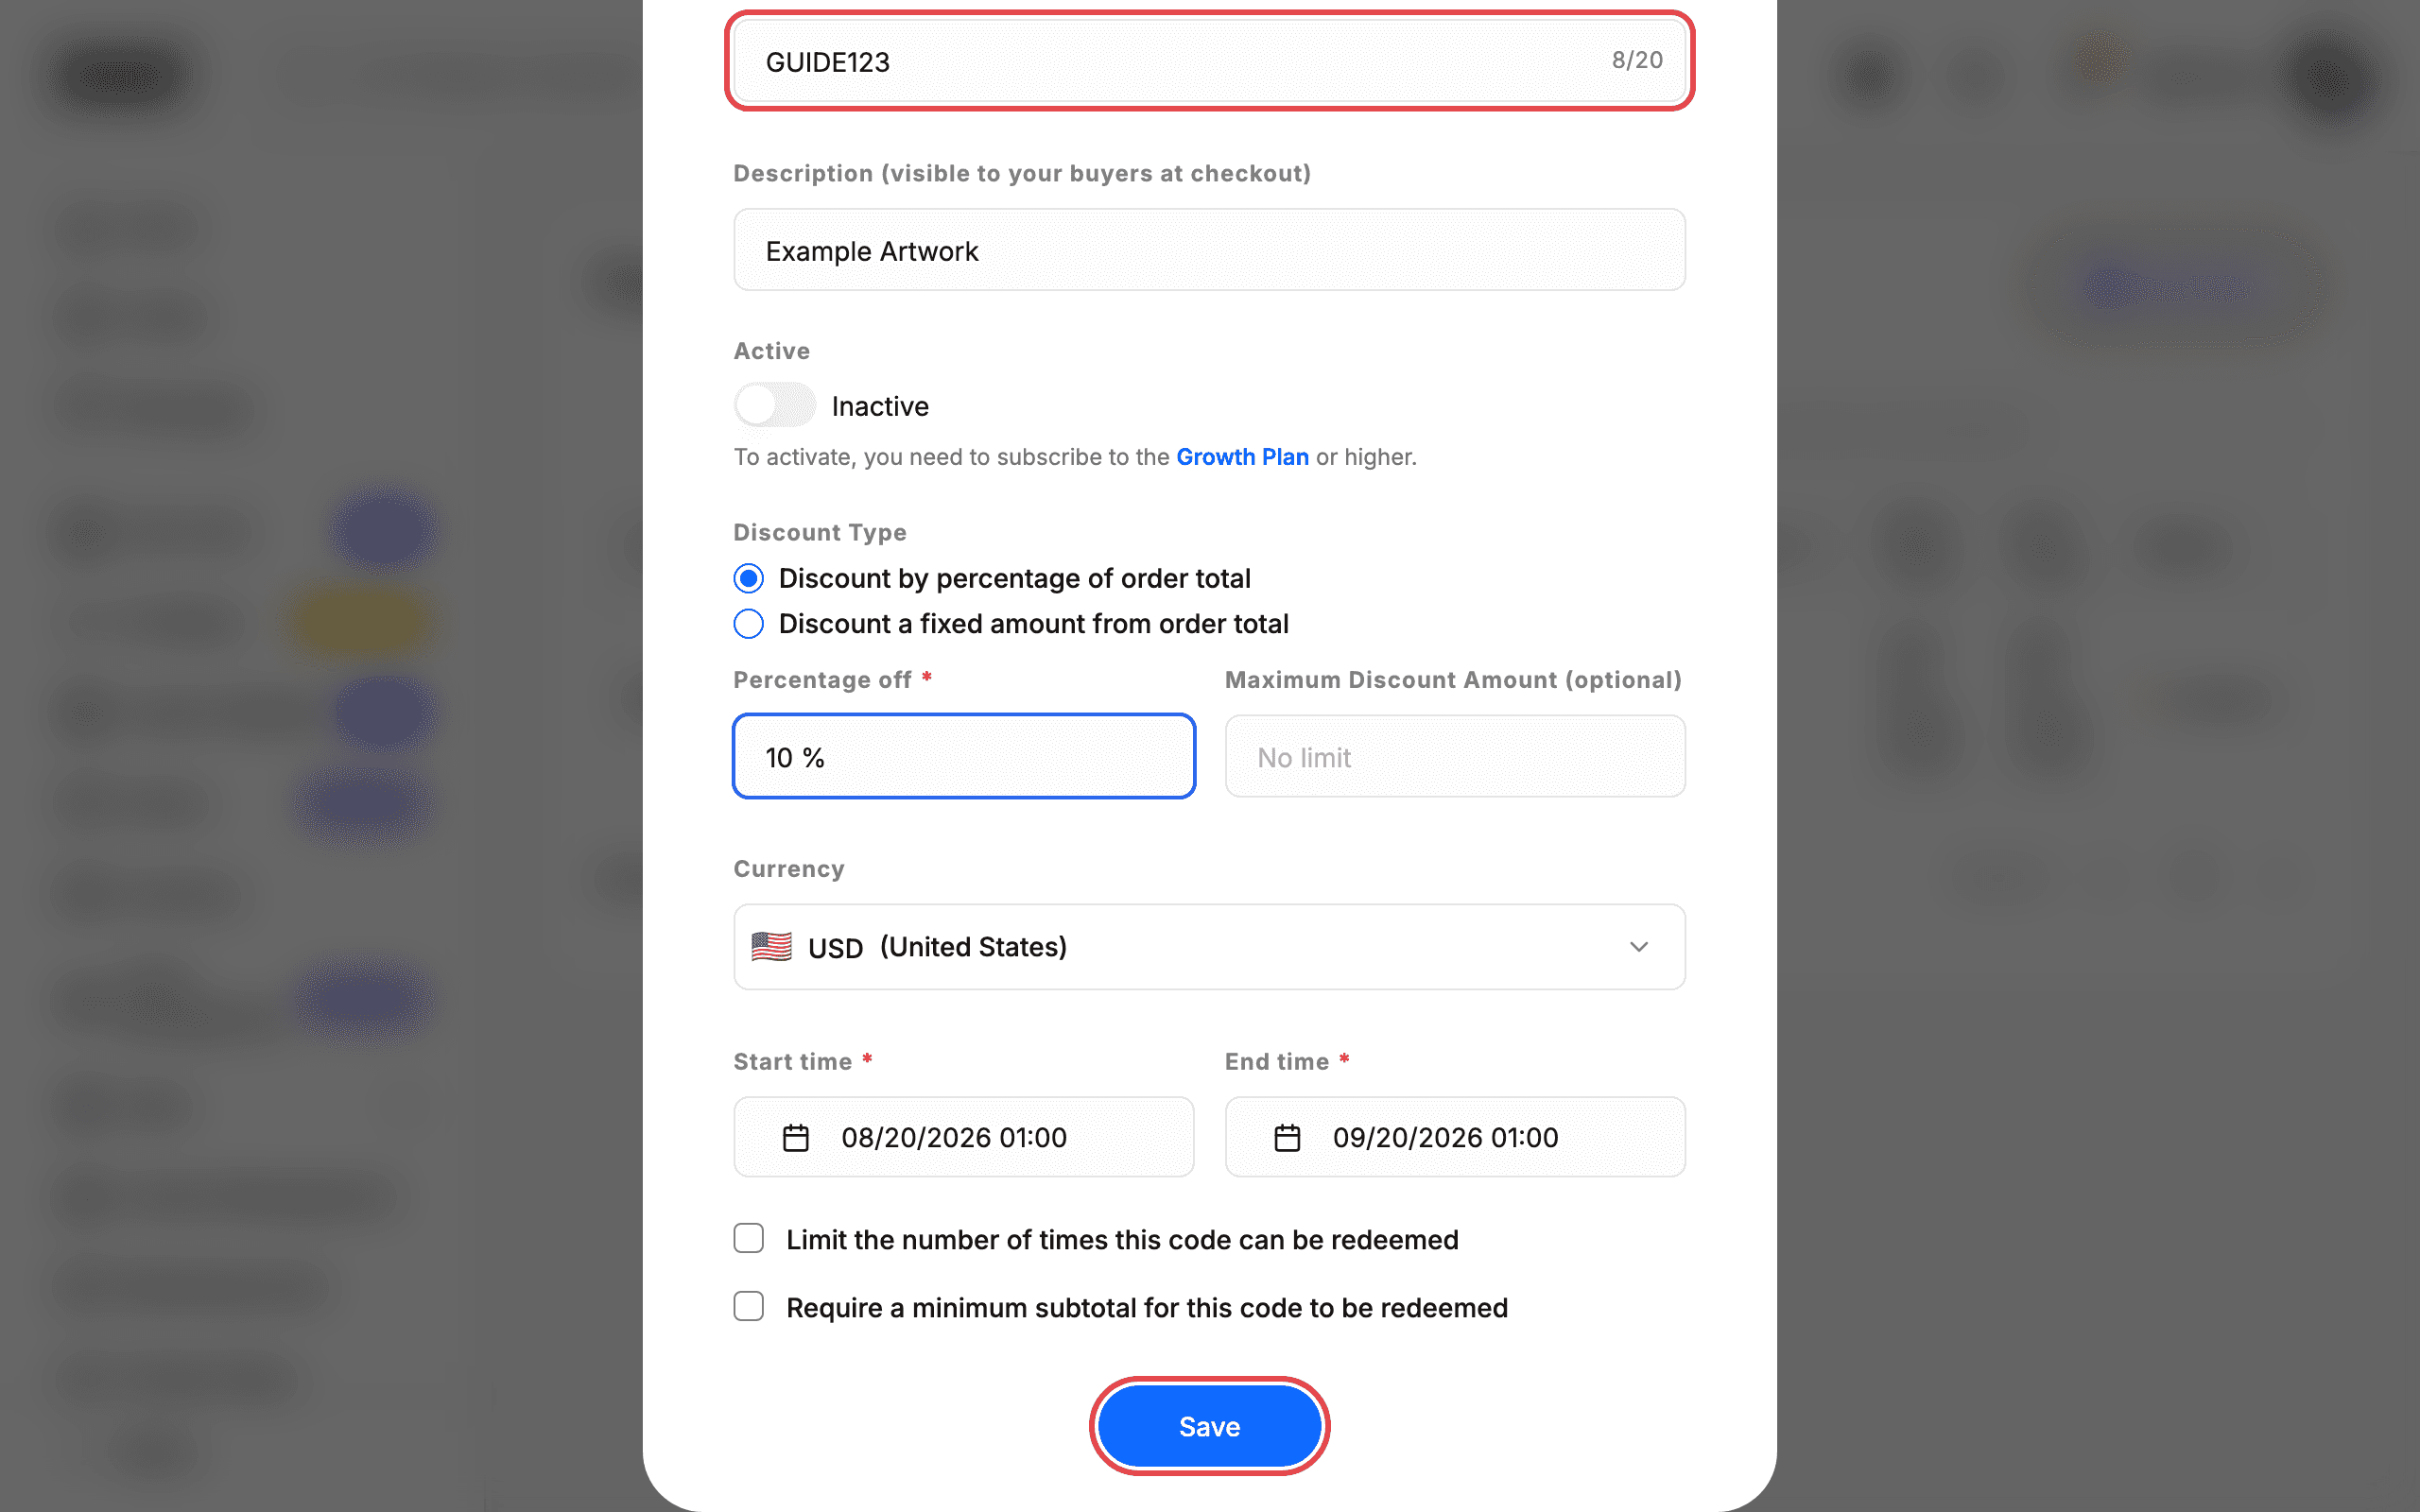
Click Save. The dialog closes, the message Promo Code created! appears, and your code shows up in the table.
On a free plan the code appears with status Inactive even if you chose Active.
6. Send the code to buyers
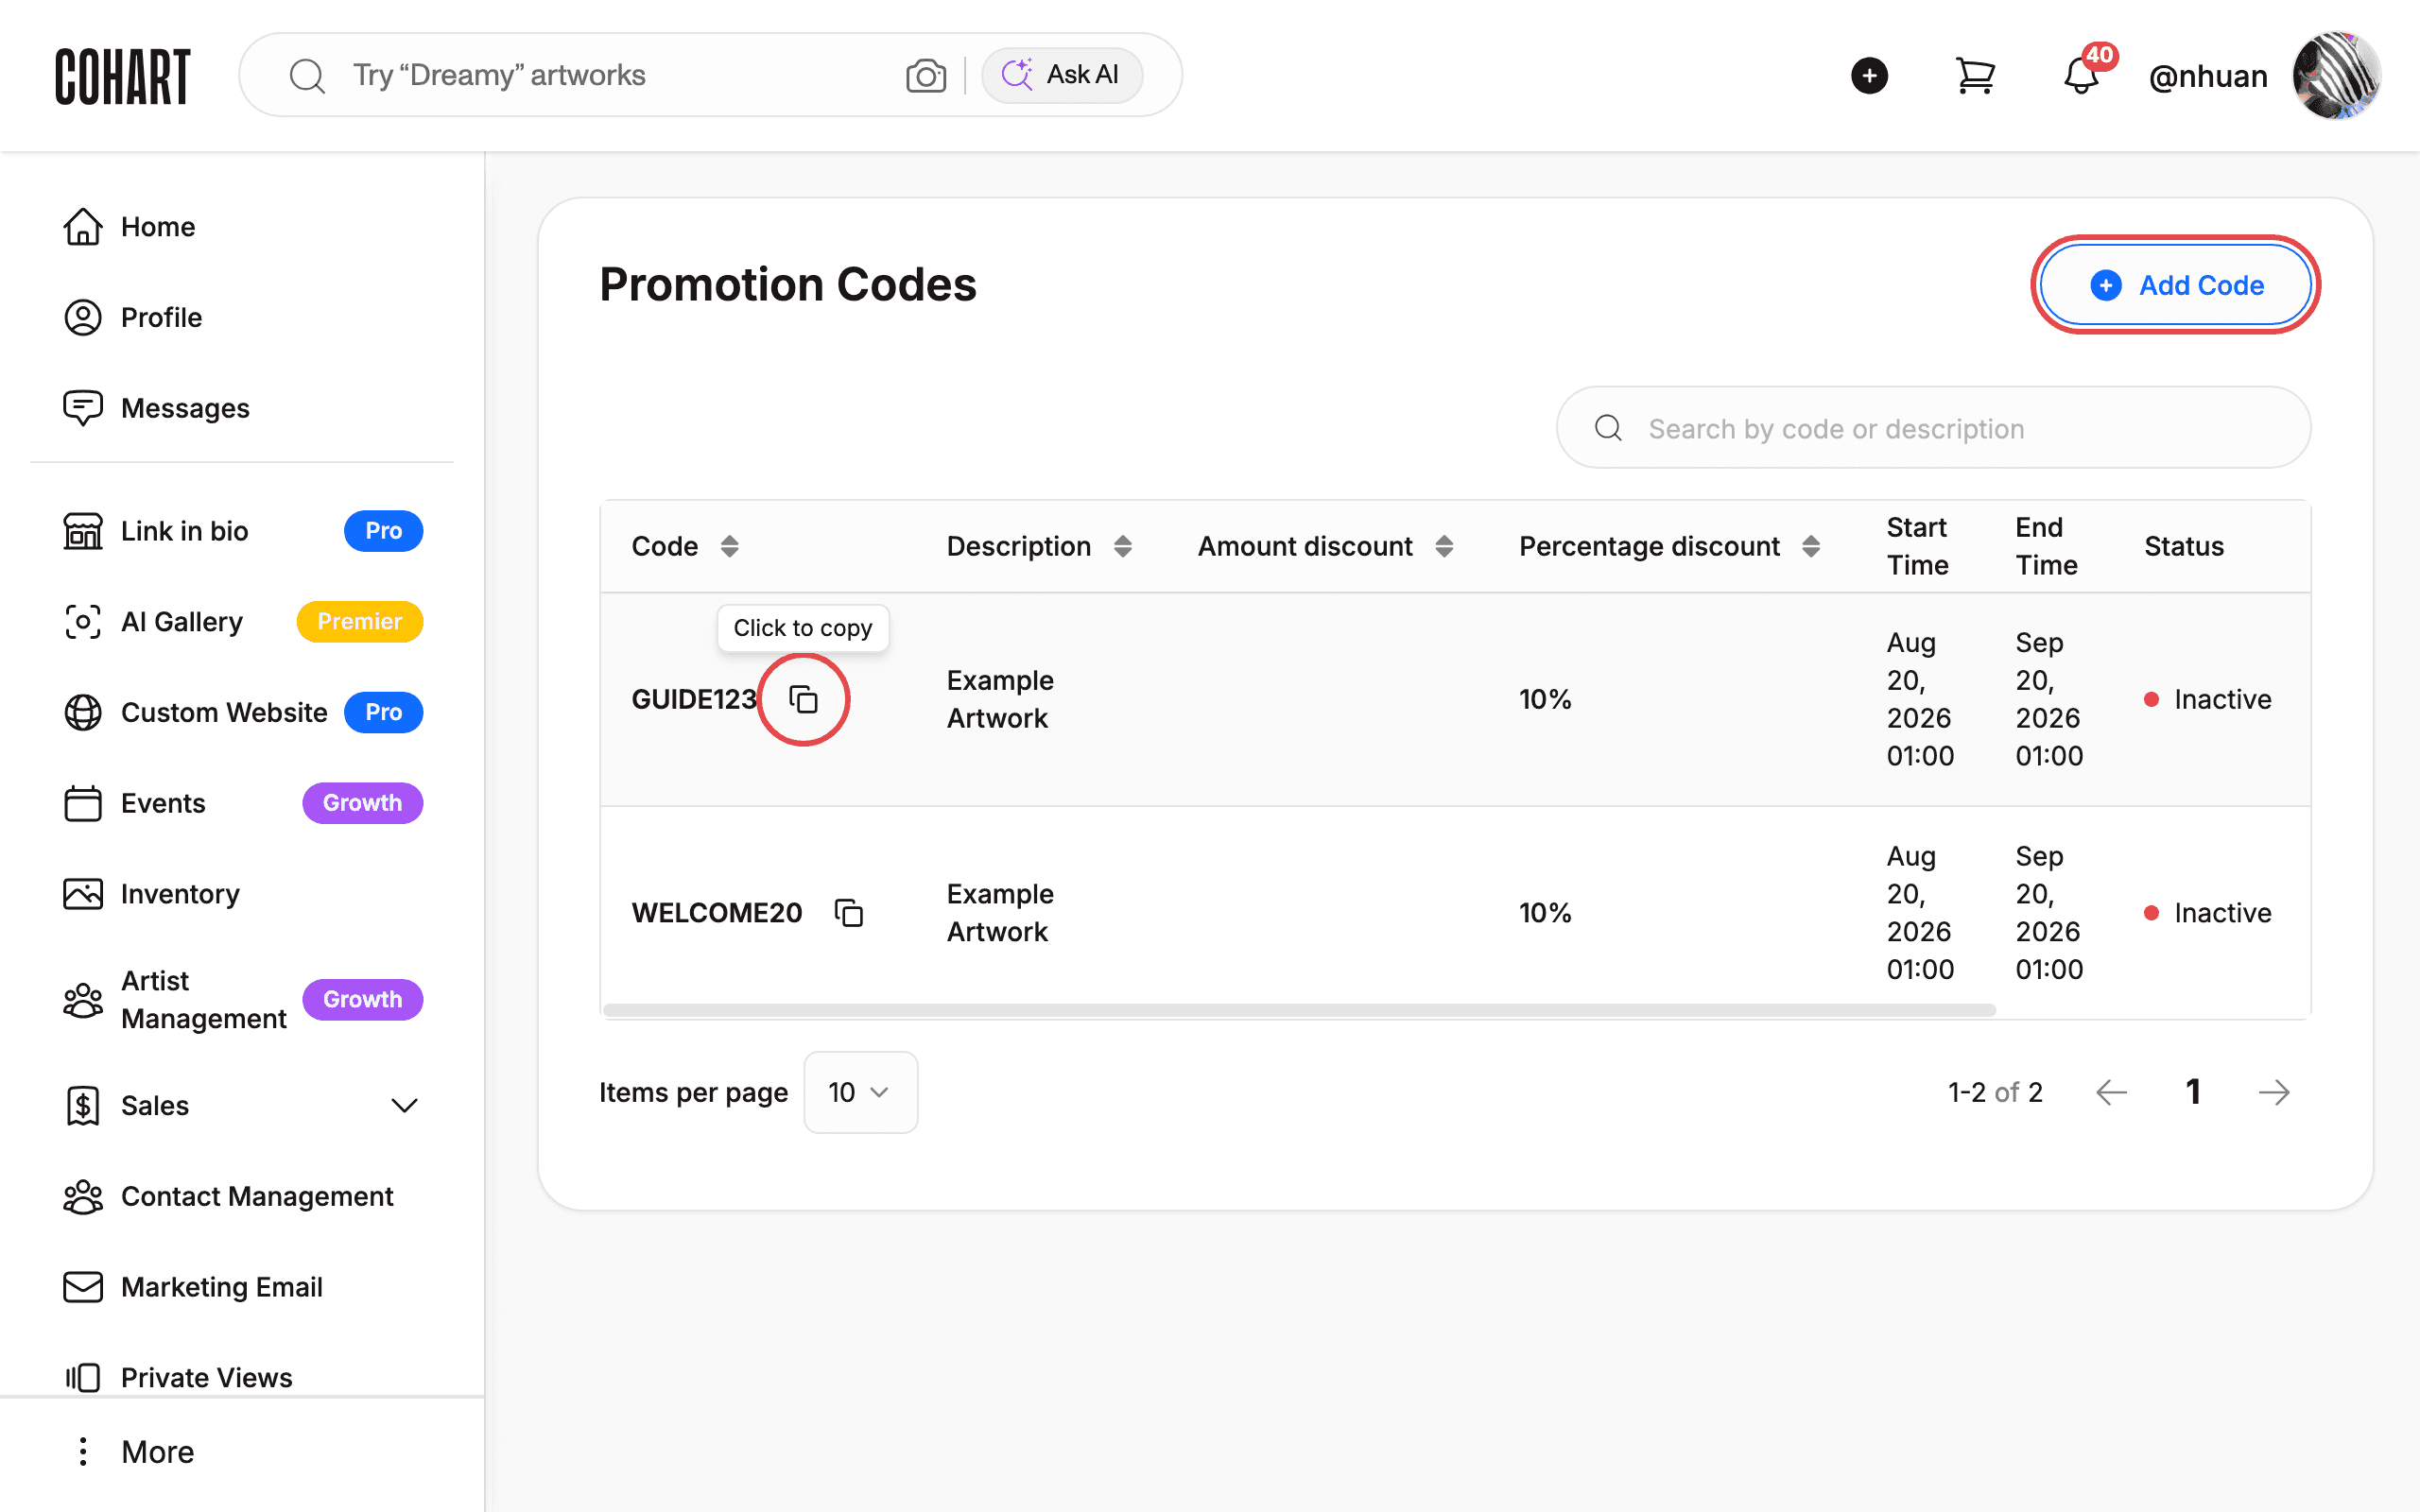
Click the copy icon next to the code in the Code column. The code is copied — paste it into an email, a direct message, or your newsletter and share it with your buyers. Buyers enter the code at checkout to get the discount.
7. Open the row menu
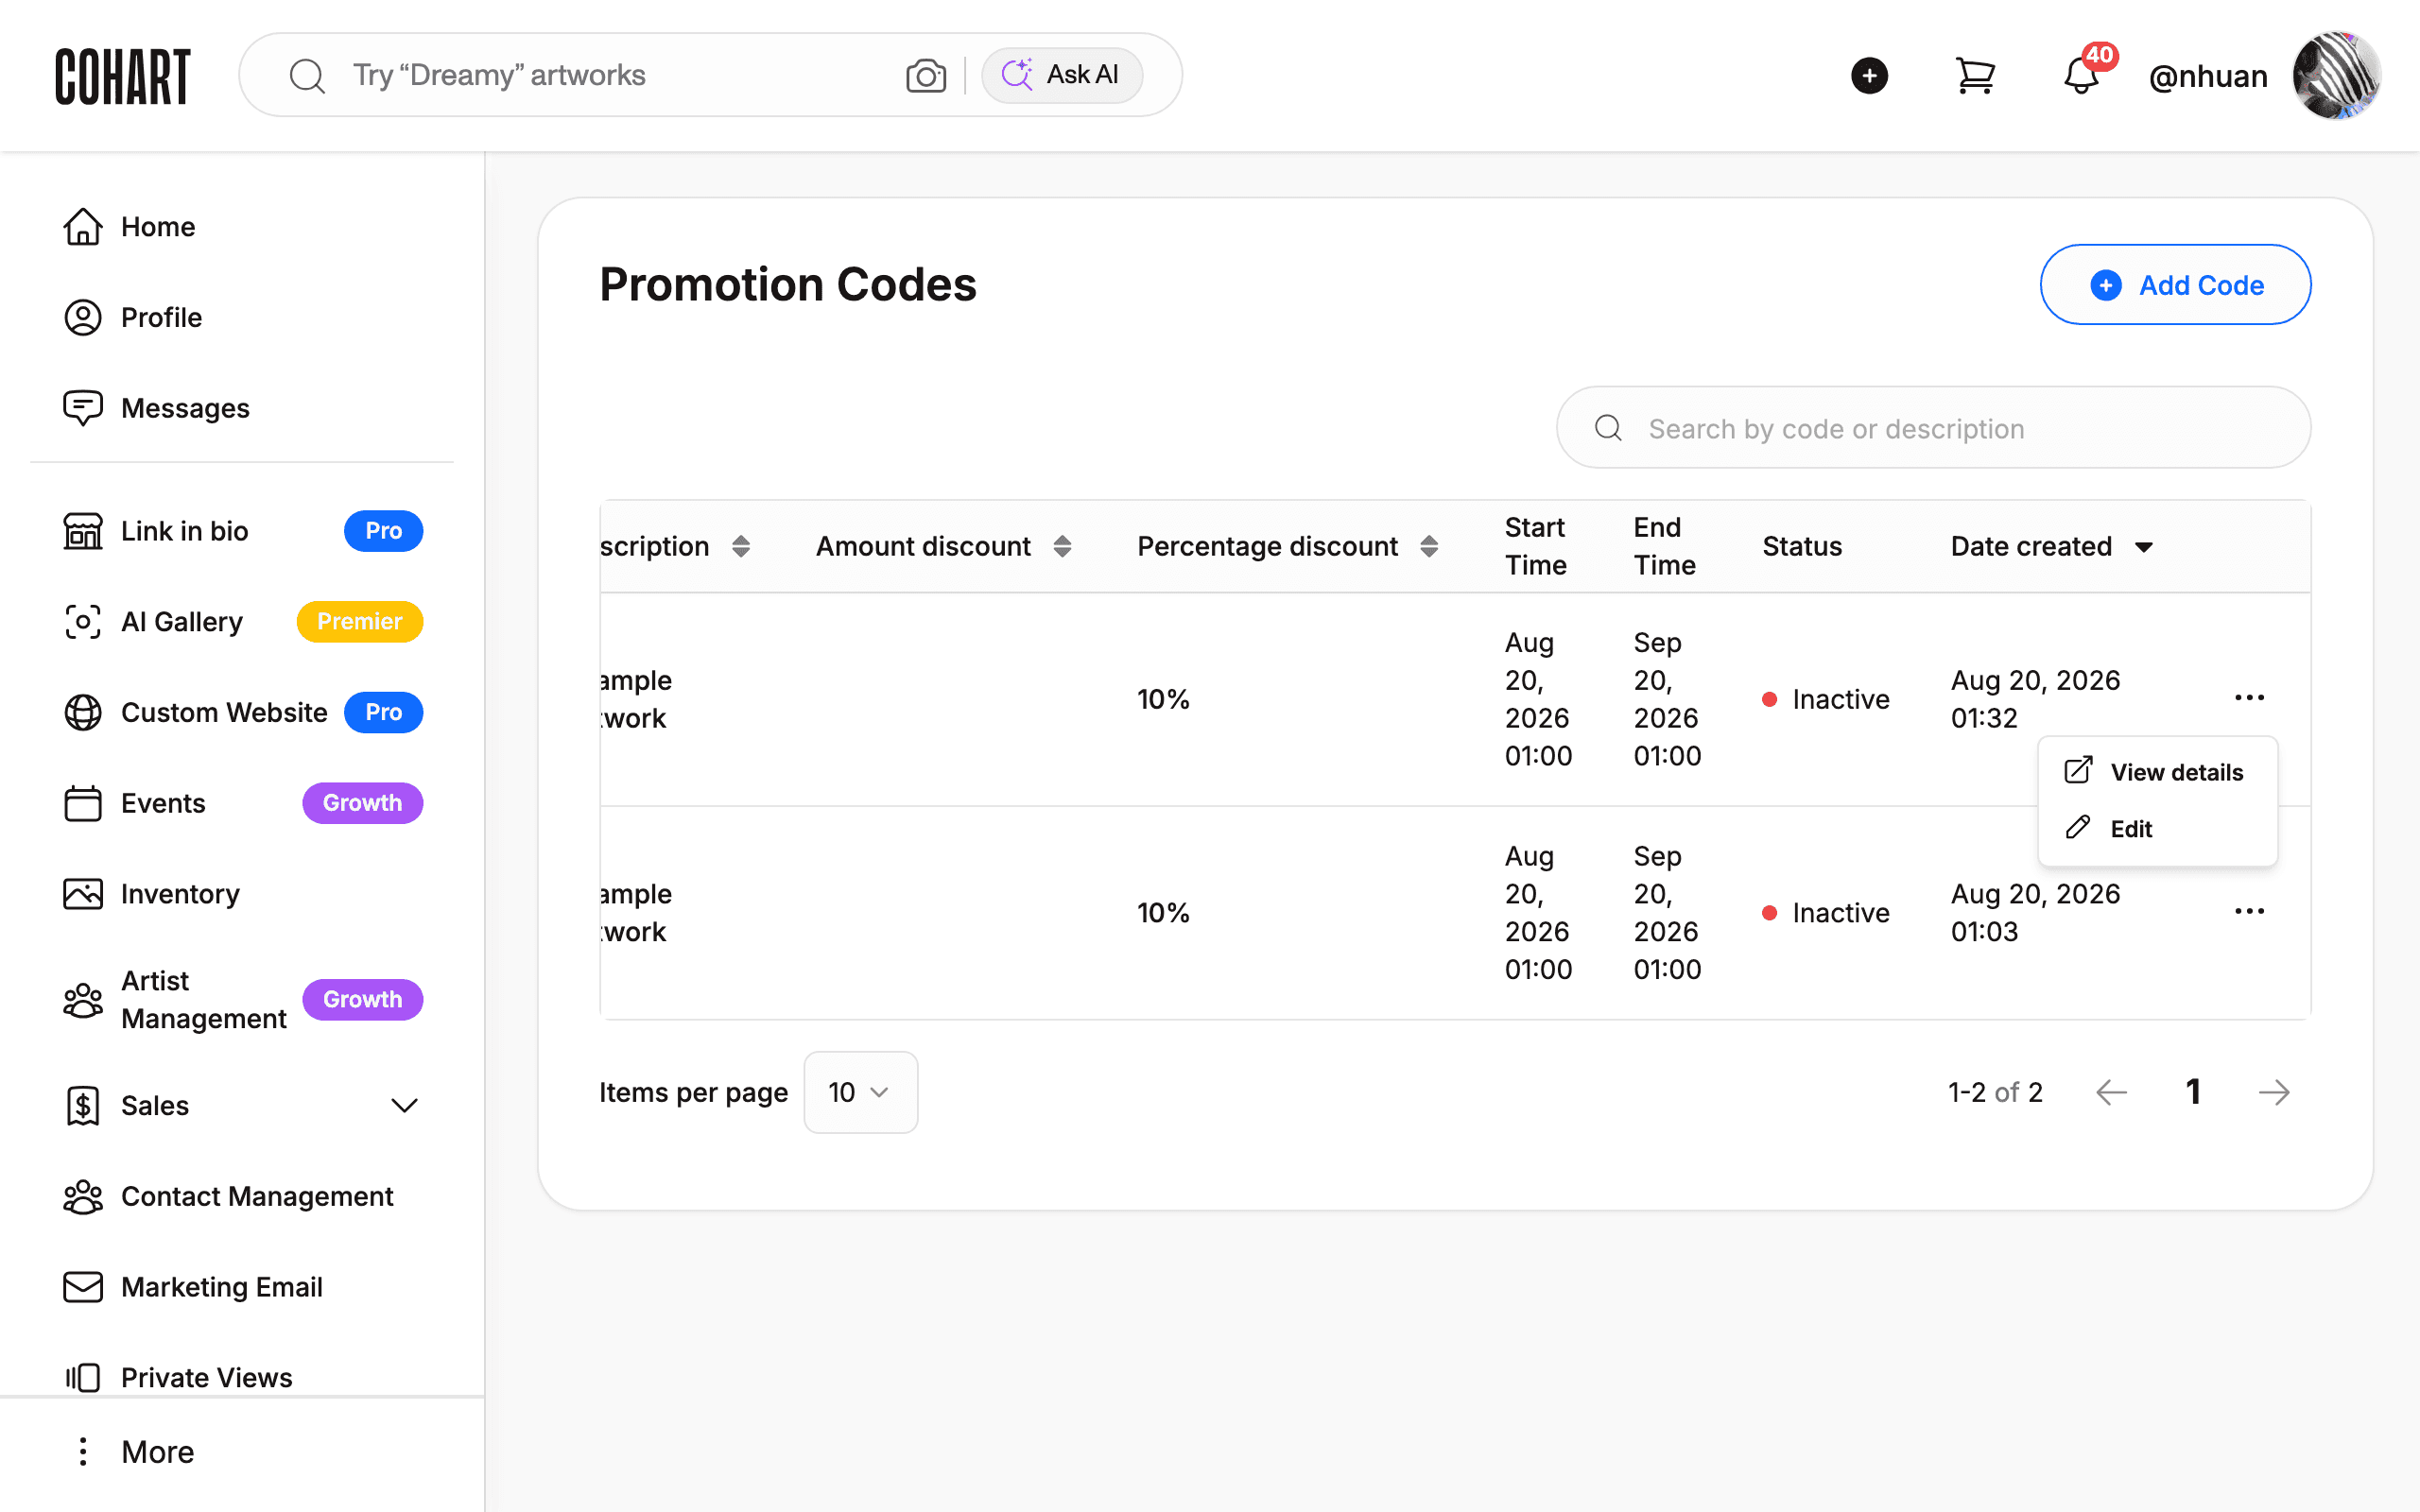
Each code row has a menu button. Click it to see two actions: View details and Edit.
8. View code details and redemptions
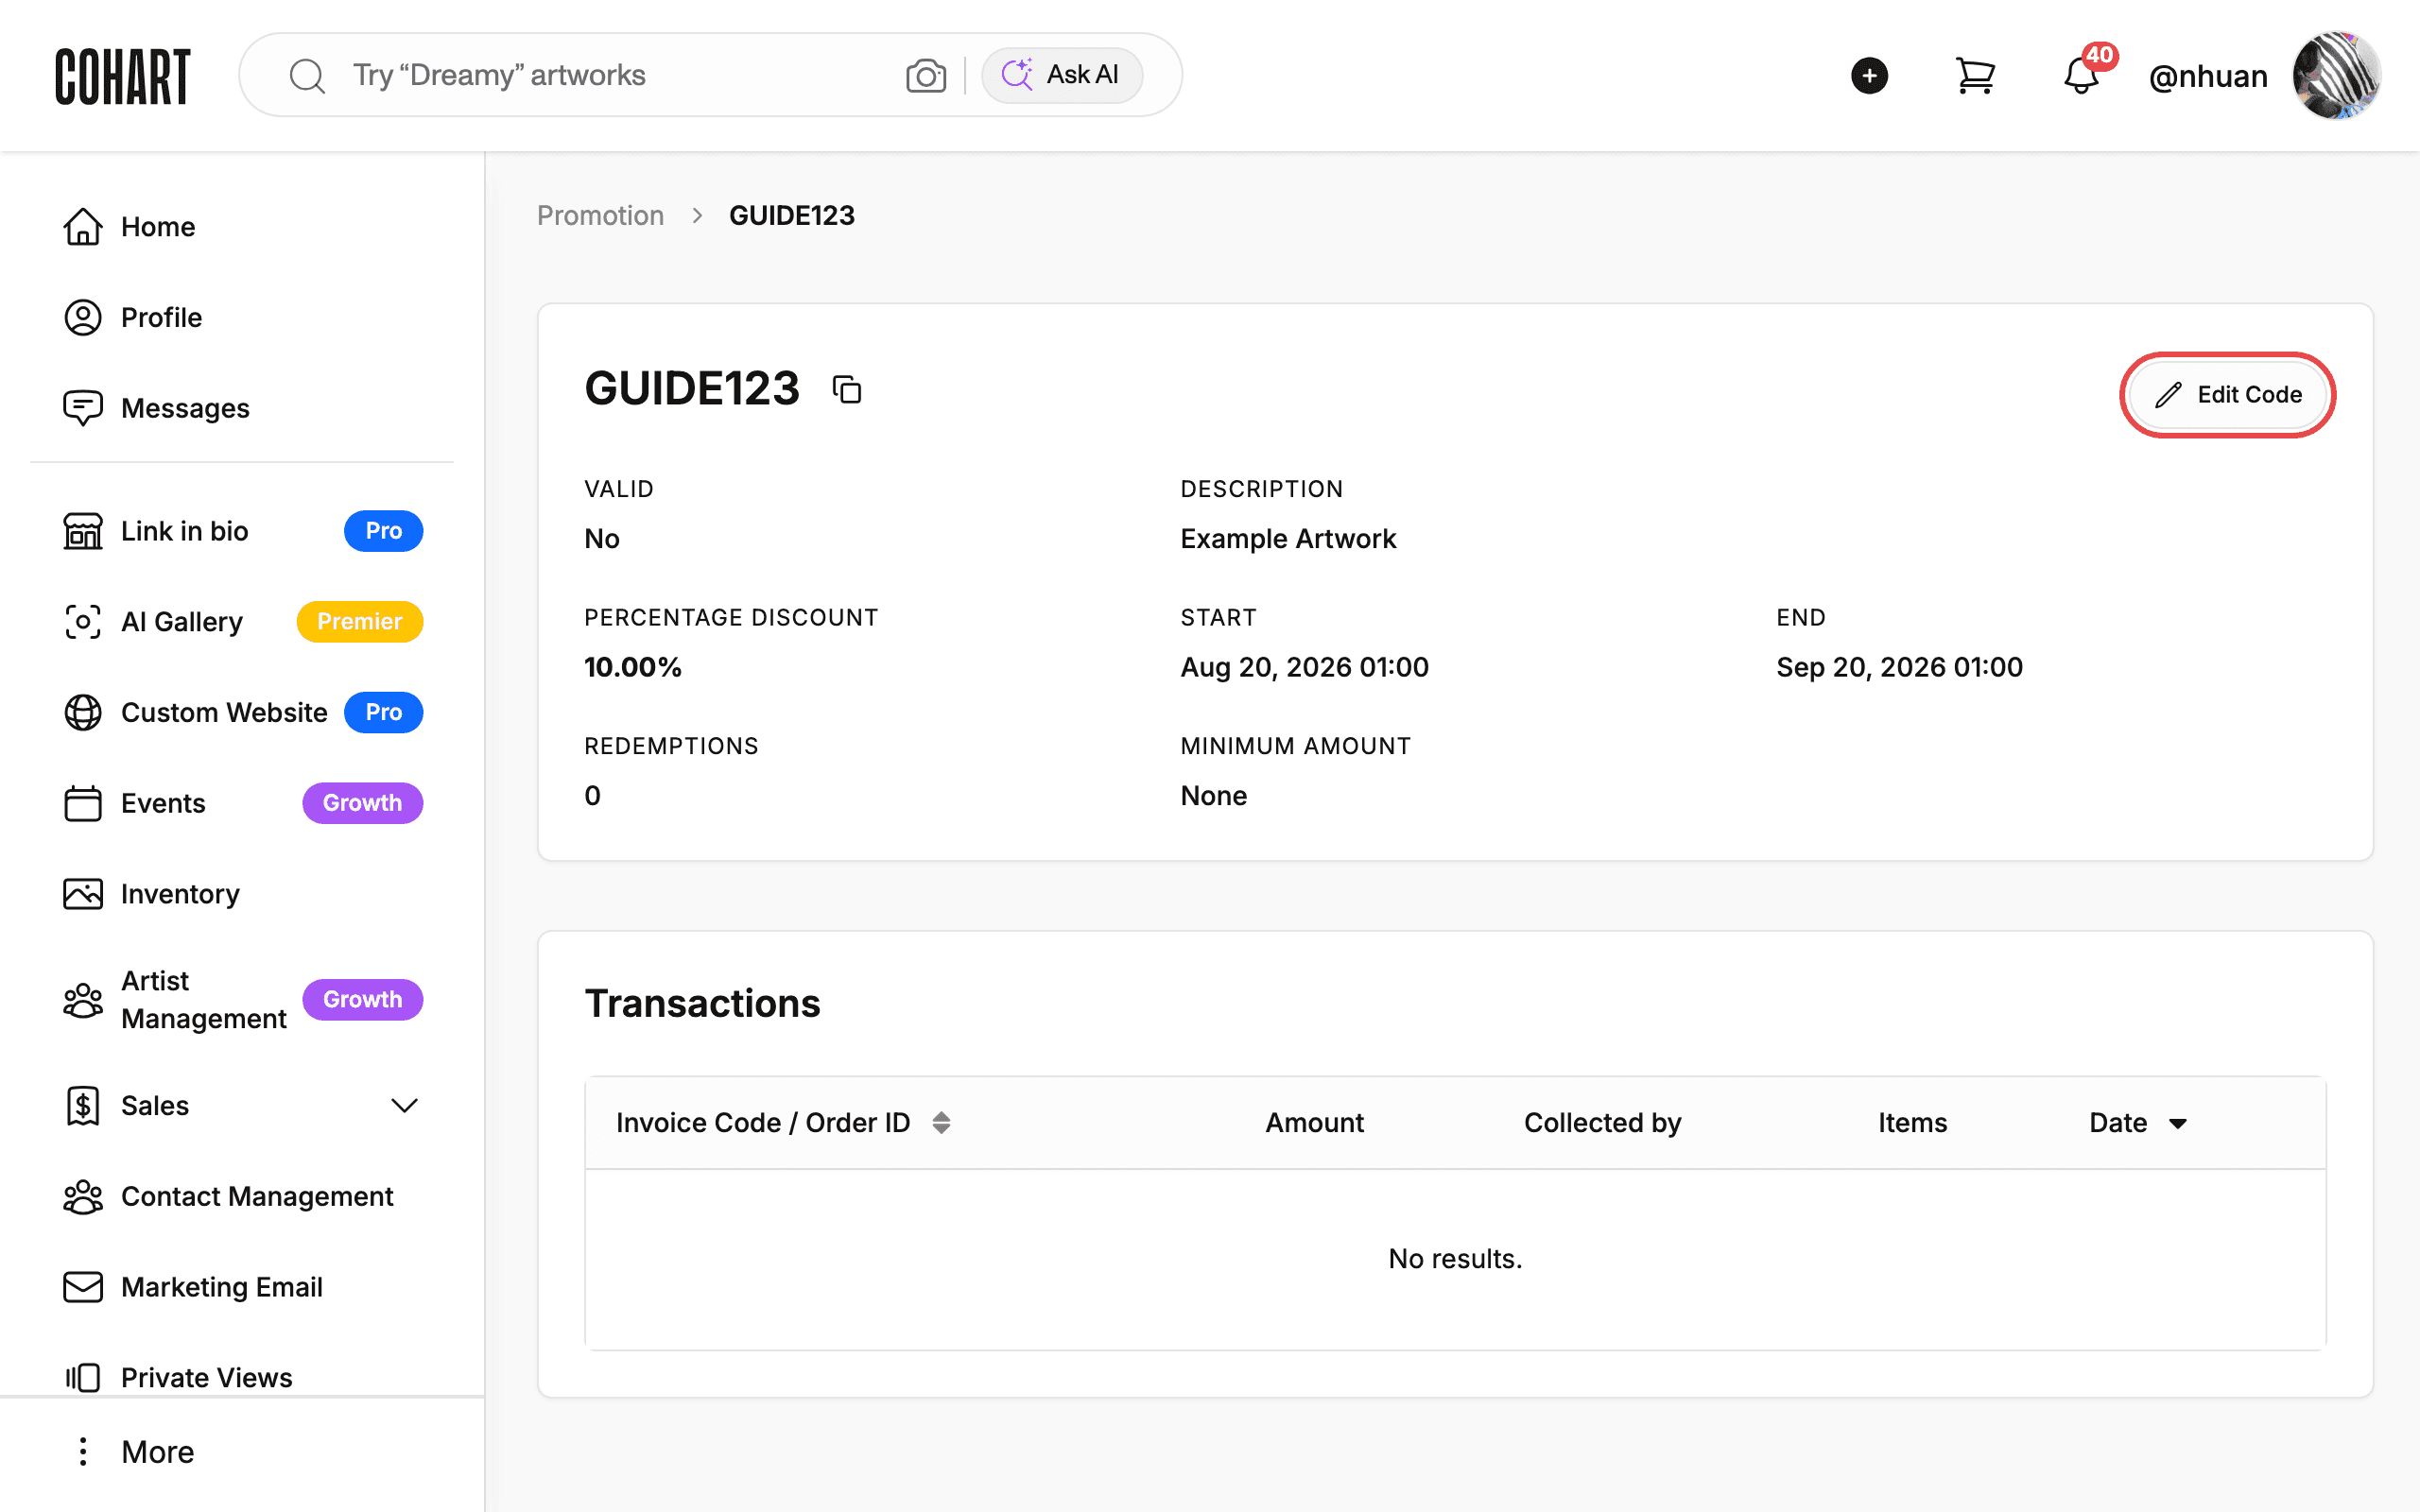
Click View details. The detail page opens in a new window. It shows the code, its status (for example VALID), DESCRIPTION, PERCENTAGE DISCOUNT, START and END dates, REDEMPTIONS, and MINIMUM AMOUNT. Below, the Transactions table (columns: Invoice Code / Order ID, Amount, Collected by, Items, Date) lists every order that used the code.
9. Edit a code
Click Edit Code (on the detail page) or Edit (from the row menu). The Edit Promo Code dialog explains: “You can only edit the code’s description and start/end time, or turn off the code below.” Change what you need and click Save.
10. Search your codes
Use the Search by code or description field to filter the table. If nothing matches, the table shows No results.
Tips
- Code is required and capped at 20 characters; Percentage off is required for percentage discounts — the dialog shows a “Percentage off is required” message if you try to save without it.
- The description is what buyers see at checkout, so write something clear, for example “Welcome discount for new buyers”.
- Redemption limits and minimum subtotals are optional but can protect your margins.
- On a free plan the code stays Inactive; upgrading to the Growth Plan or higher is required to activate codes.
Troubleshooting
- List shows Inactive but the detail page shows VALID → plans that cannot activate codes show this mismatch → check your plan under Manage Plan and upgrade to the Growth Plan or higher to activate codes.
- Save seems unresponsive → a cookie banner or popup may be covering the bottom of the dialog → close or accept the banner and try again.
- View details does nothing → it opens a separate browser window, which pop-up blockers stop → allow pop-ups from the site and try again.