How to Create a Private View
Overview
A private view is a curated artwork collection you assemble, publish, and share with collectors. It exists so you can present a chosen set of works with details and prices in one focused page instead of sending loose links. It is for sellers such as artists, galleries, and advisors who invite collectors to consider specific works. Publishing affects what collectors receive: the view becomes a live page marked ACTIVE that you share by copying its link, and it appears at the top of your My Private Views list with a NEW badge, creation date, and artwork count. By the end of this guide you will have named a view, selected and ordered artworks, reviewed the selection, and published it as an ACTIVE view ready to share.
Before you start
- A Cohart seller or advisor account with Private Views in the sidebar. After sign-in you land on Inventory, then you open Private Views from there.
- Artworks already in Inventory to choose from (see How to Upload an Artwork if your Inventory is empty). The picker offers My Artworks, From Artists I Represent, and All Artworks tabs with Search and page numbers, and the Selected panel counts your picks.
- A view name and at least one artwork. The name field is required and publishing requires at least one selected work, so use Preview to check before you publish.
- Know the two endings before you click. Publish view makes the view live as ACTIVE and shareable, while Save stores a draft and returns you to the Private Views list.
Steps
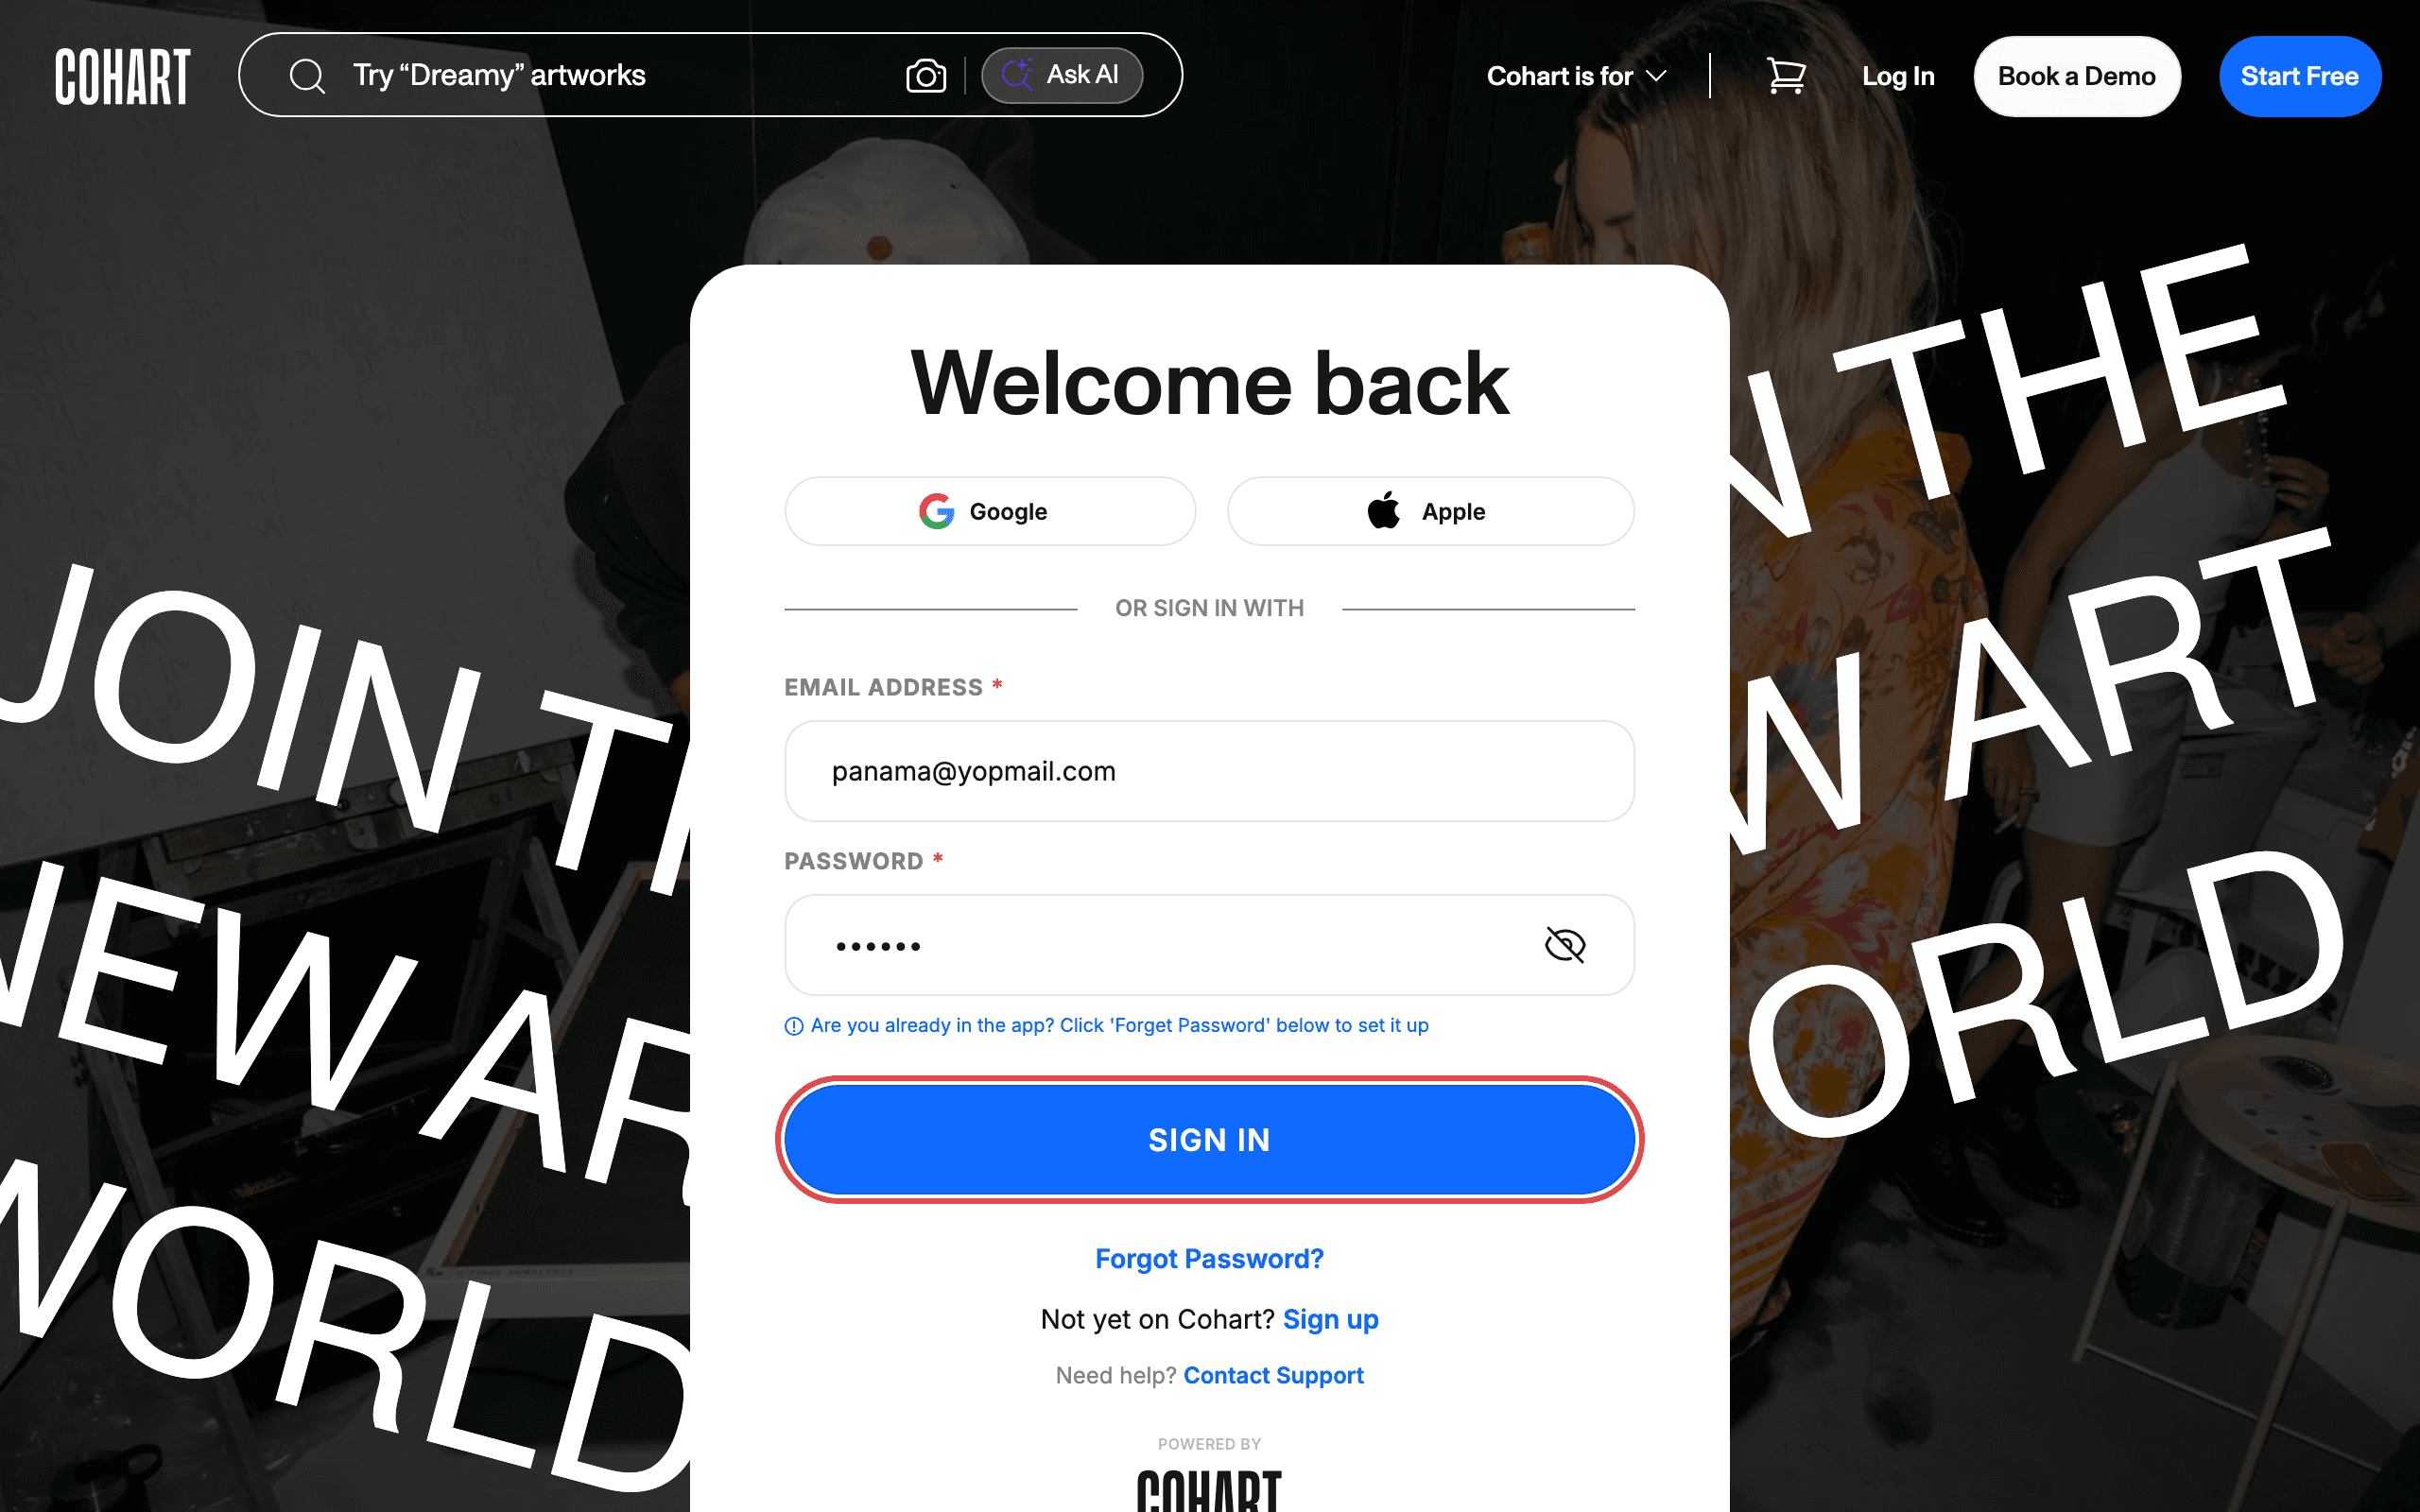
1. Sign in to Cohart
Sign in with your email address and password, or use Google or Apple.
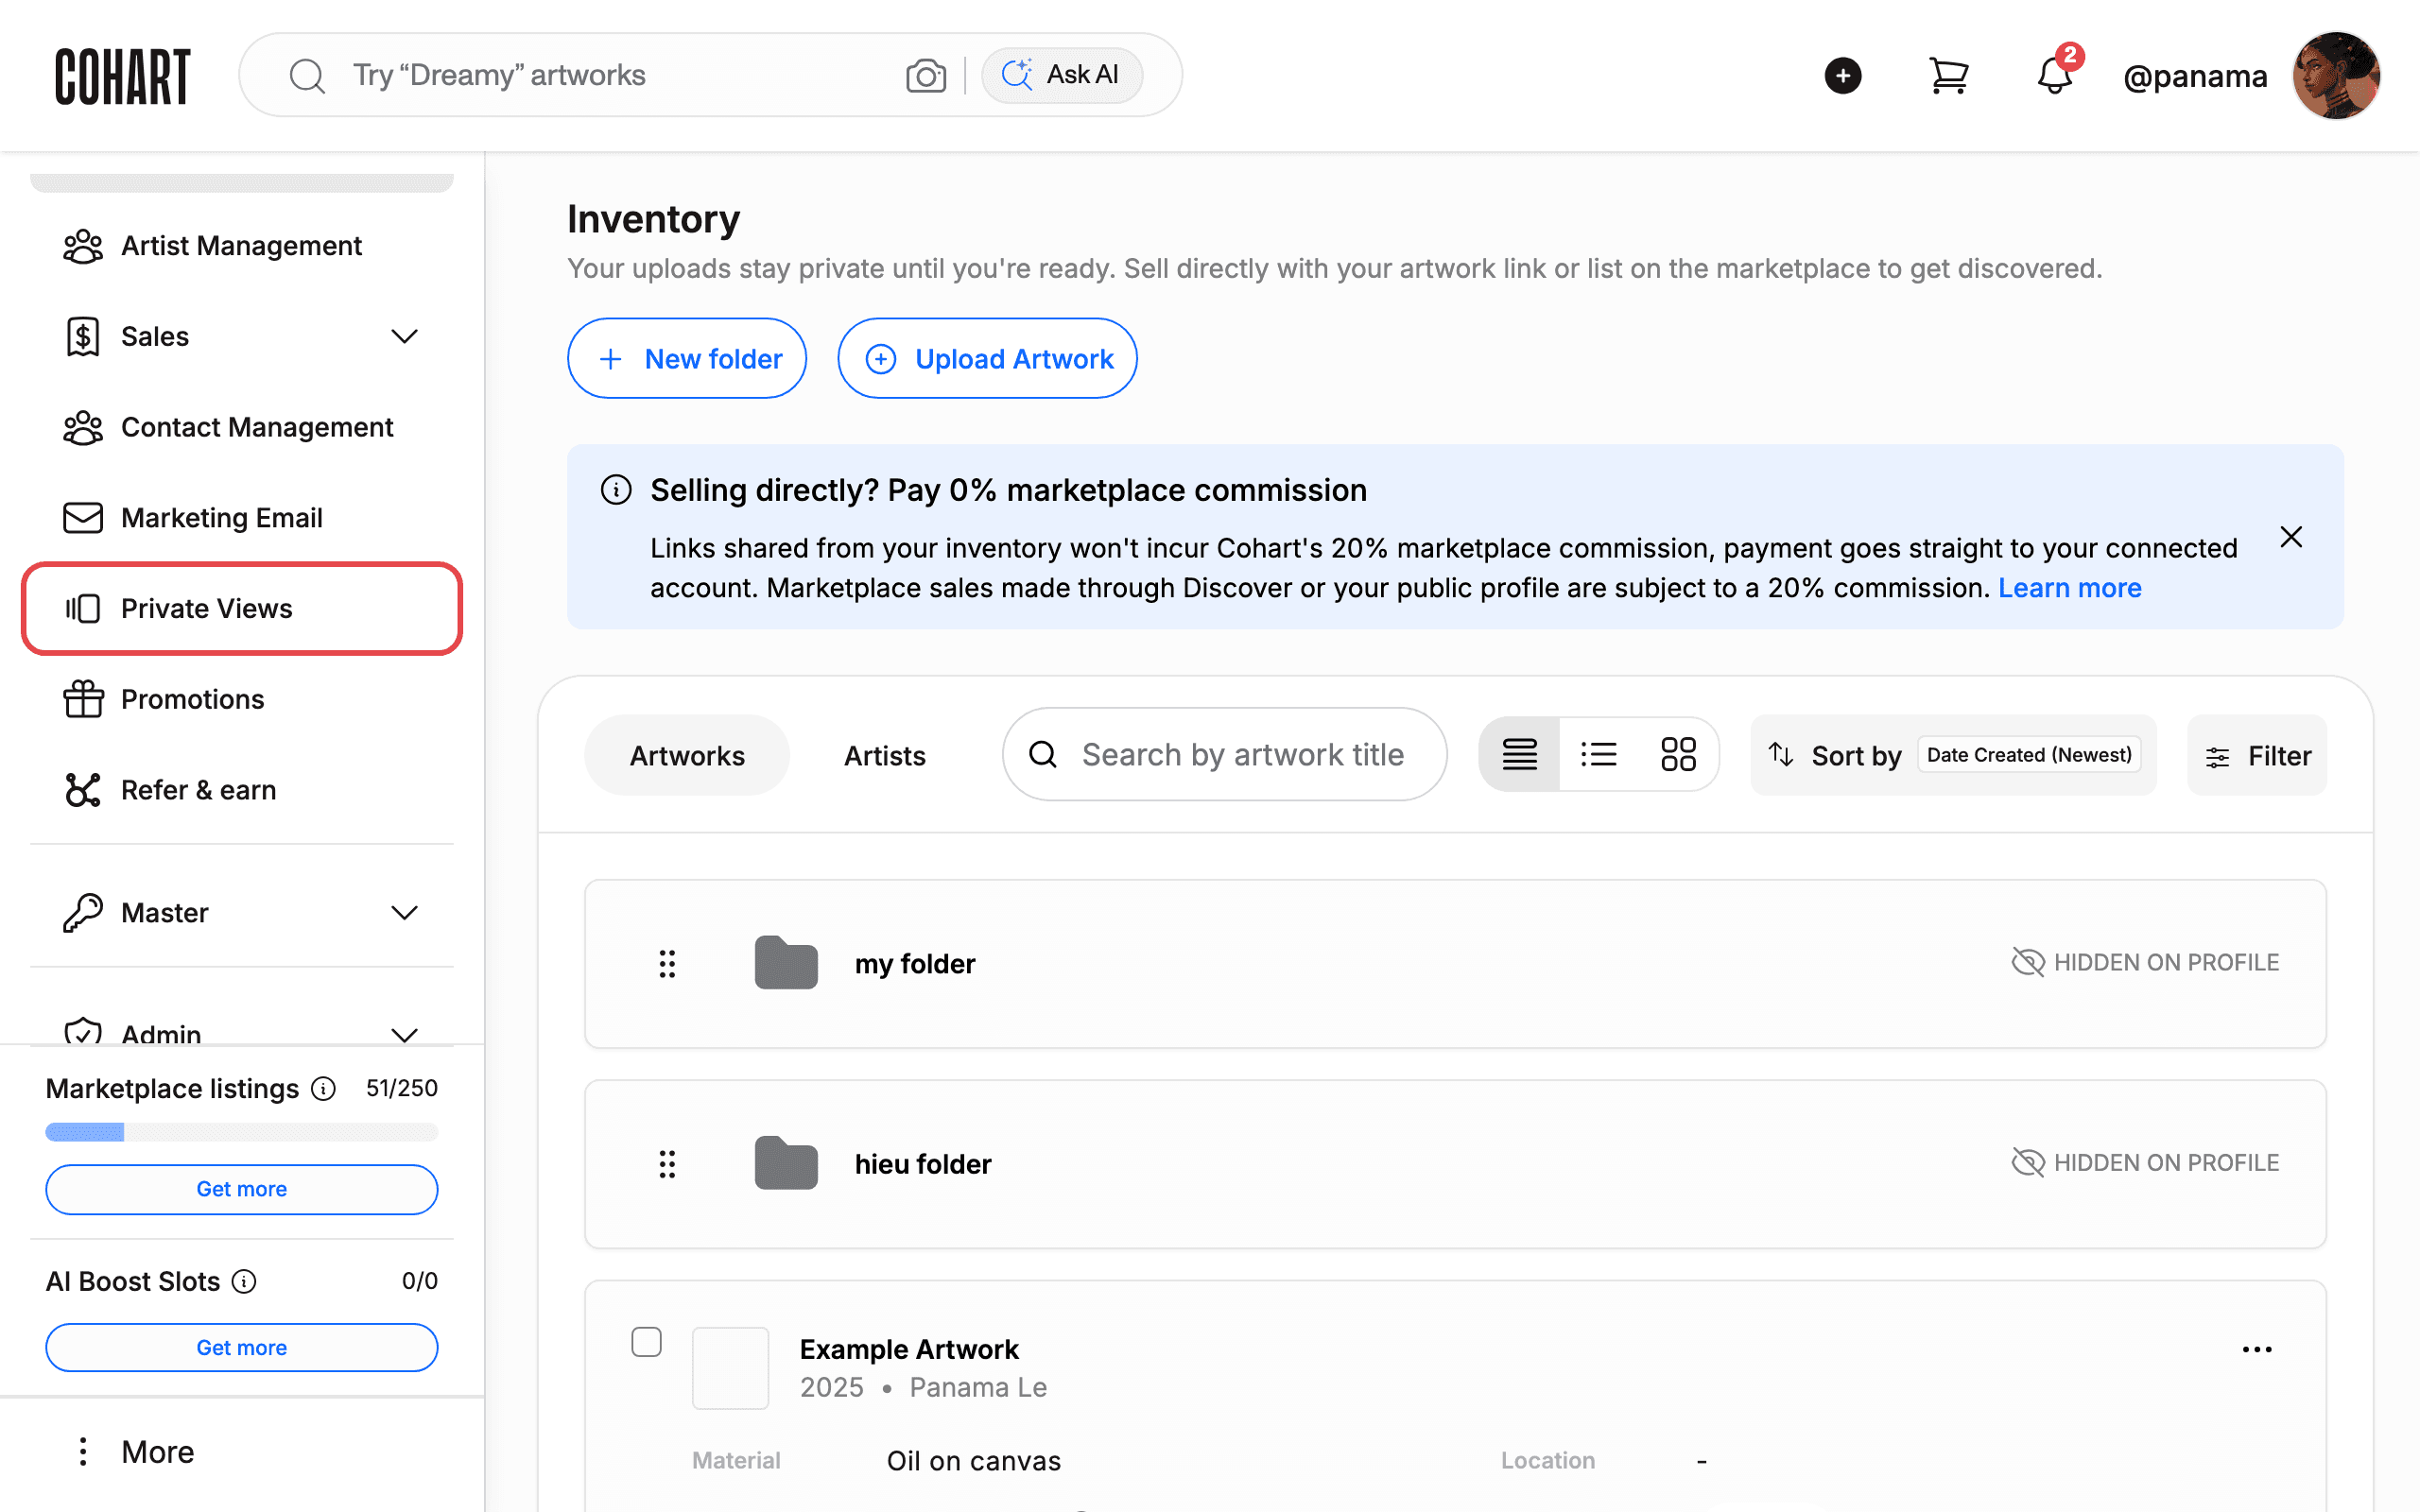
2. Open Private Views
After sign-in you land on Inventory. In the left sidebar, click Private Views.
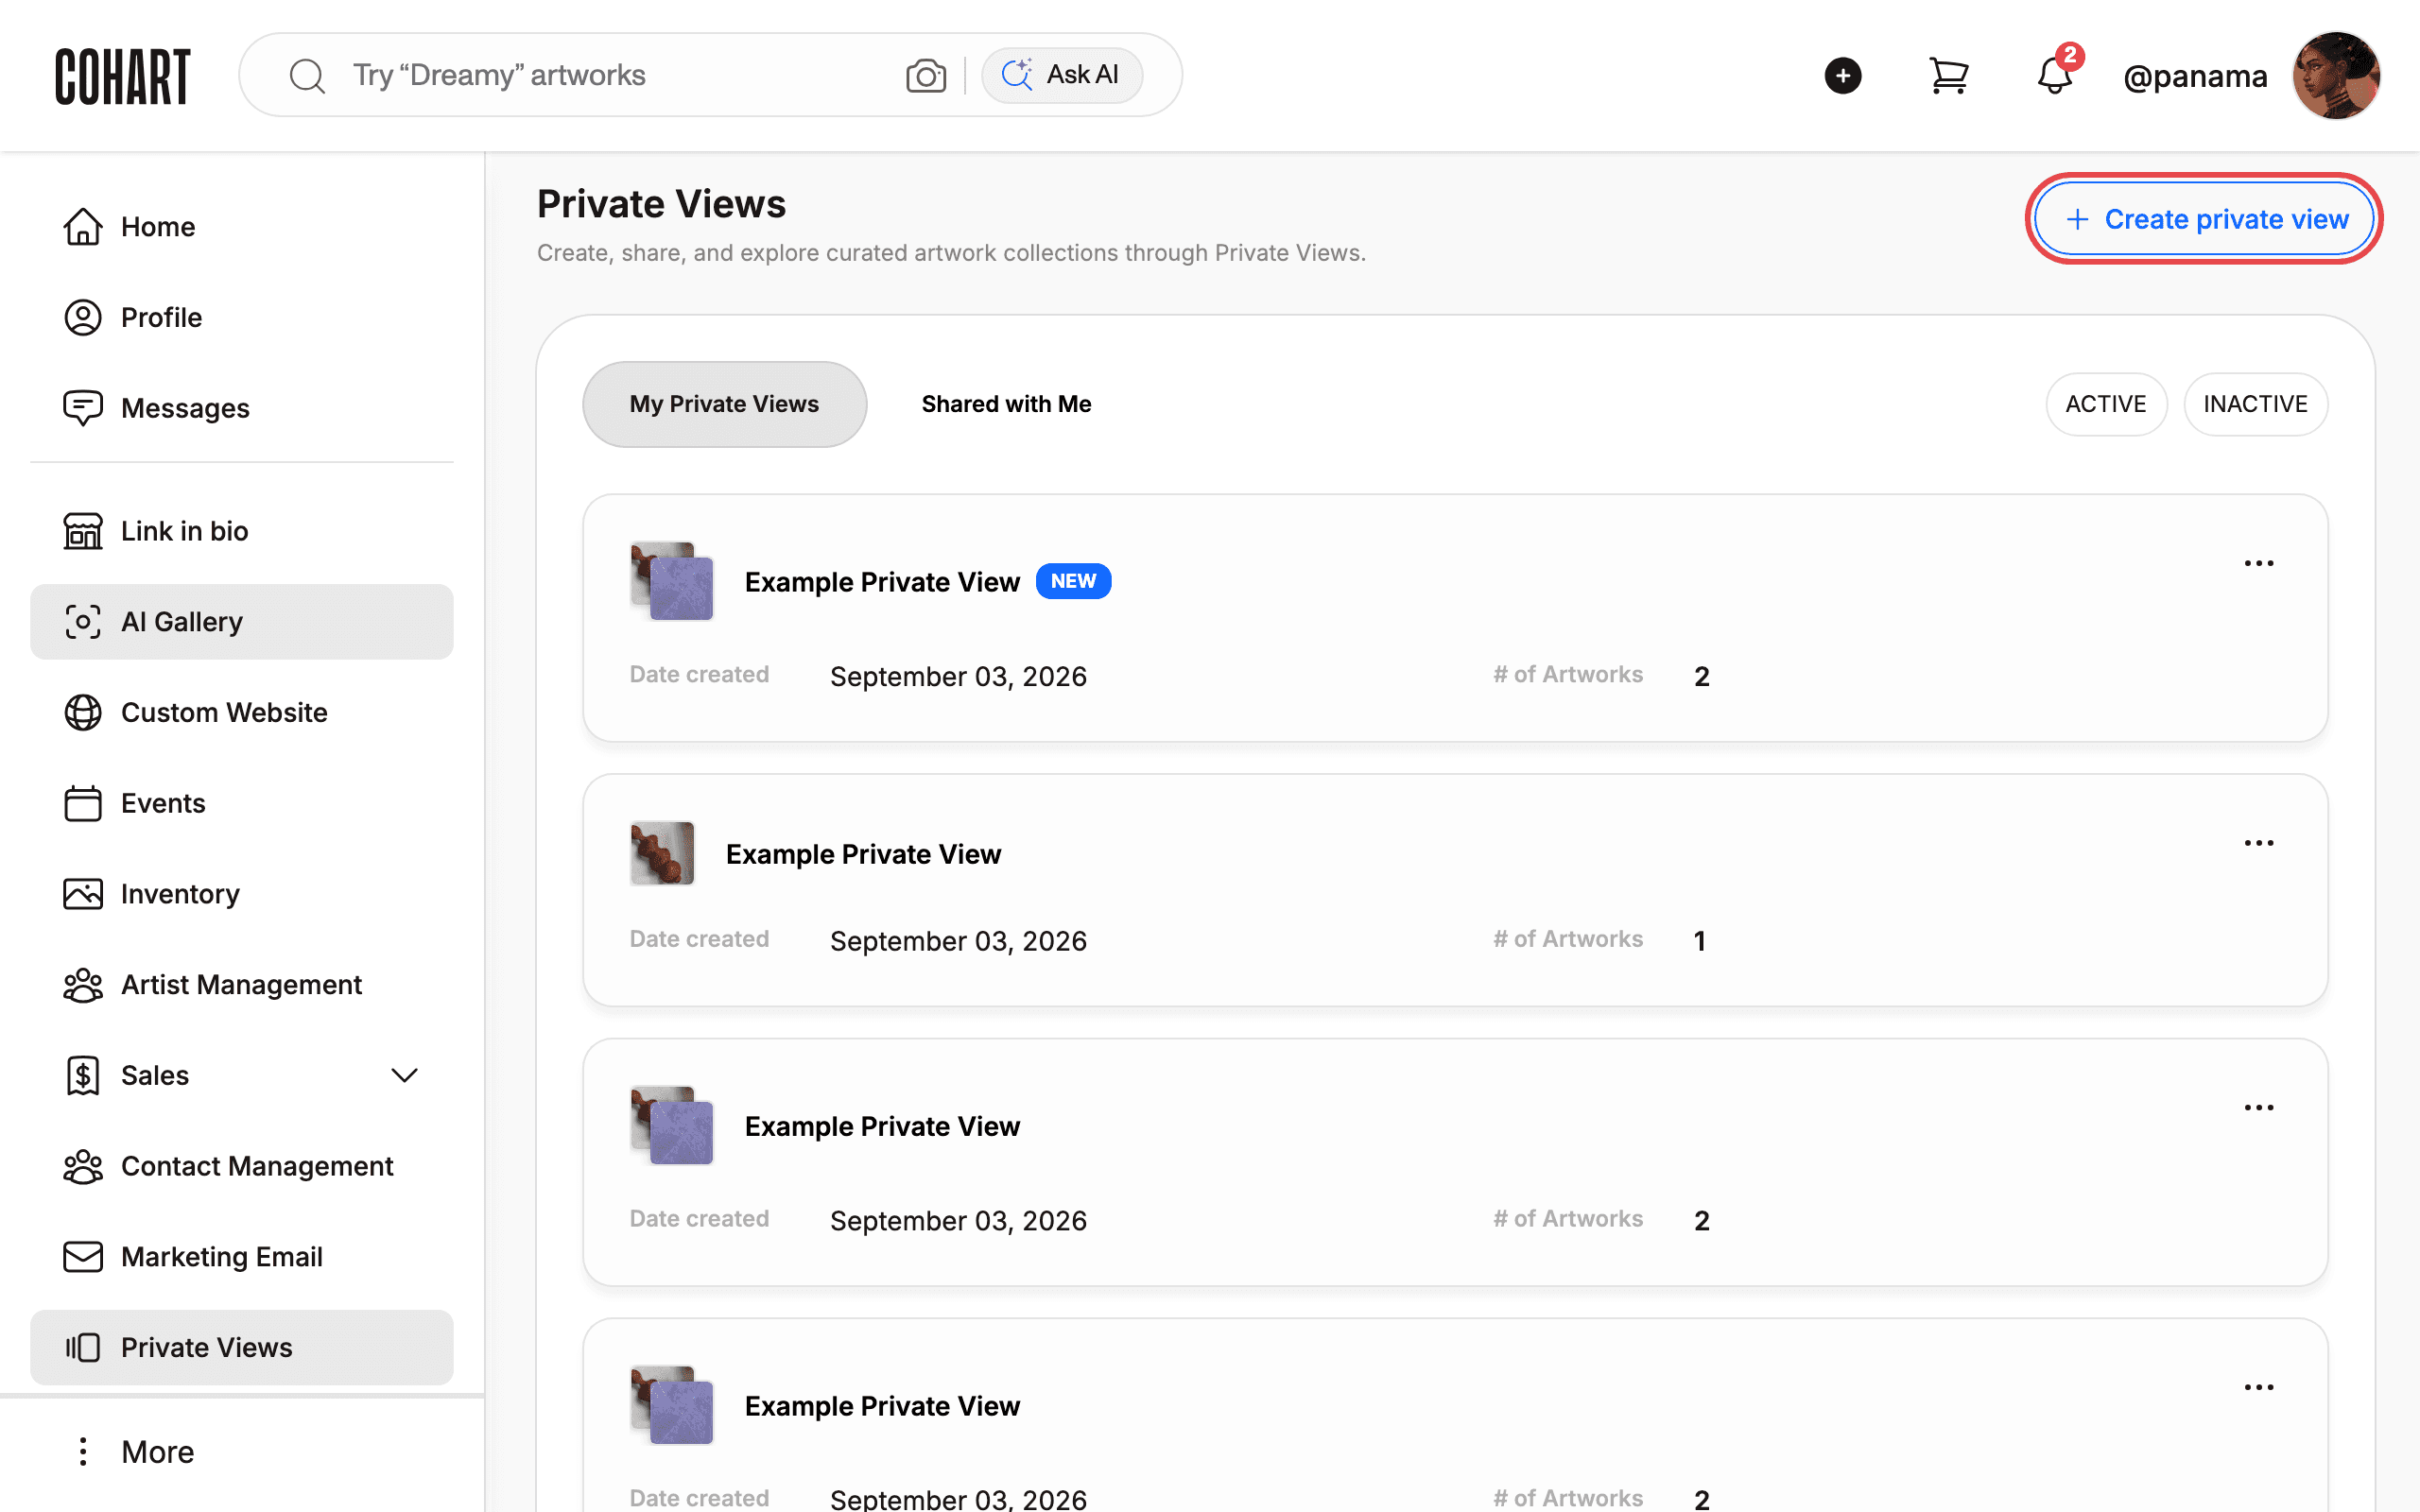
3. Start a new private view
The Private Views page opens. It shows your My Private Views and Shared with Me tabs, with ACTIVE and INACTIVE filters. Click Create private view in the top-right corner.
Each existing view shows its Date created, # of Artworks, and a ··· menu with more actions.
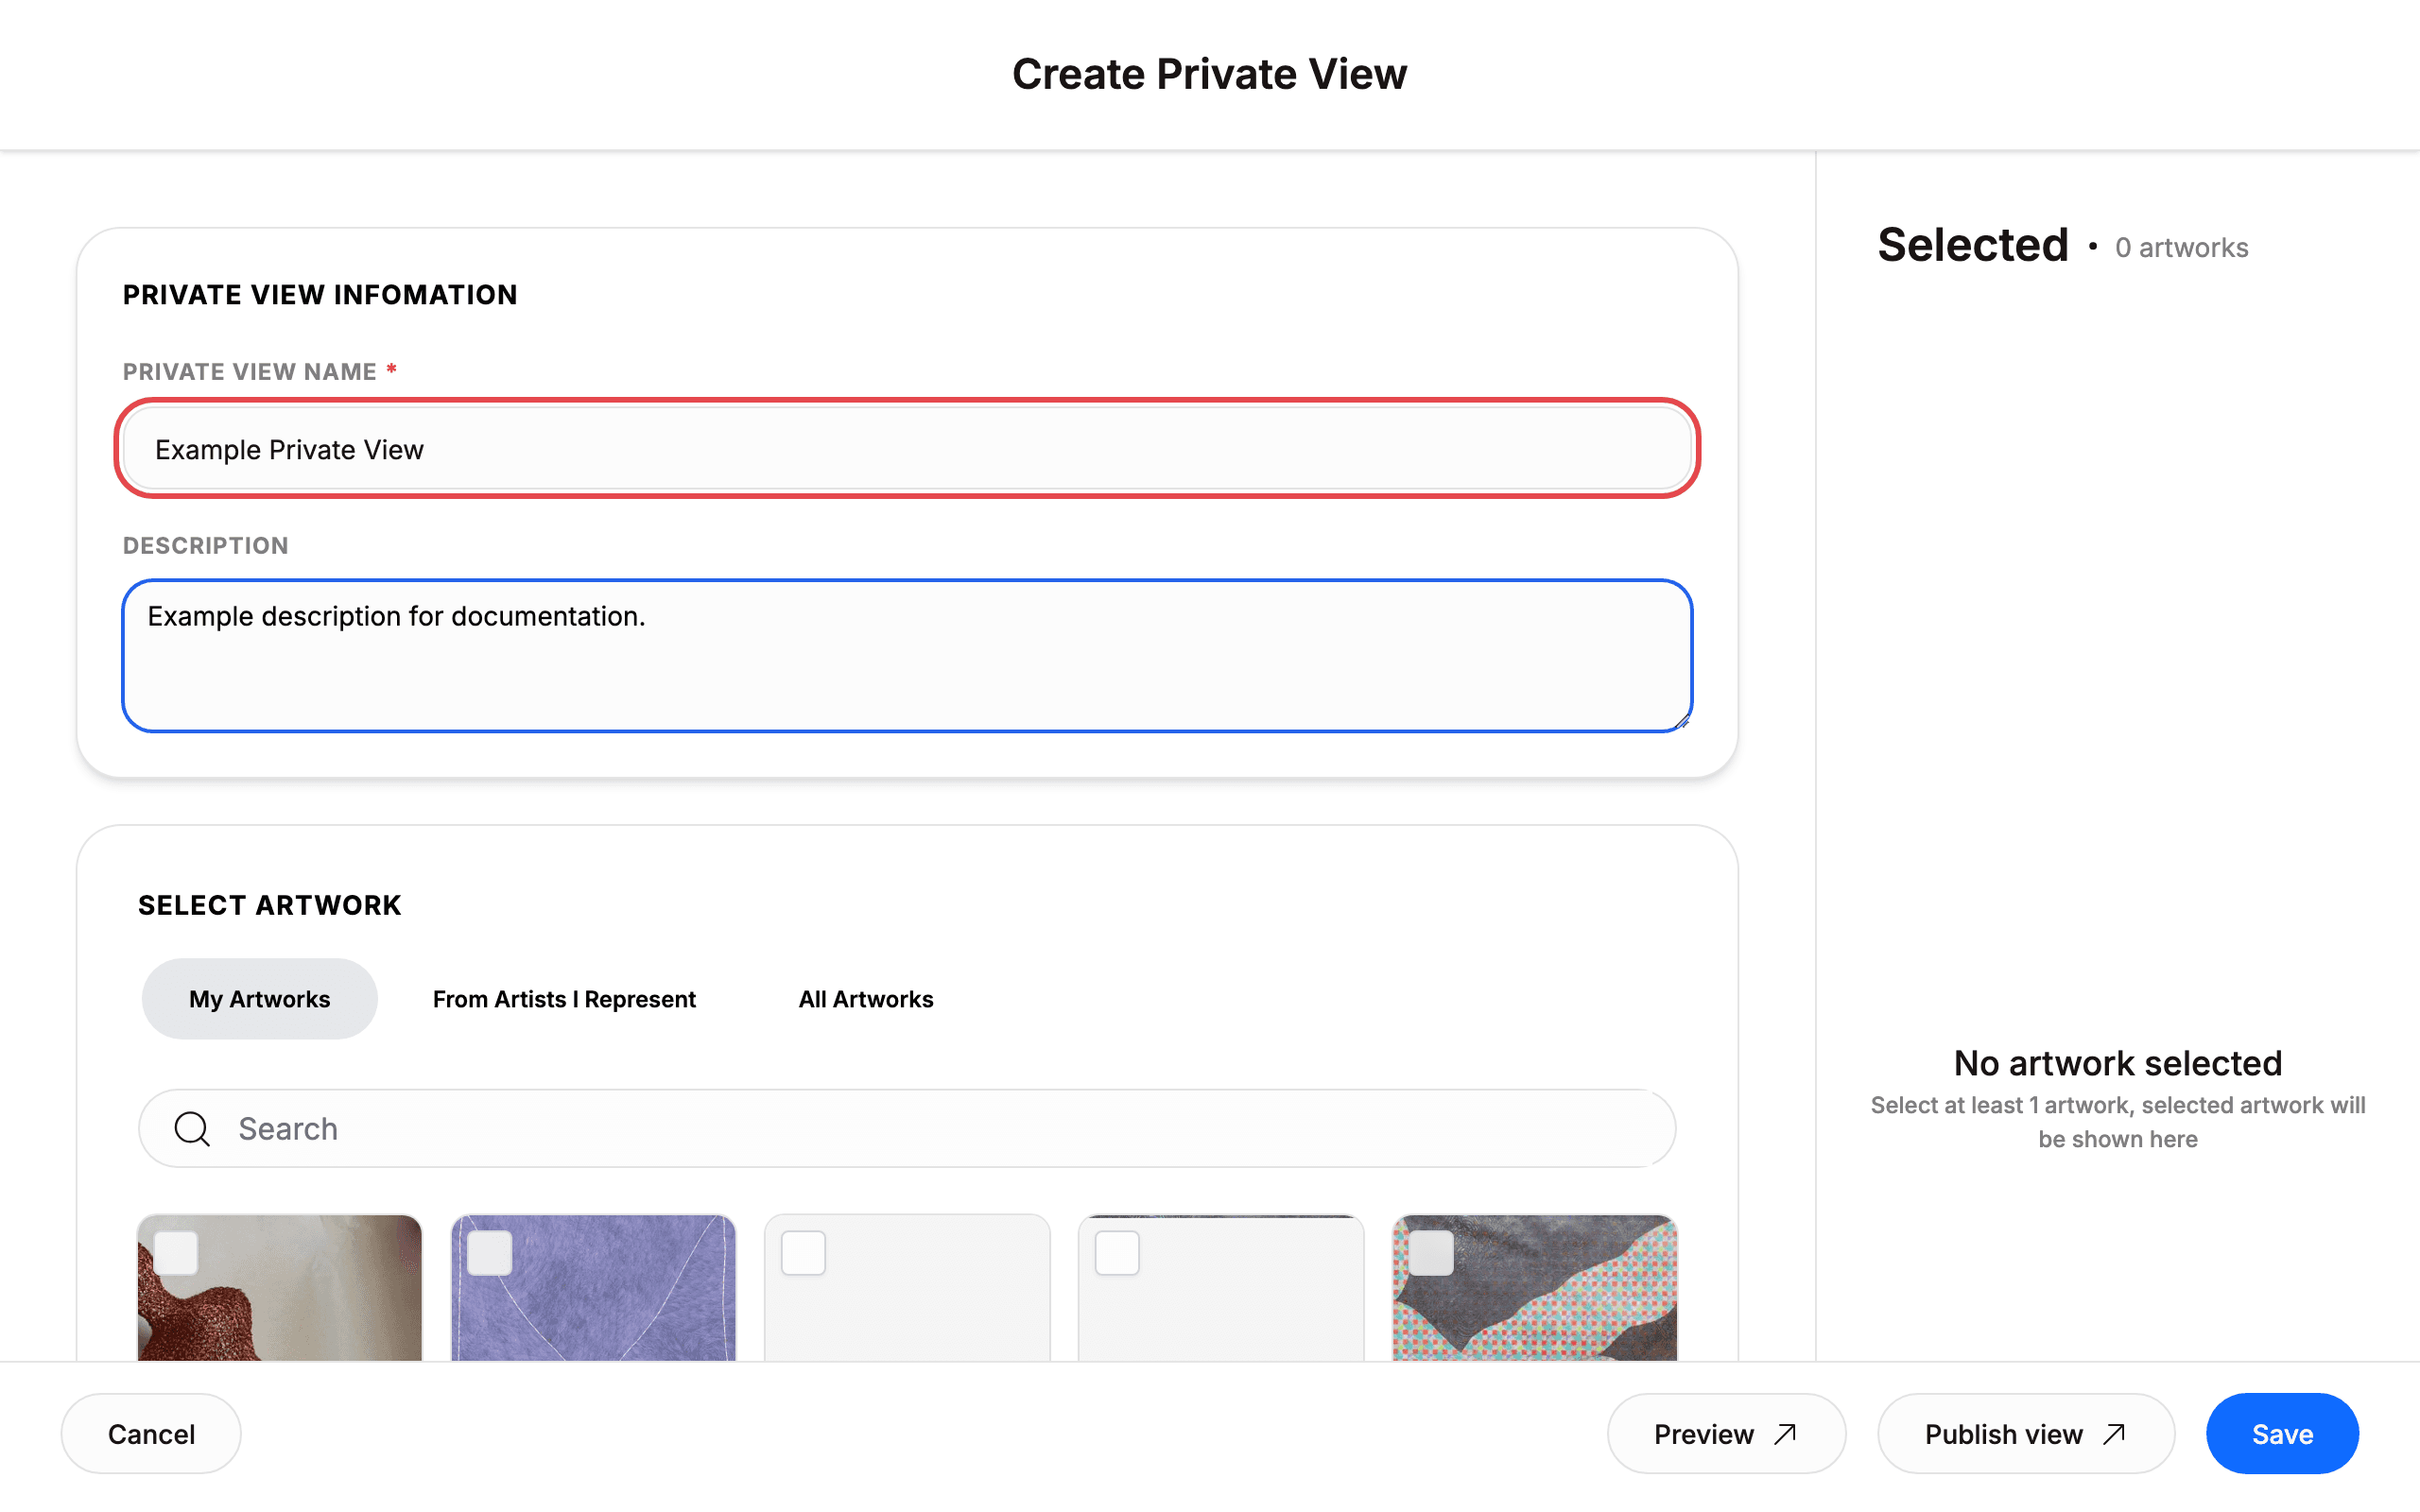
4. Enter the view details
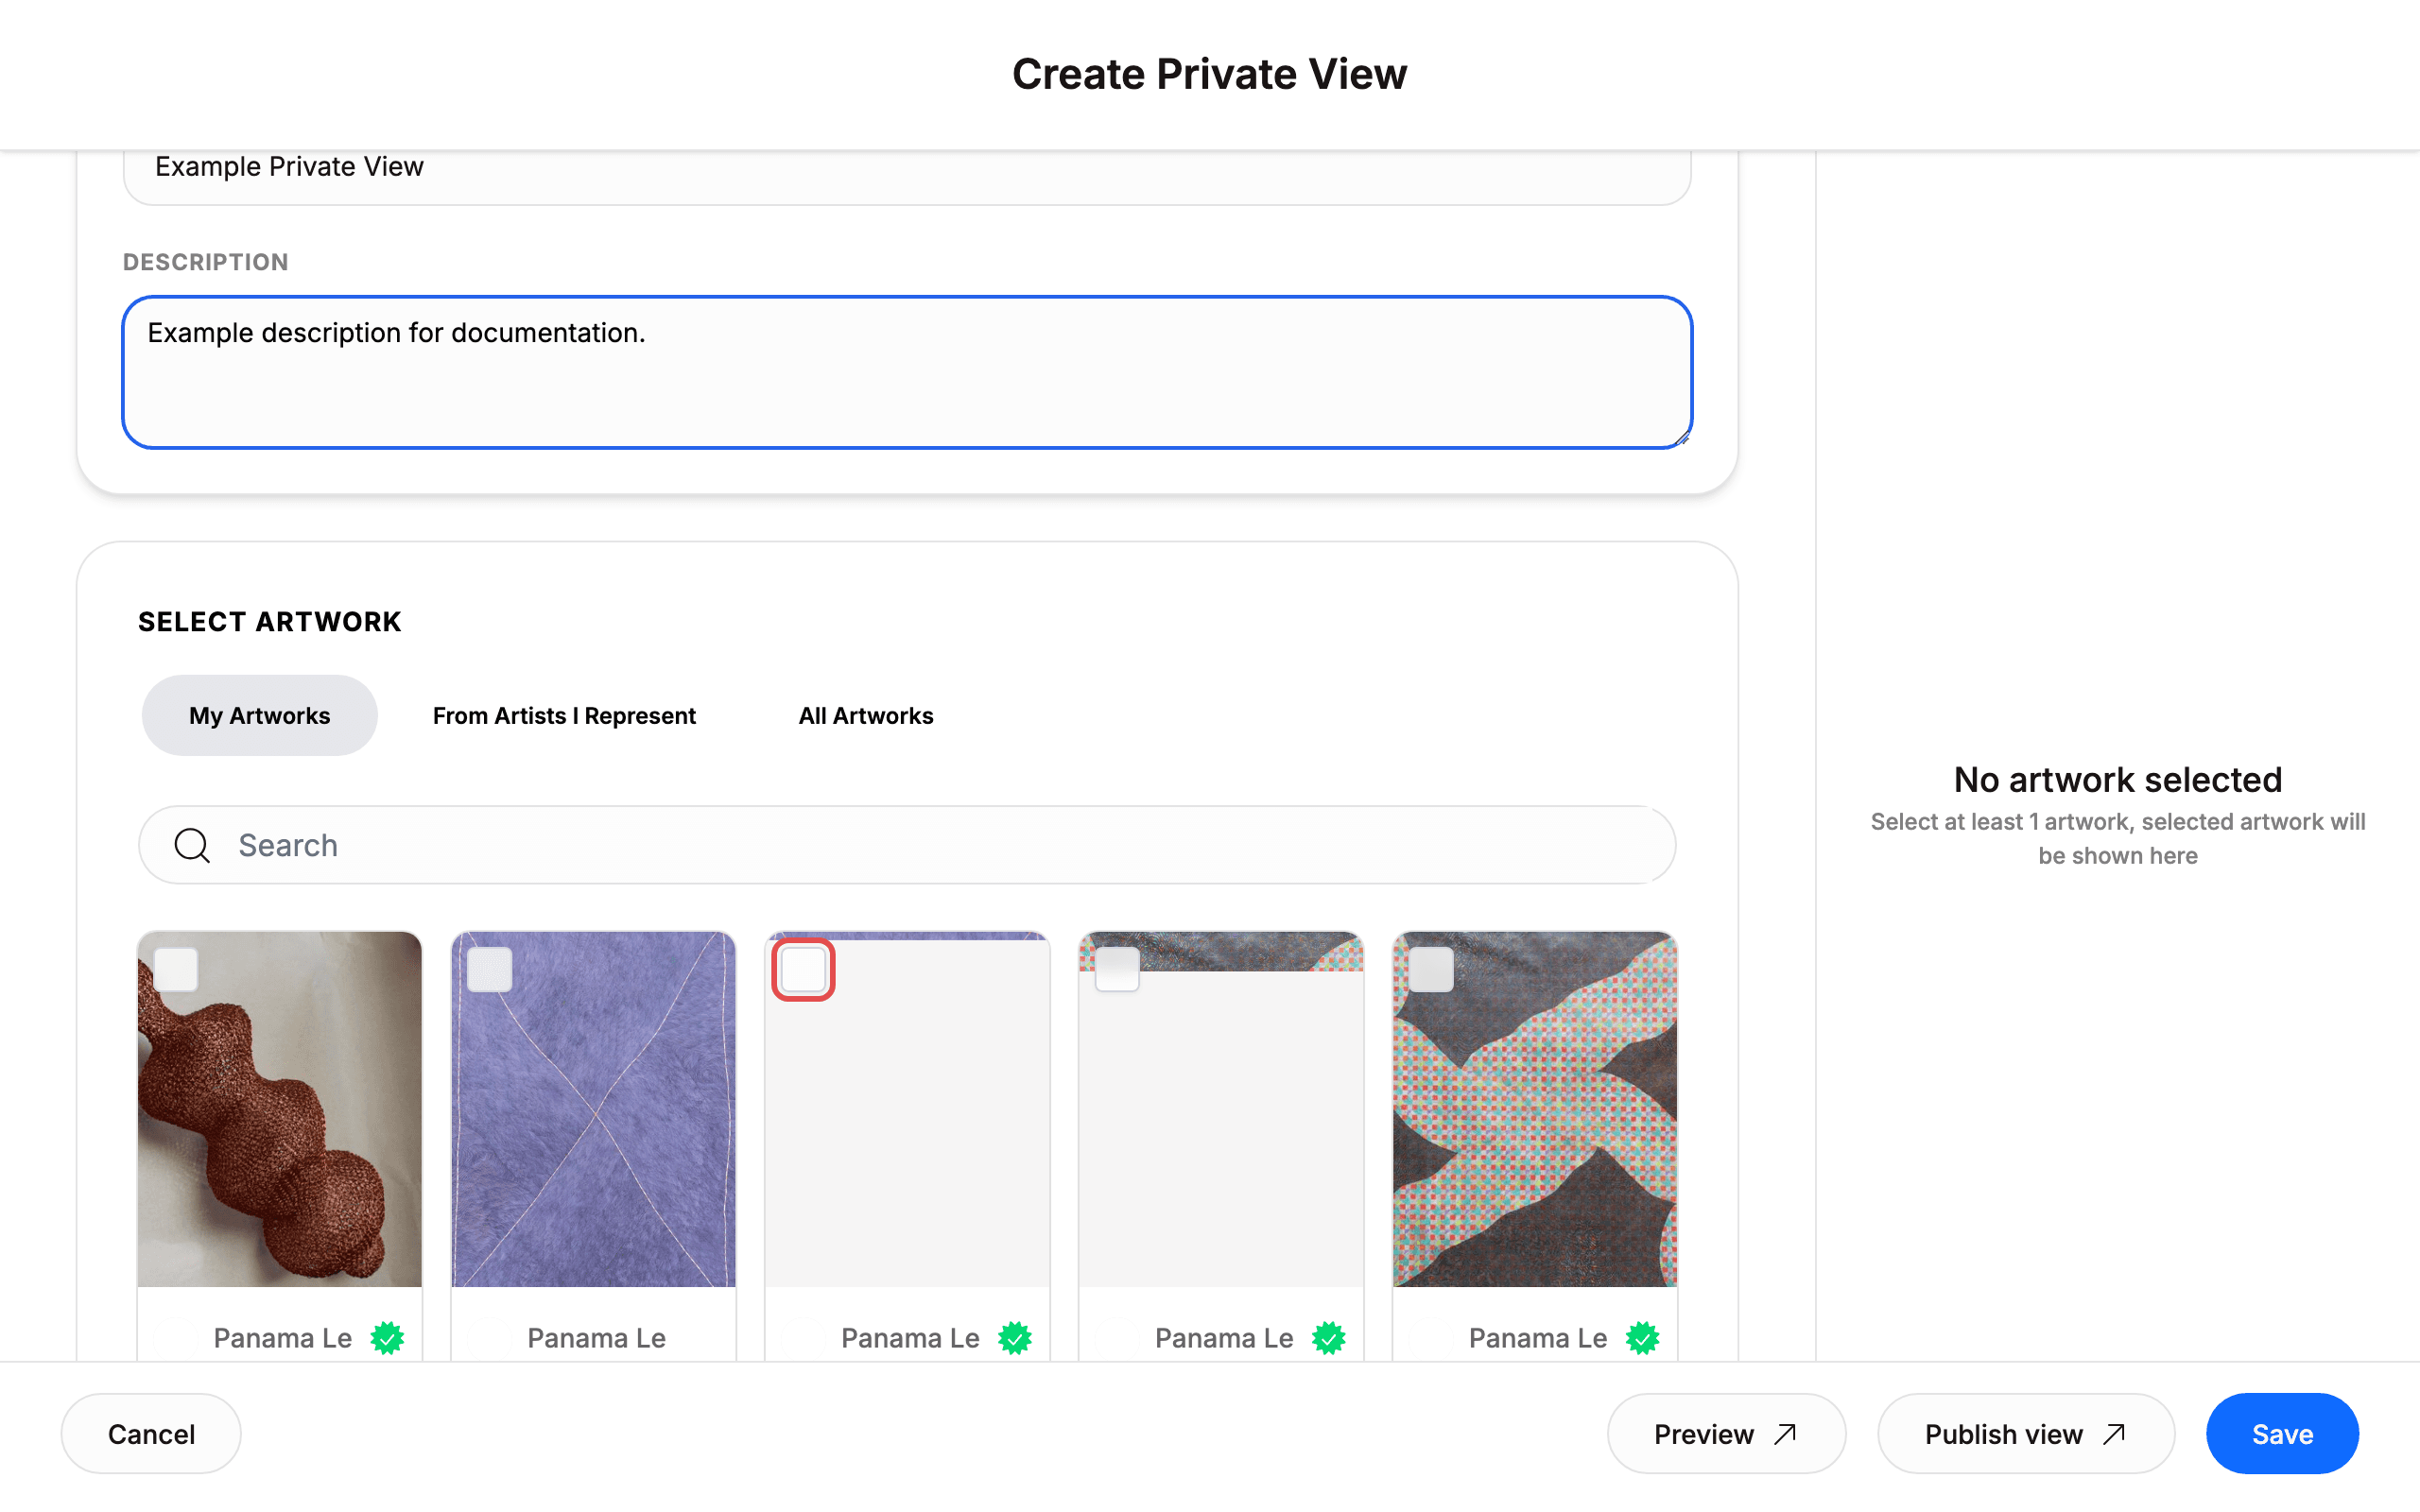
The Create Private View page opens. Under PRIVATE VIEW INFOMATION, type a name into PRIVATE VIEW NAME and add an optional DESCRIPTION.
The name field is required. The red * next to PRIVATE VIEW NAME marks it.
5. Select artworks
Under SELECT ARTWORK, check the box on each artwork card you want to include. Use the Search field or the page numbers (1, 2, 3 …) to find works.
Switch sources with the My Artworks, From Artists I Represent, and All Artworks tabs.
6. Review your selection
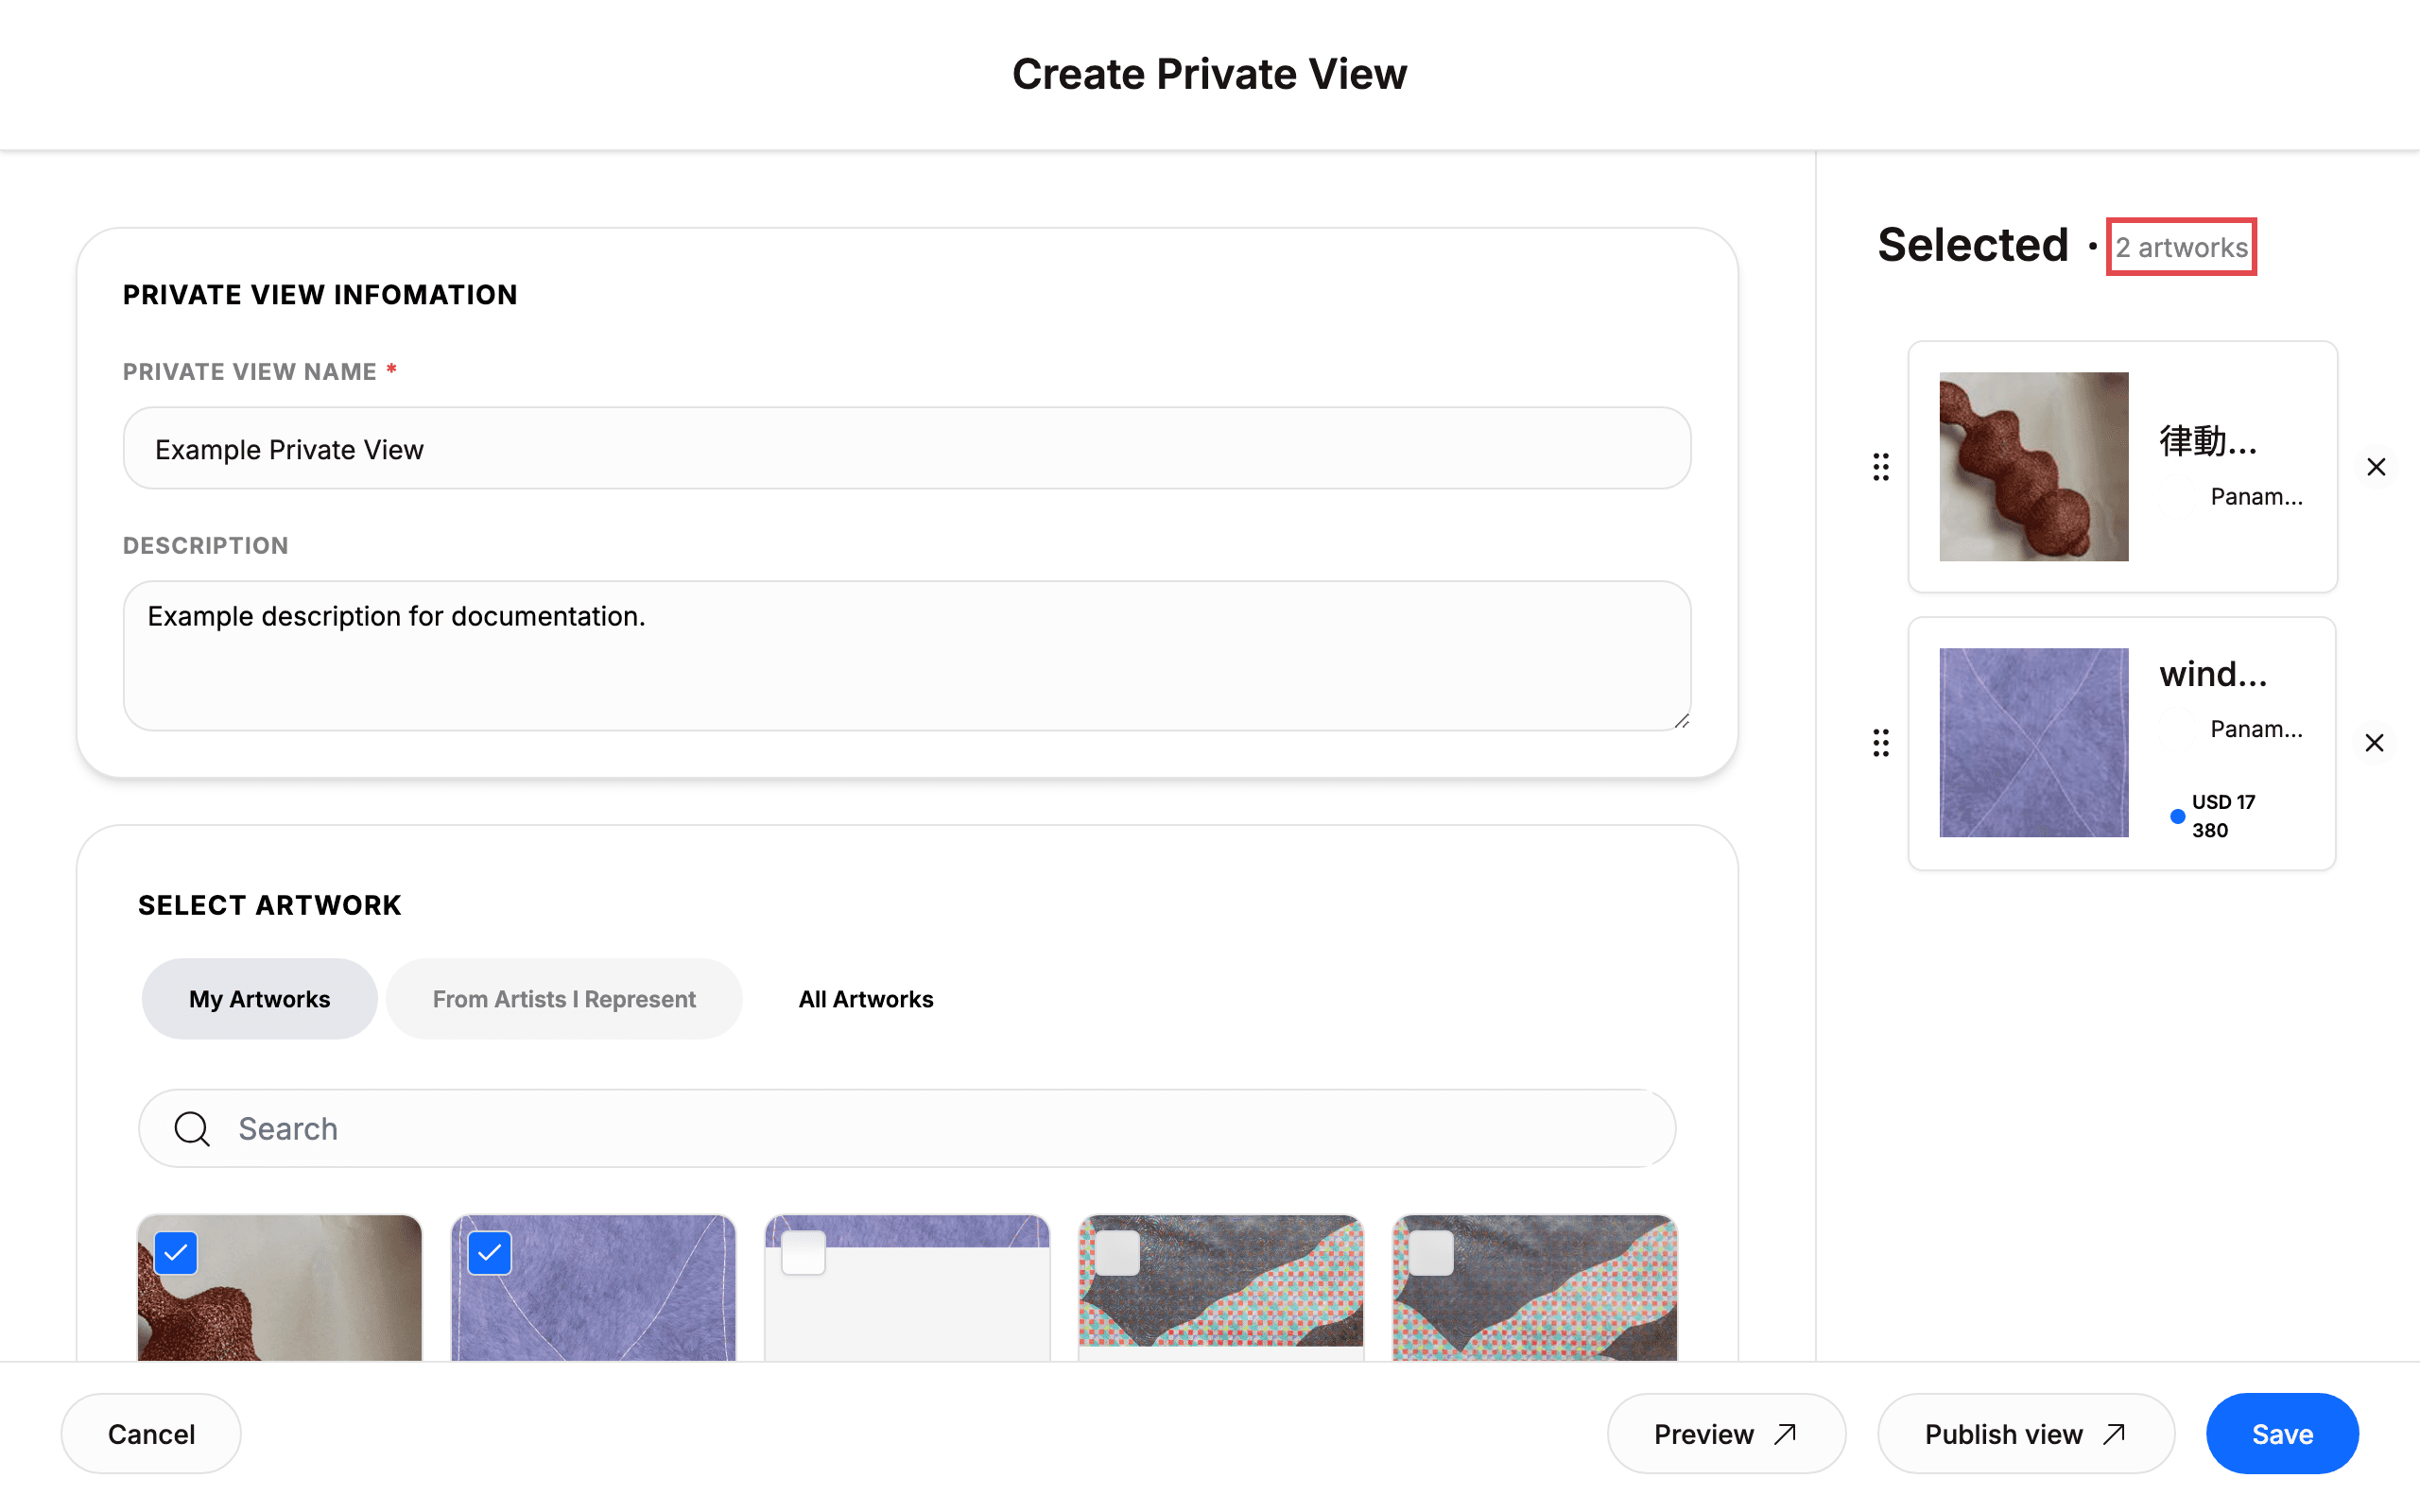
Check the Selected panel on the right. It counts your picks (for example 2 artworks). Drag the handle to reorder, or click the × (Remove artwork) to drop a piece.
You must select at least 1 artwork. Click Preview at any time to open a preview overlay, then close it to keep editing.
7. Publish the view
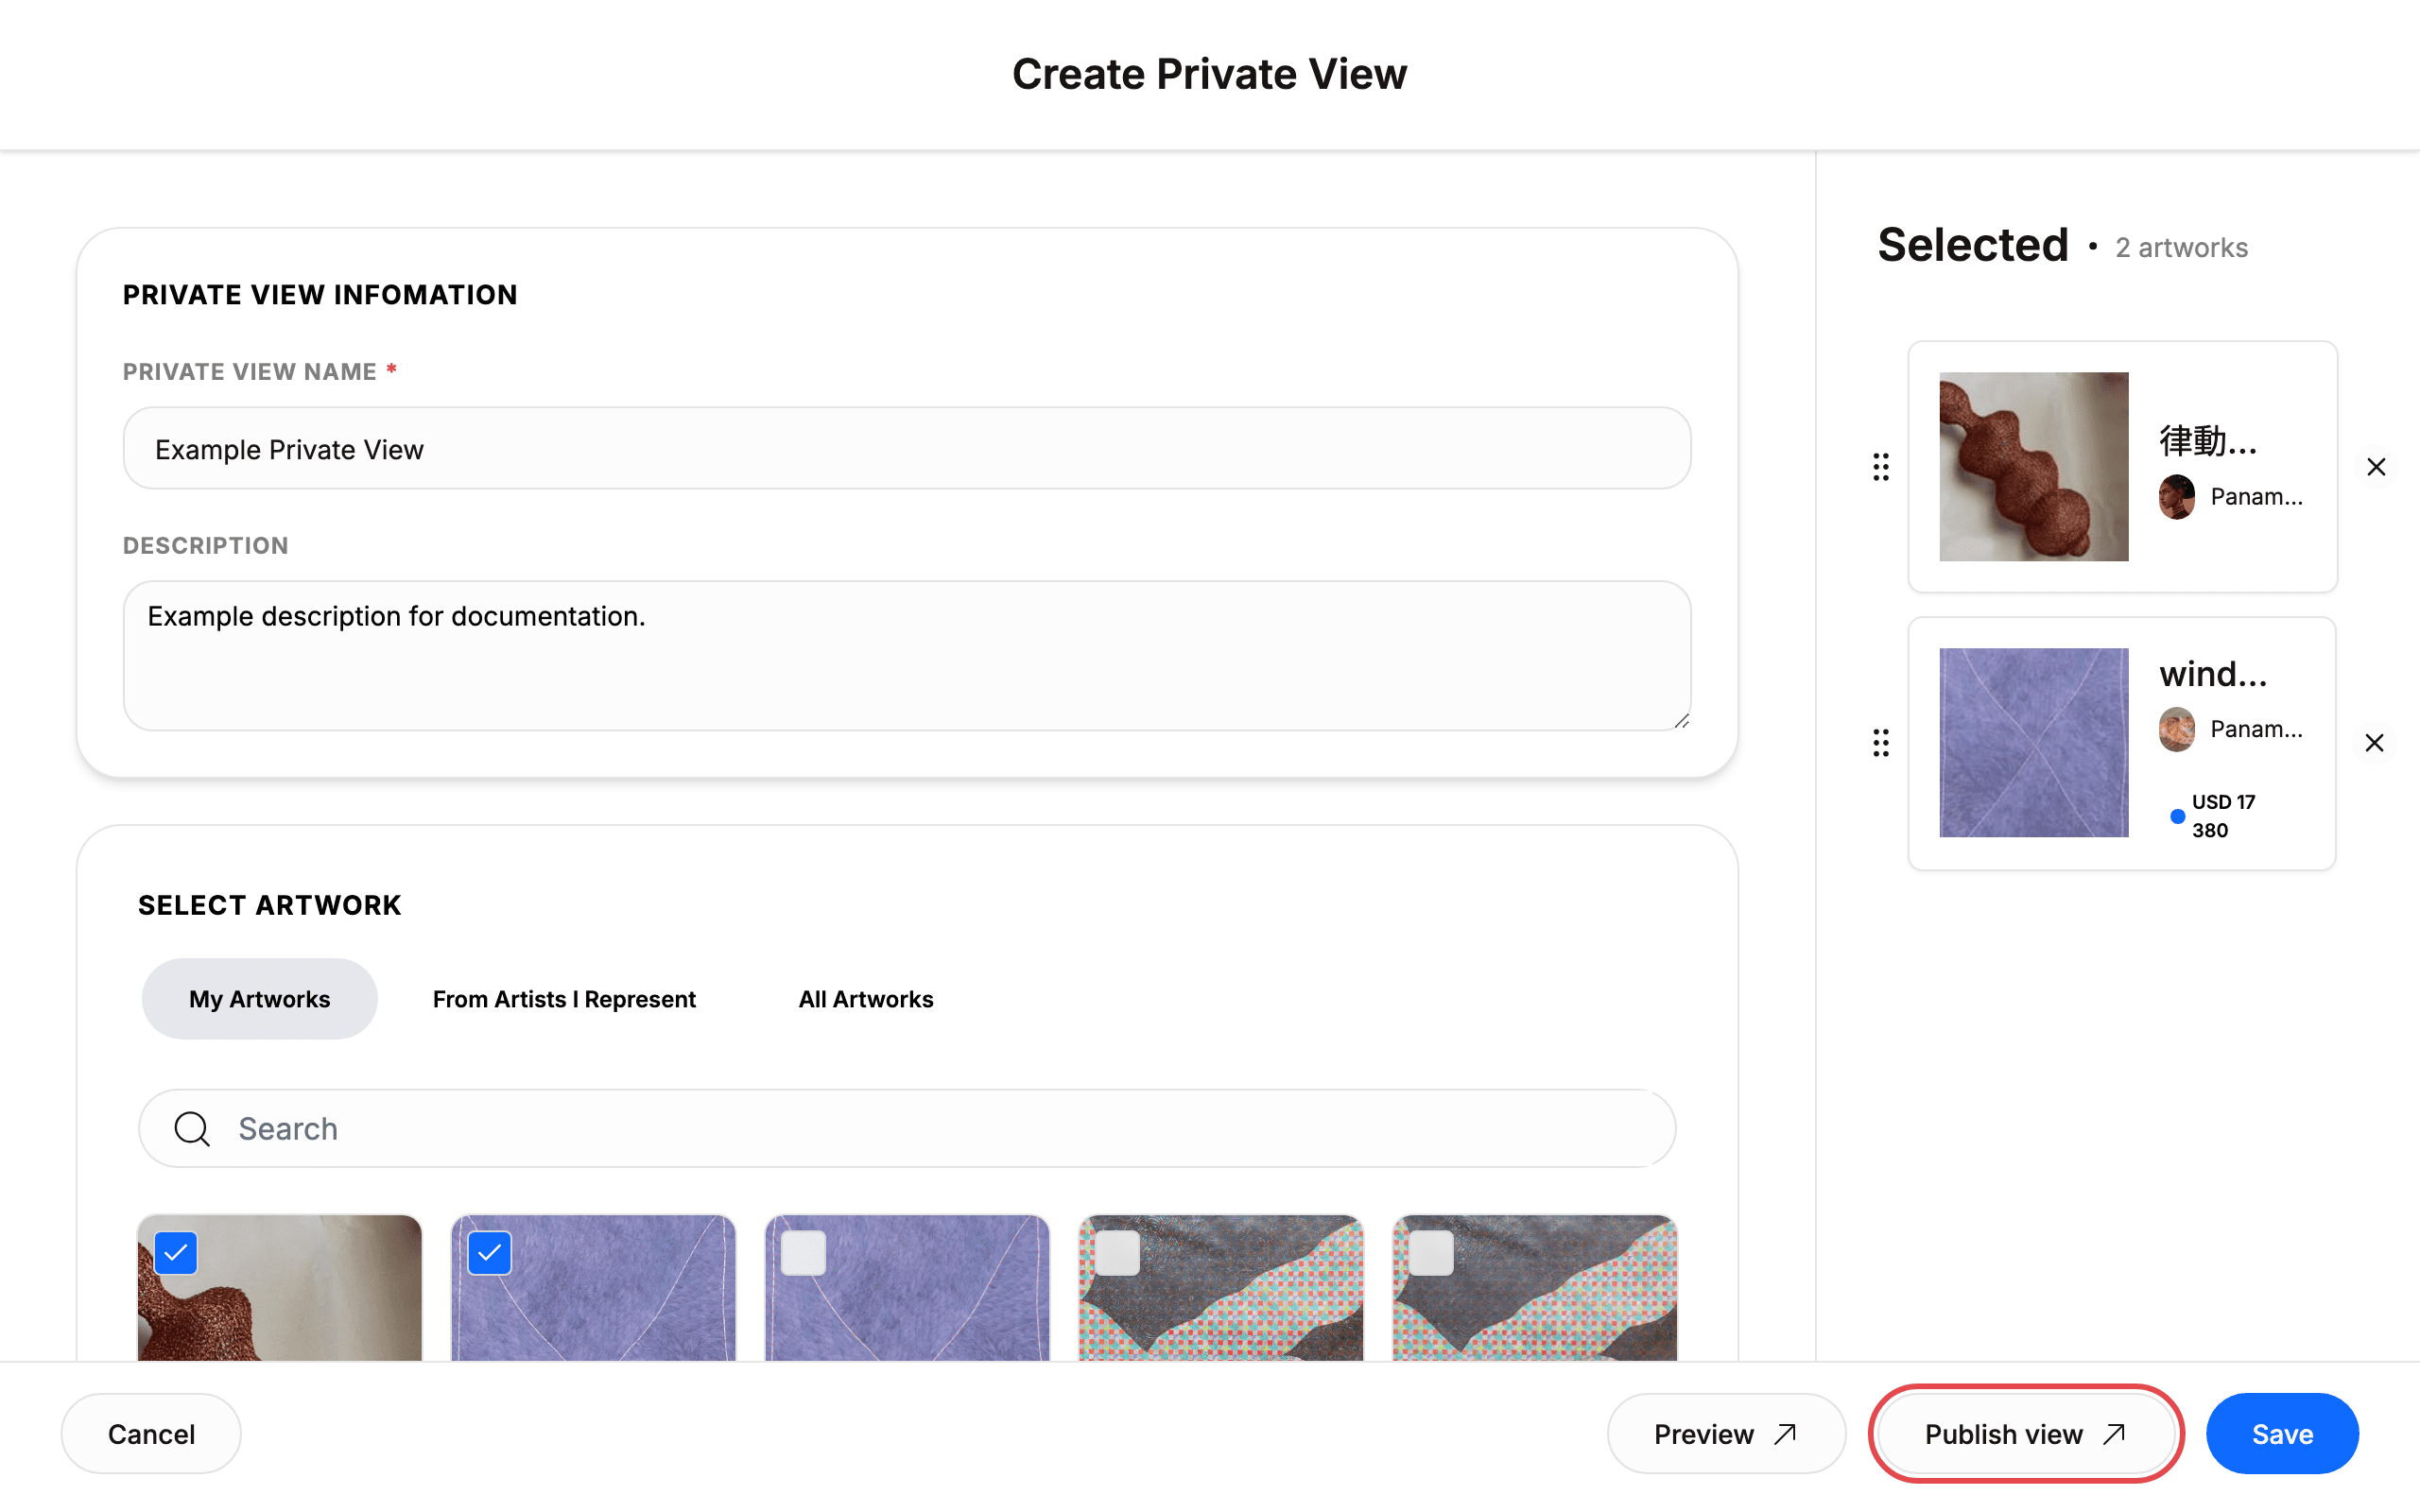
When the view looks right, click Publish view in the bottom bar.
The button shows Saving… while Cohart creates the view, then a Private View created! message appears. Prefer a draft instead? Click Save: it stores the view and returns you to the Private Views list.
8. Share your ACTIVE view
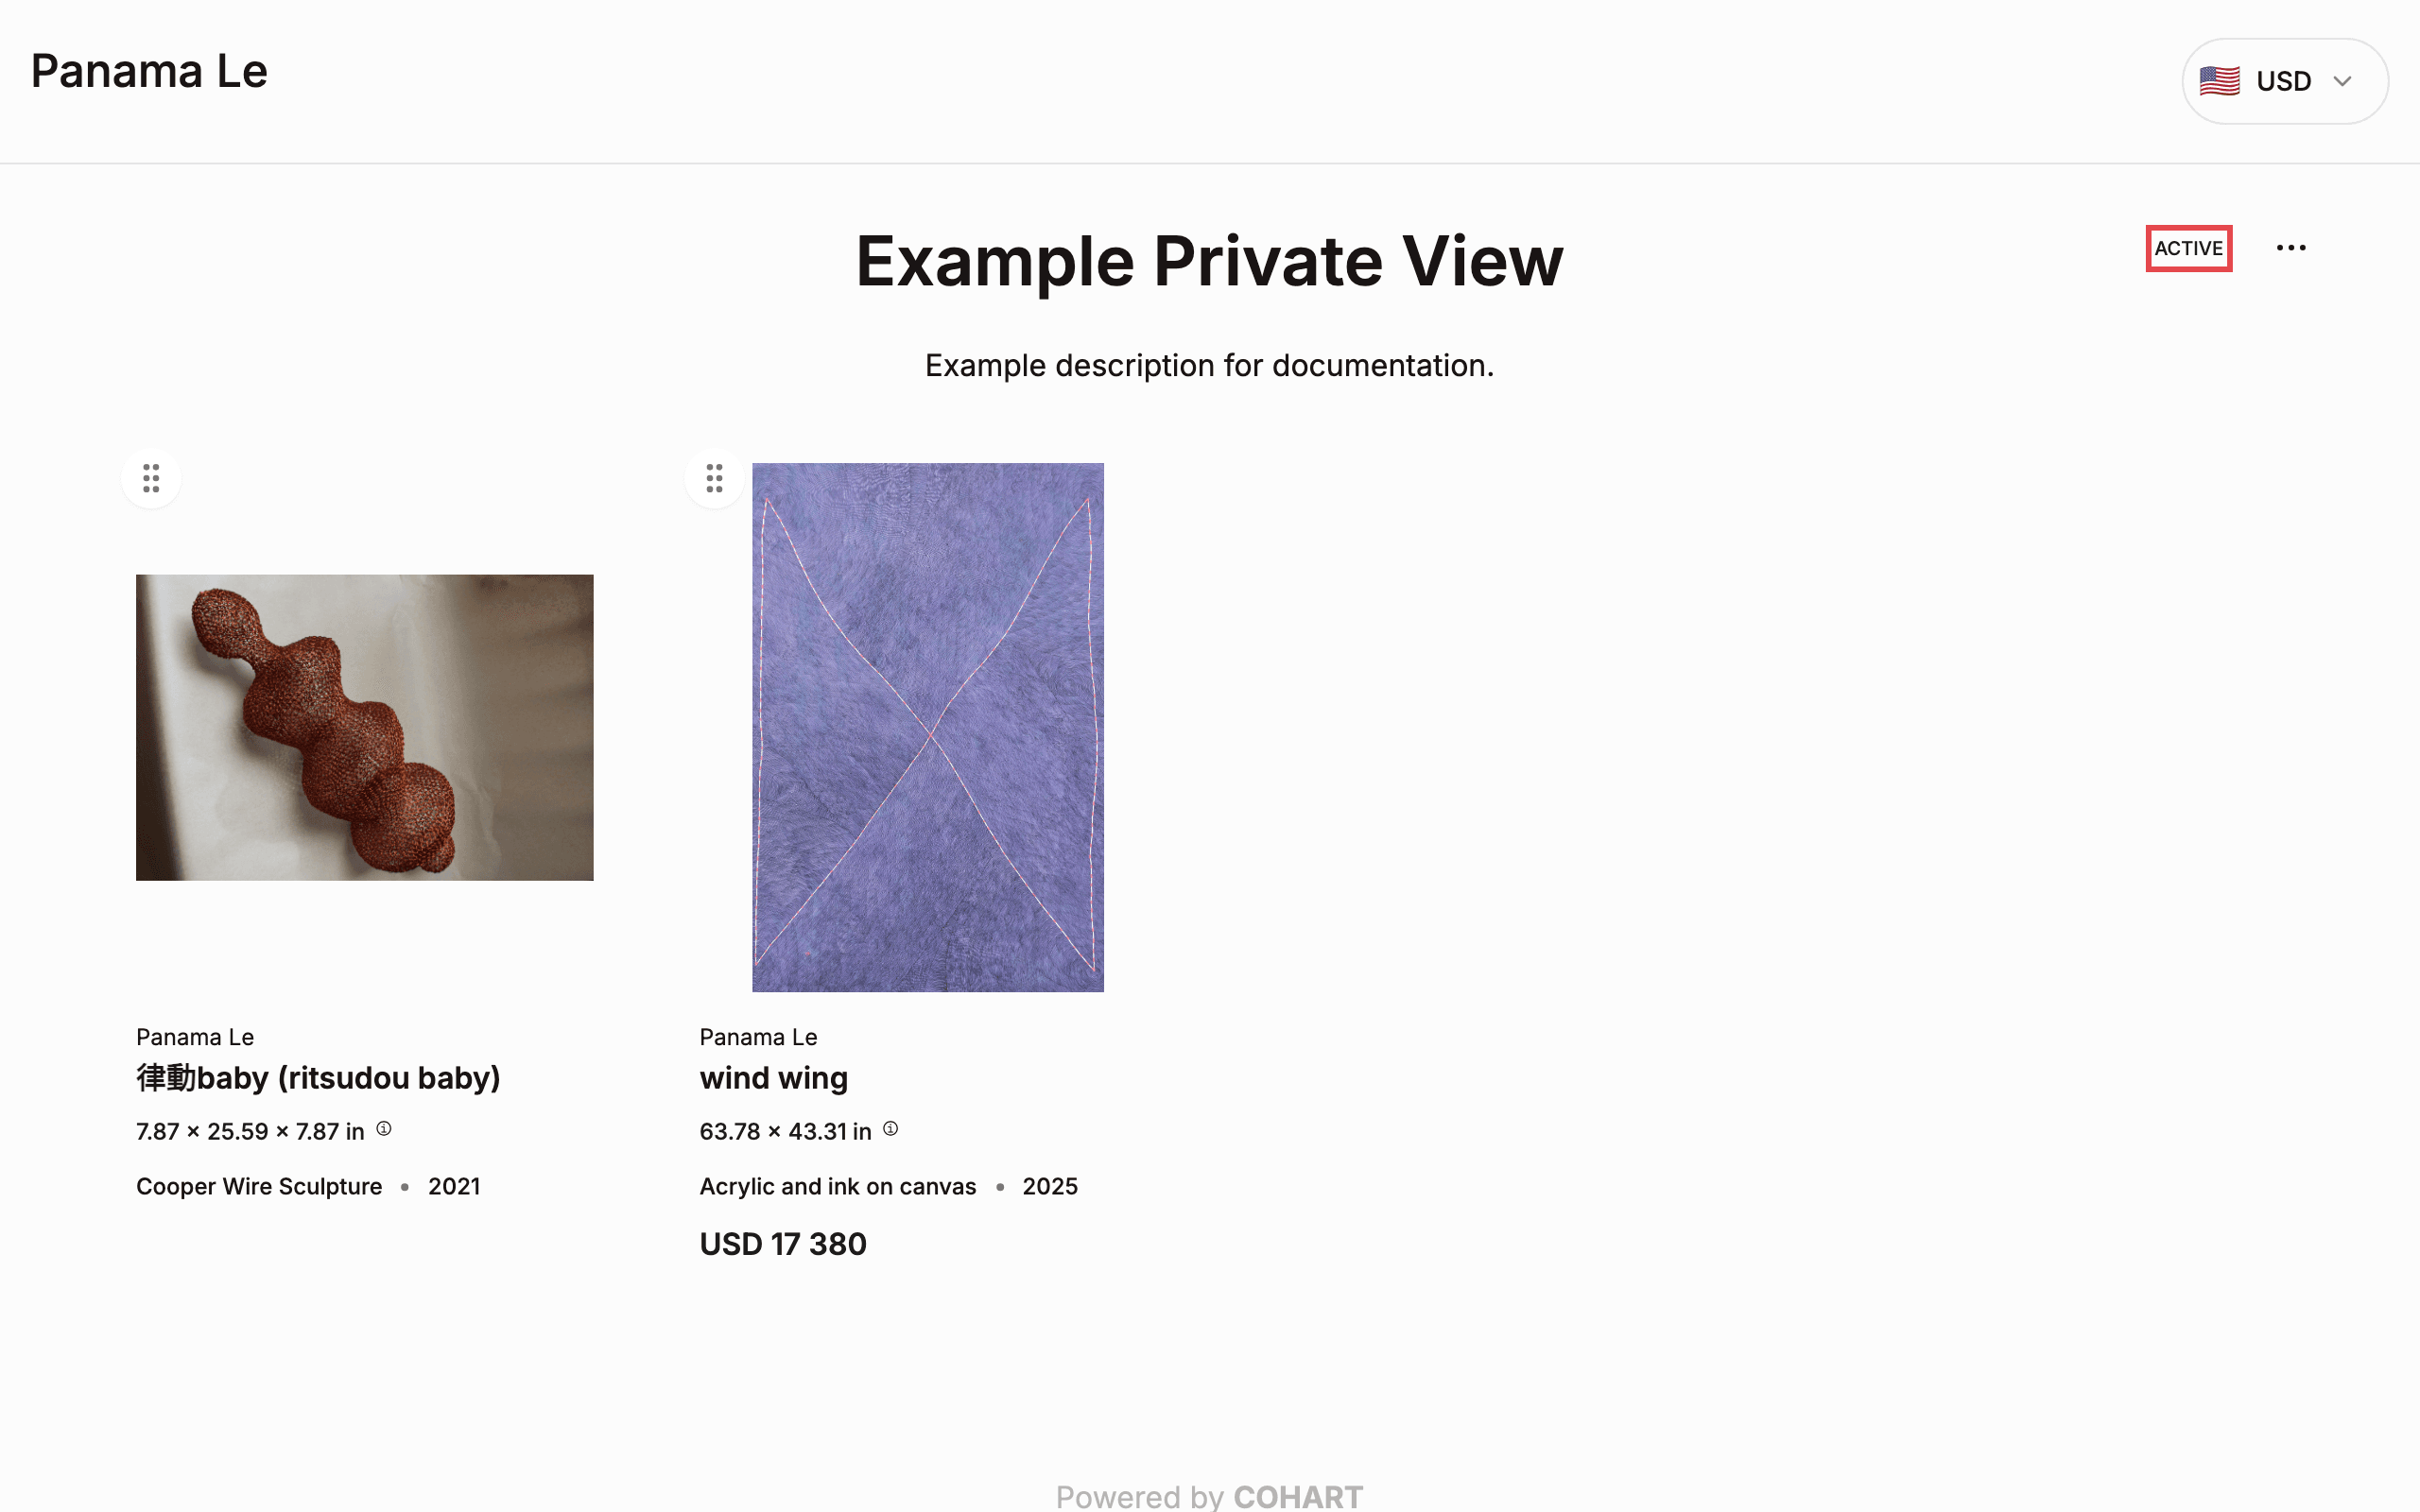
Cohart opens your new view. The ACTIVE badge confirms it is live, with each artwork’s details and price (for example USD 17 380) below.
Copy the link from your browser to share the view. A ··· menu sits next to ACTIVE.
Tips
- The button reads Saving… for roughly 20 seconds before the Private View created! message appears. Do not click twice or leave the page.
- The create page loads empty at first. Only the Create Private View heading renders immediately; the form and artwork grid appear after a few seconds. Wait before interacting.
- The preview overlay shows loading placeholders for several seconds before the artworks render.
- Views you create appear at the top of My Private Views with a NEW badge, the creation date, and the artwork count.
Troubleshooting
- Private view name is required error under PRIVATE VIEW NAME → you tried to save without a name → type a name and try again.
- Please select at least one artwork error → no artwork is selected → add at least one artwork with the card checkboxes before saving or publishing.