How to Set Up Your Custom Website
Overview
Your custom website is a full multi-page site on Cohart — Home, Collection, Artists, Events, About, Contact, Blog, and any pages you add — styled by a theme and fed by your real profile content. It exists so your profile can work like a real website: a branded place to send collectors, press, and partners that looks like yours and updates when you change your artworks, bio, and collections. It is for artists and galleries who want more than a profile: a branded site with its own navigation, logo, favicon, typography, colors, and photo. You build it in two places: the Custom Website page, which holds your site card with its Last updated timestamp, Primary URL: link, and publish status plus Connected Domains, and the Preview Theme editor tab, which holds branding, pages, and navigation. Publishing applies your edits to the live site visitors open from the Primary URL: link, and changing the theme restyles the whole site at once. When you finish, you will have a published site on your primary address, with the option of pointing your own domain at it.
Before you start
- A Cohart seller account (artist or gallery) with profile content to show — the editor notes that artworks, bio, and collections from your profile reflect on the site instantly.
- A plan that supports publishing: the page offers Upgrade to Pro and Upgrade to Publish while the site is Unpublished, so confirm publishing is available before announcing the address.
- Branding assets within the stated limits: a square (1:1) favicon, logo images, and a profile photo in a supported format within its size cap.
- Expect live effects: Publish and Save changes alter your live site immediately, and Unpublish takes it offline — use Back, Cancel, or Close for look-only visits. For a branded address, see “How to Connect a Custom Domain to Your Custom Website”.
Steps
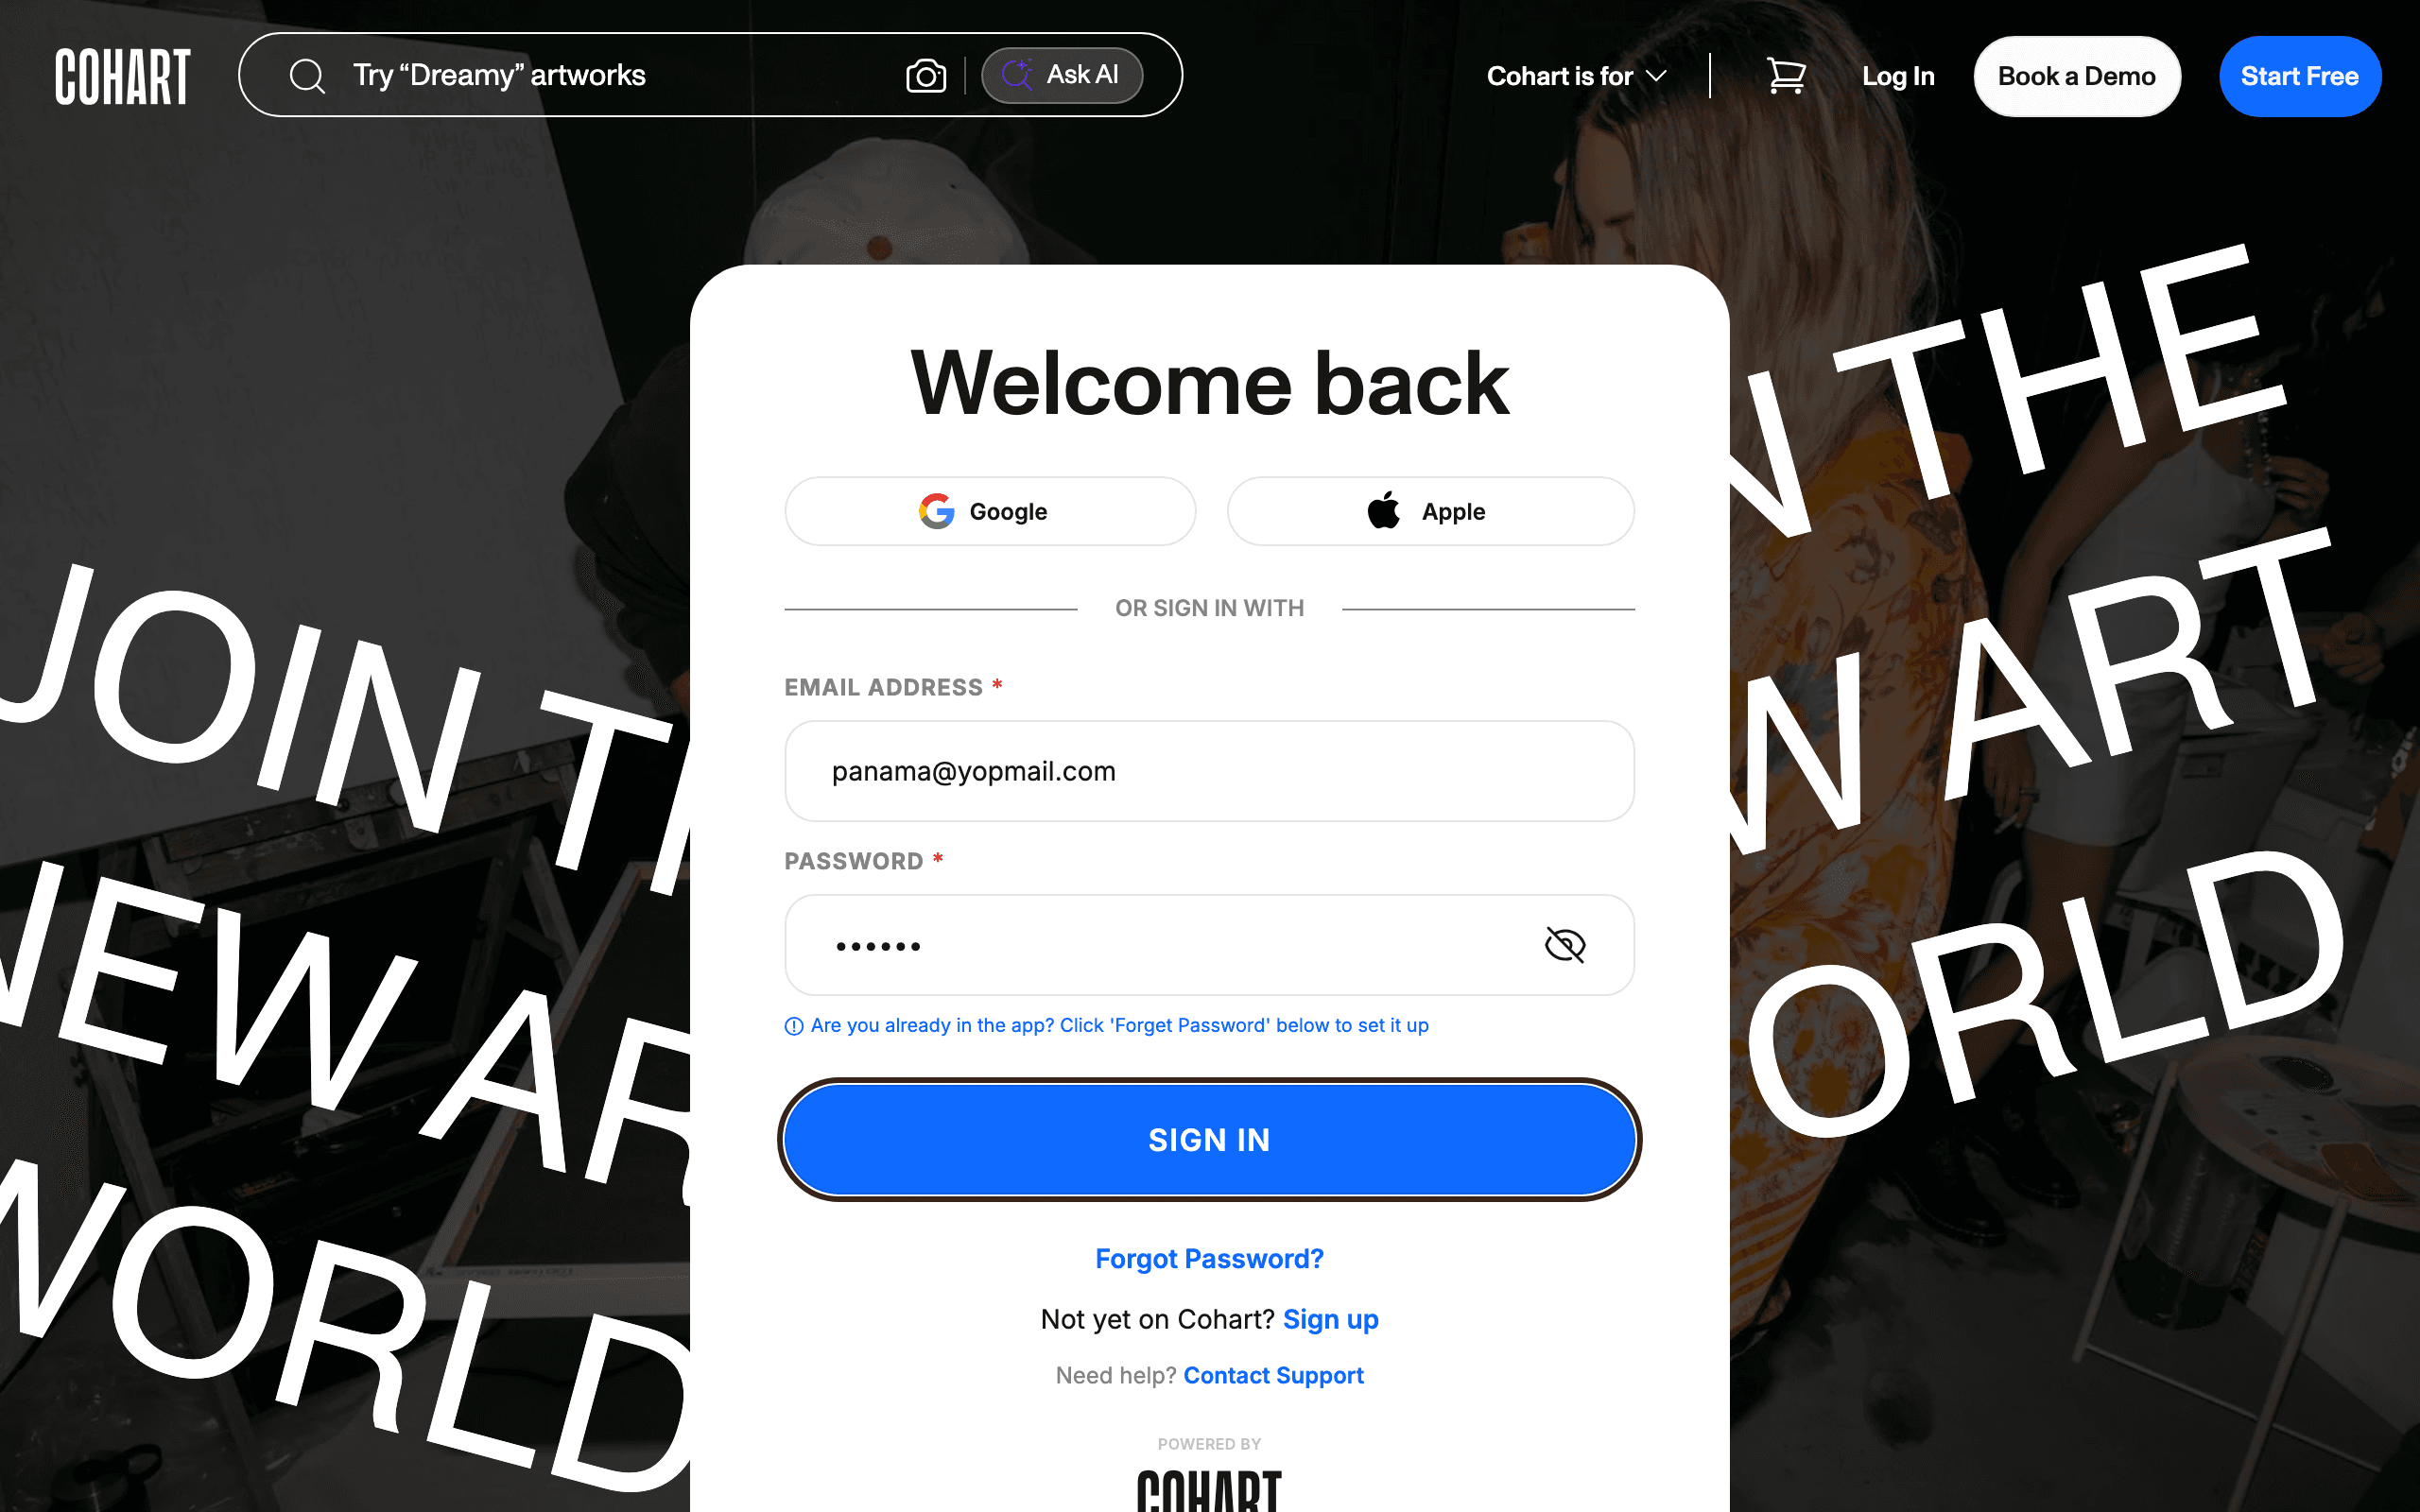
1. Sign in to Cohart
Sign in with your email address and password, or use Google or Apple.
2. Open Custom Website
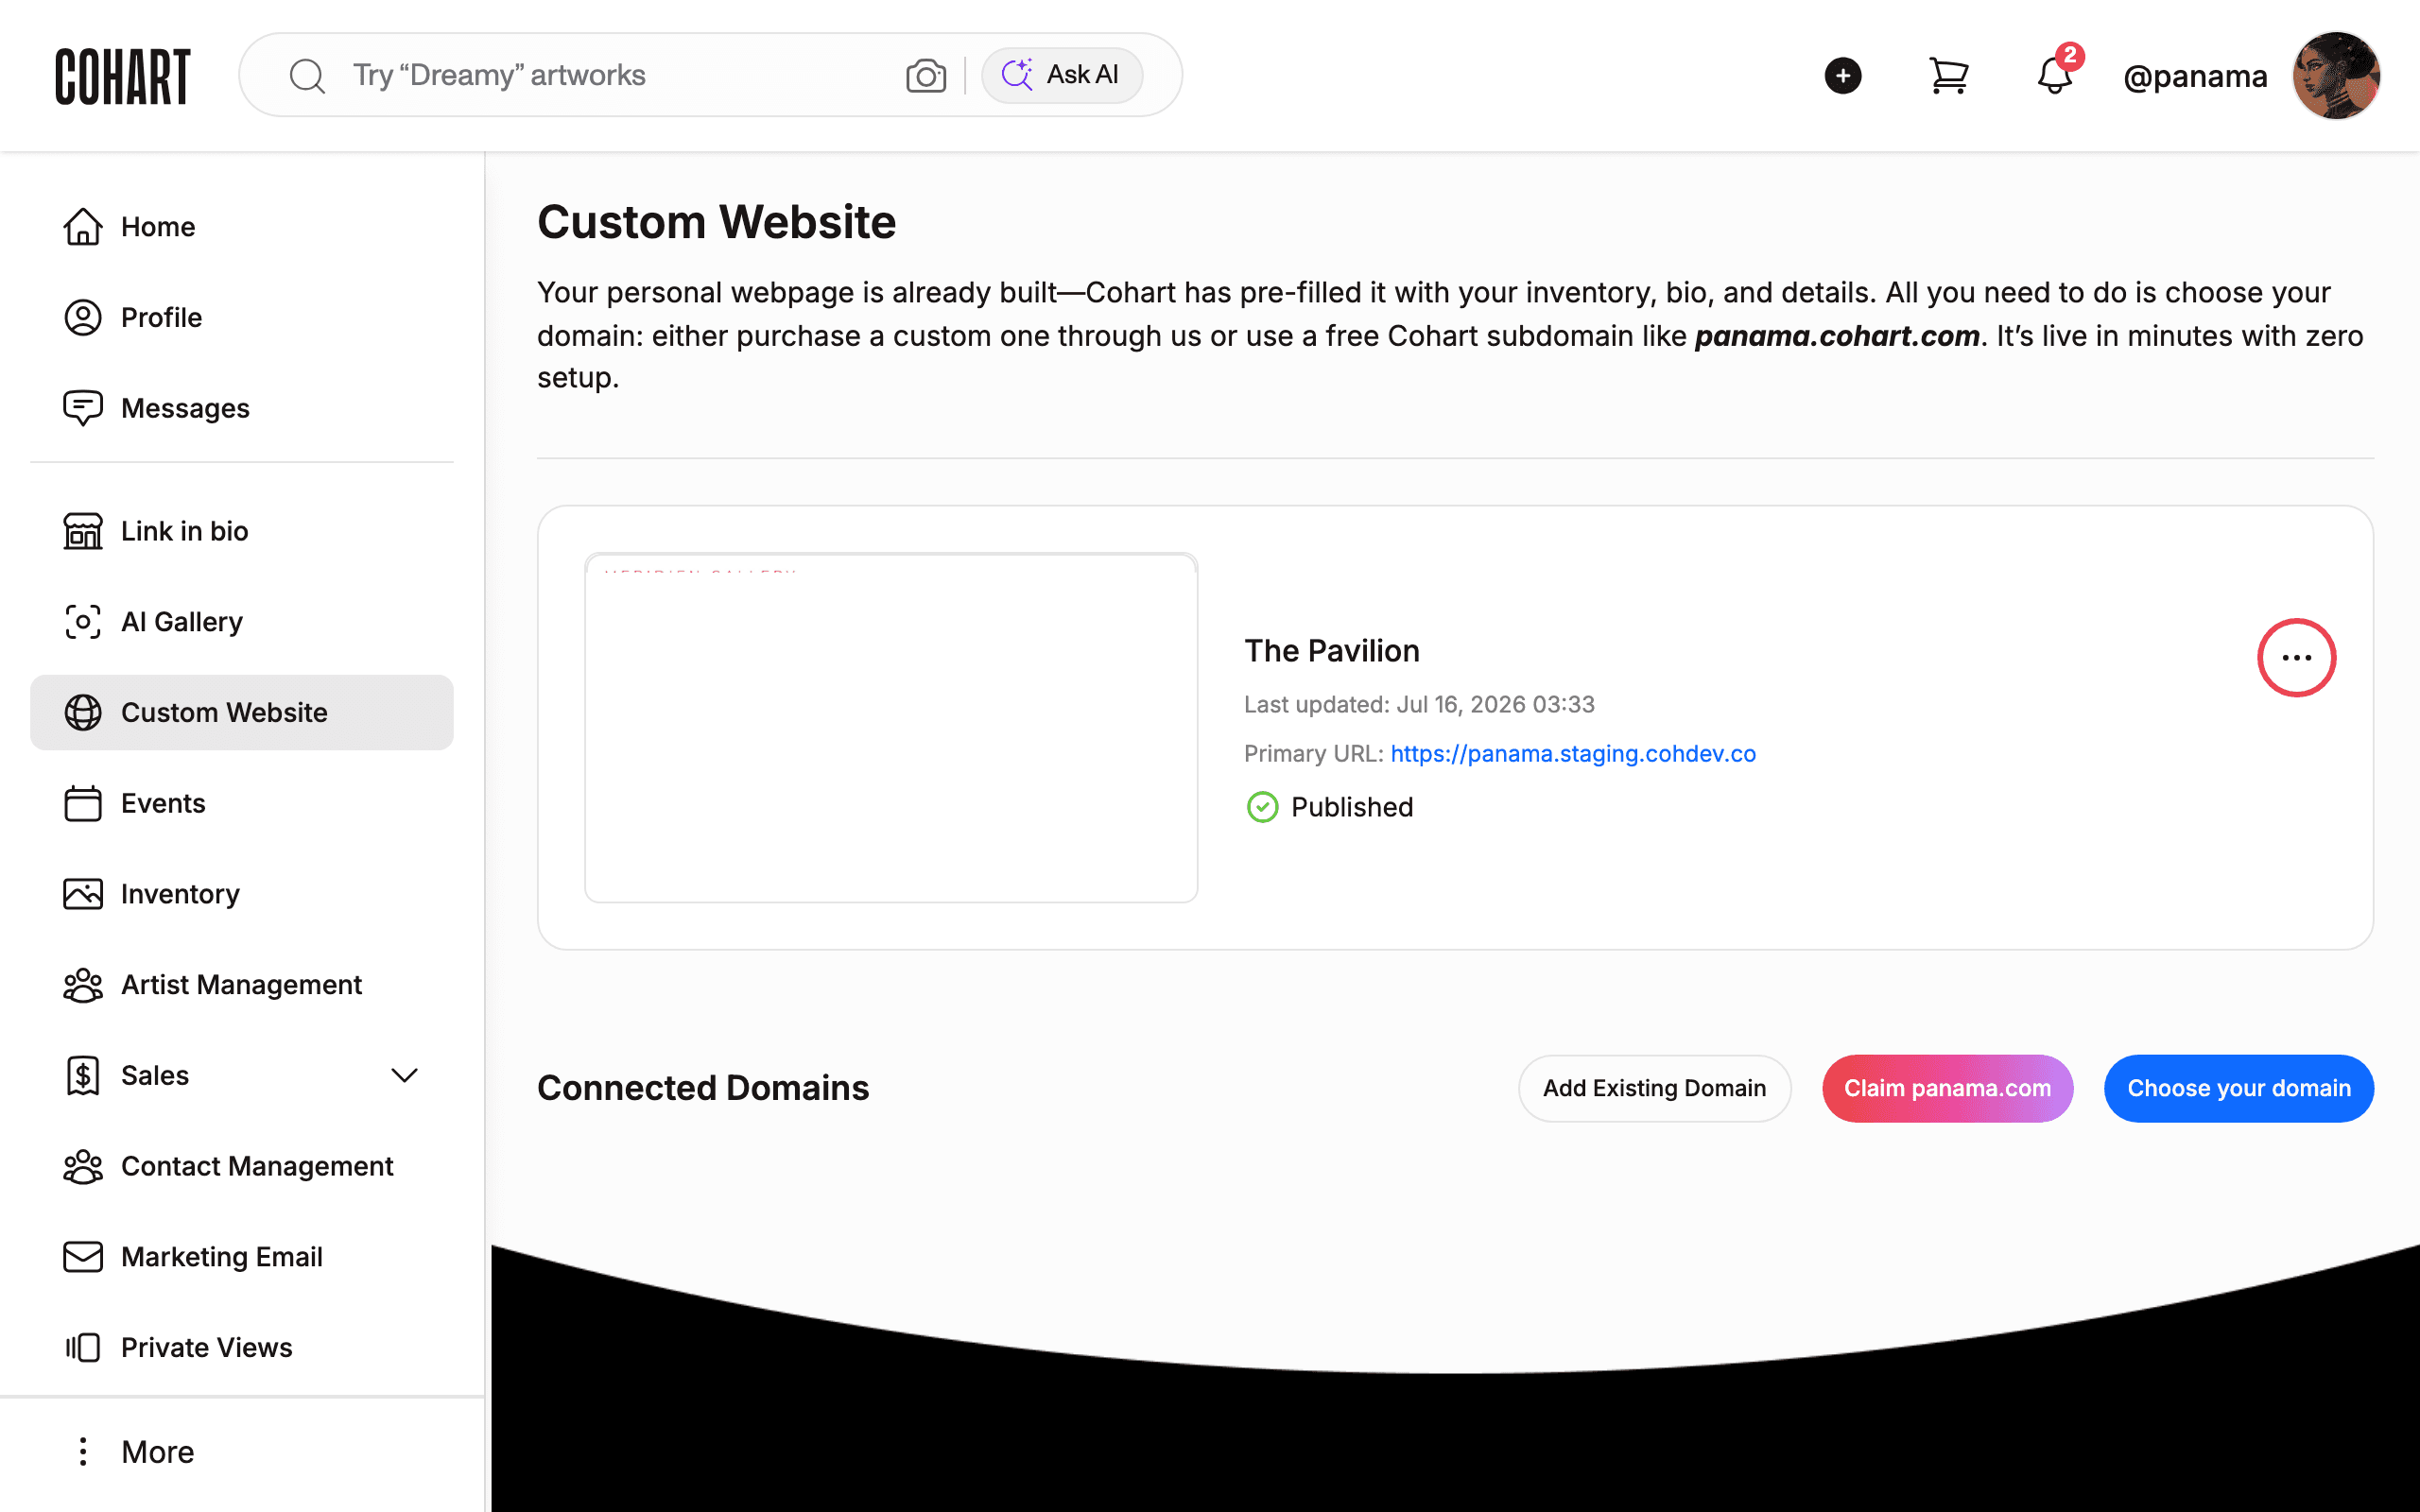
In the left sidebar, click Custom Website.
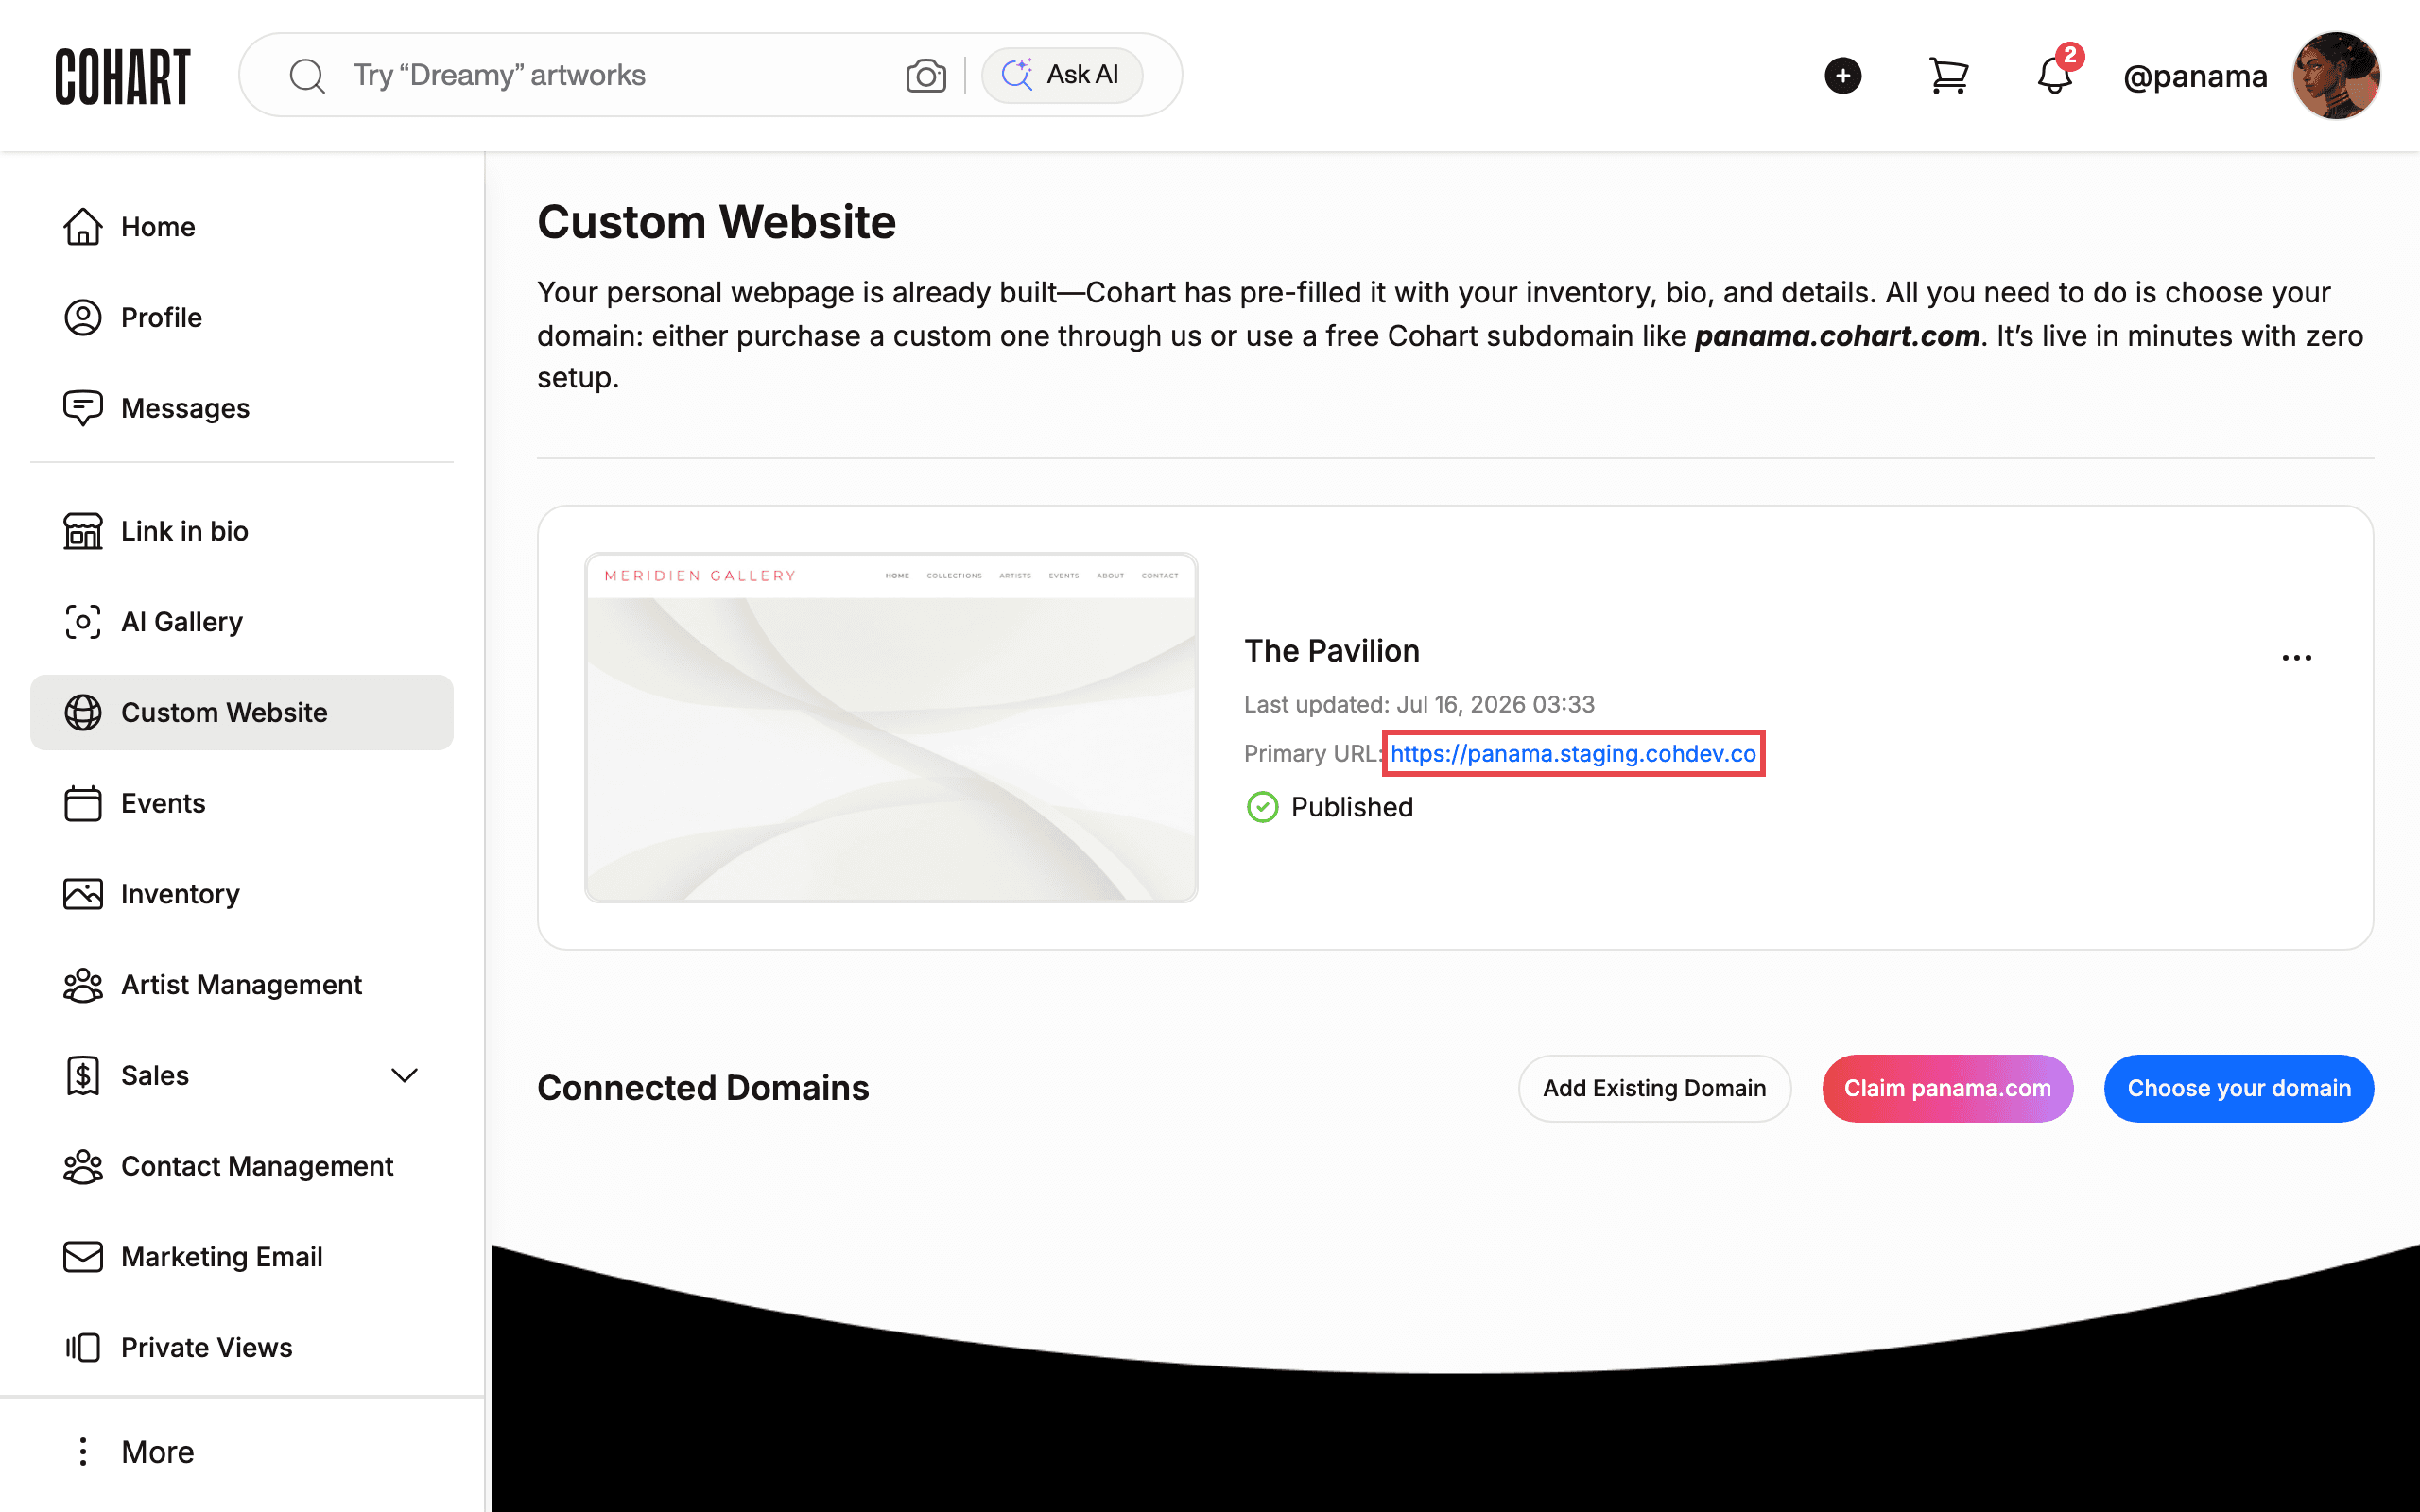
You will see the heading Custom Website and your site card with its Last updated timestamp, its Primary URL: link, and status Published. Below, find Connected Domains with Add Existing Domain, the Claim … option labeled with your own domain, and Choose your domain.
3. Open the site menu
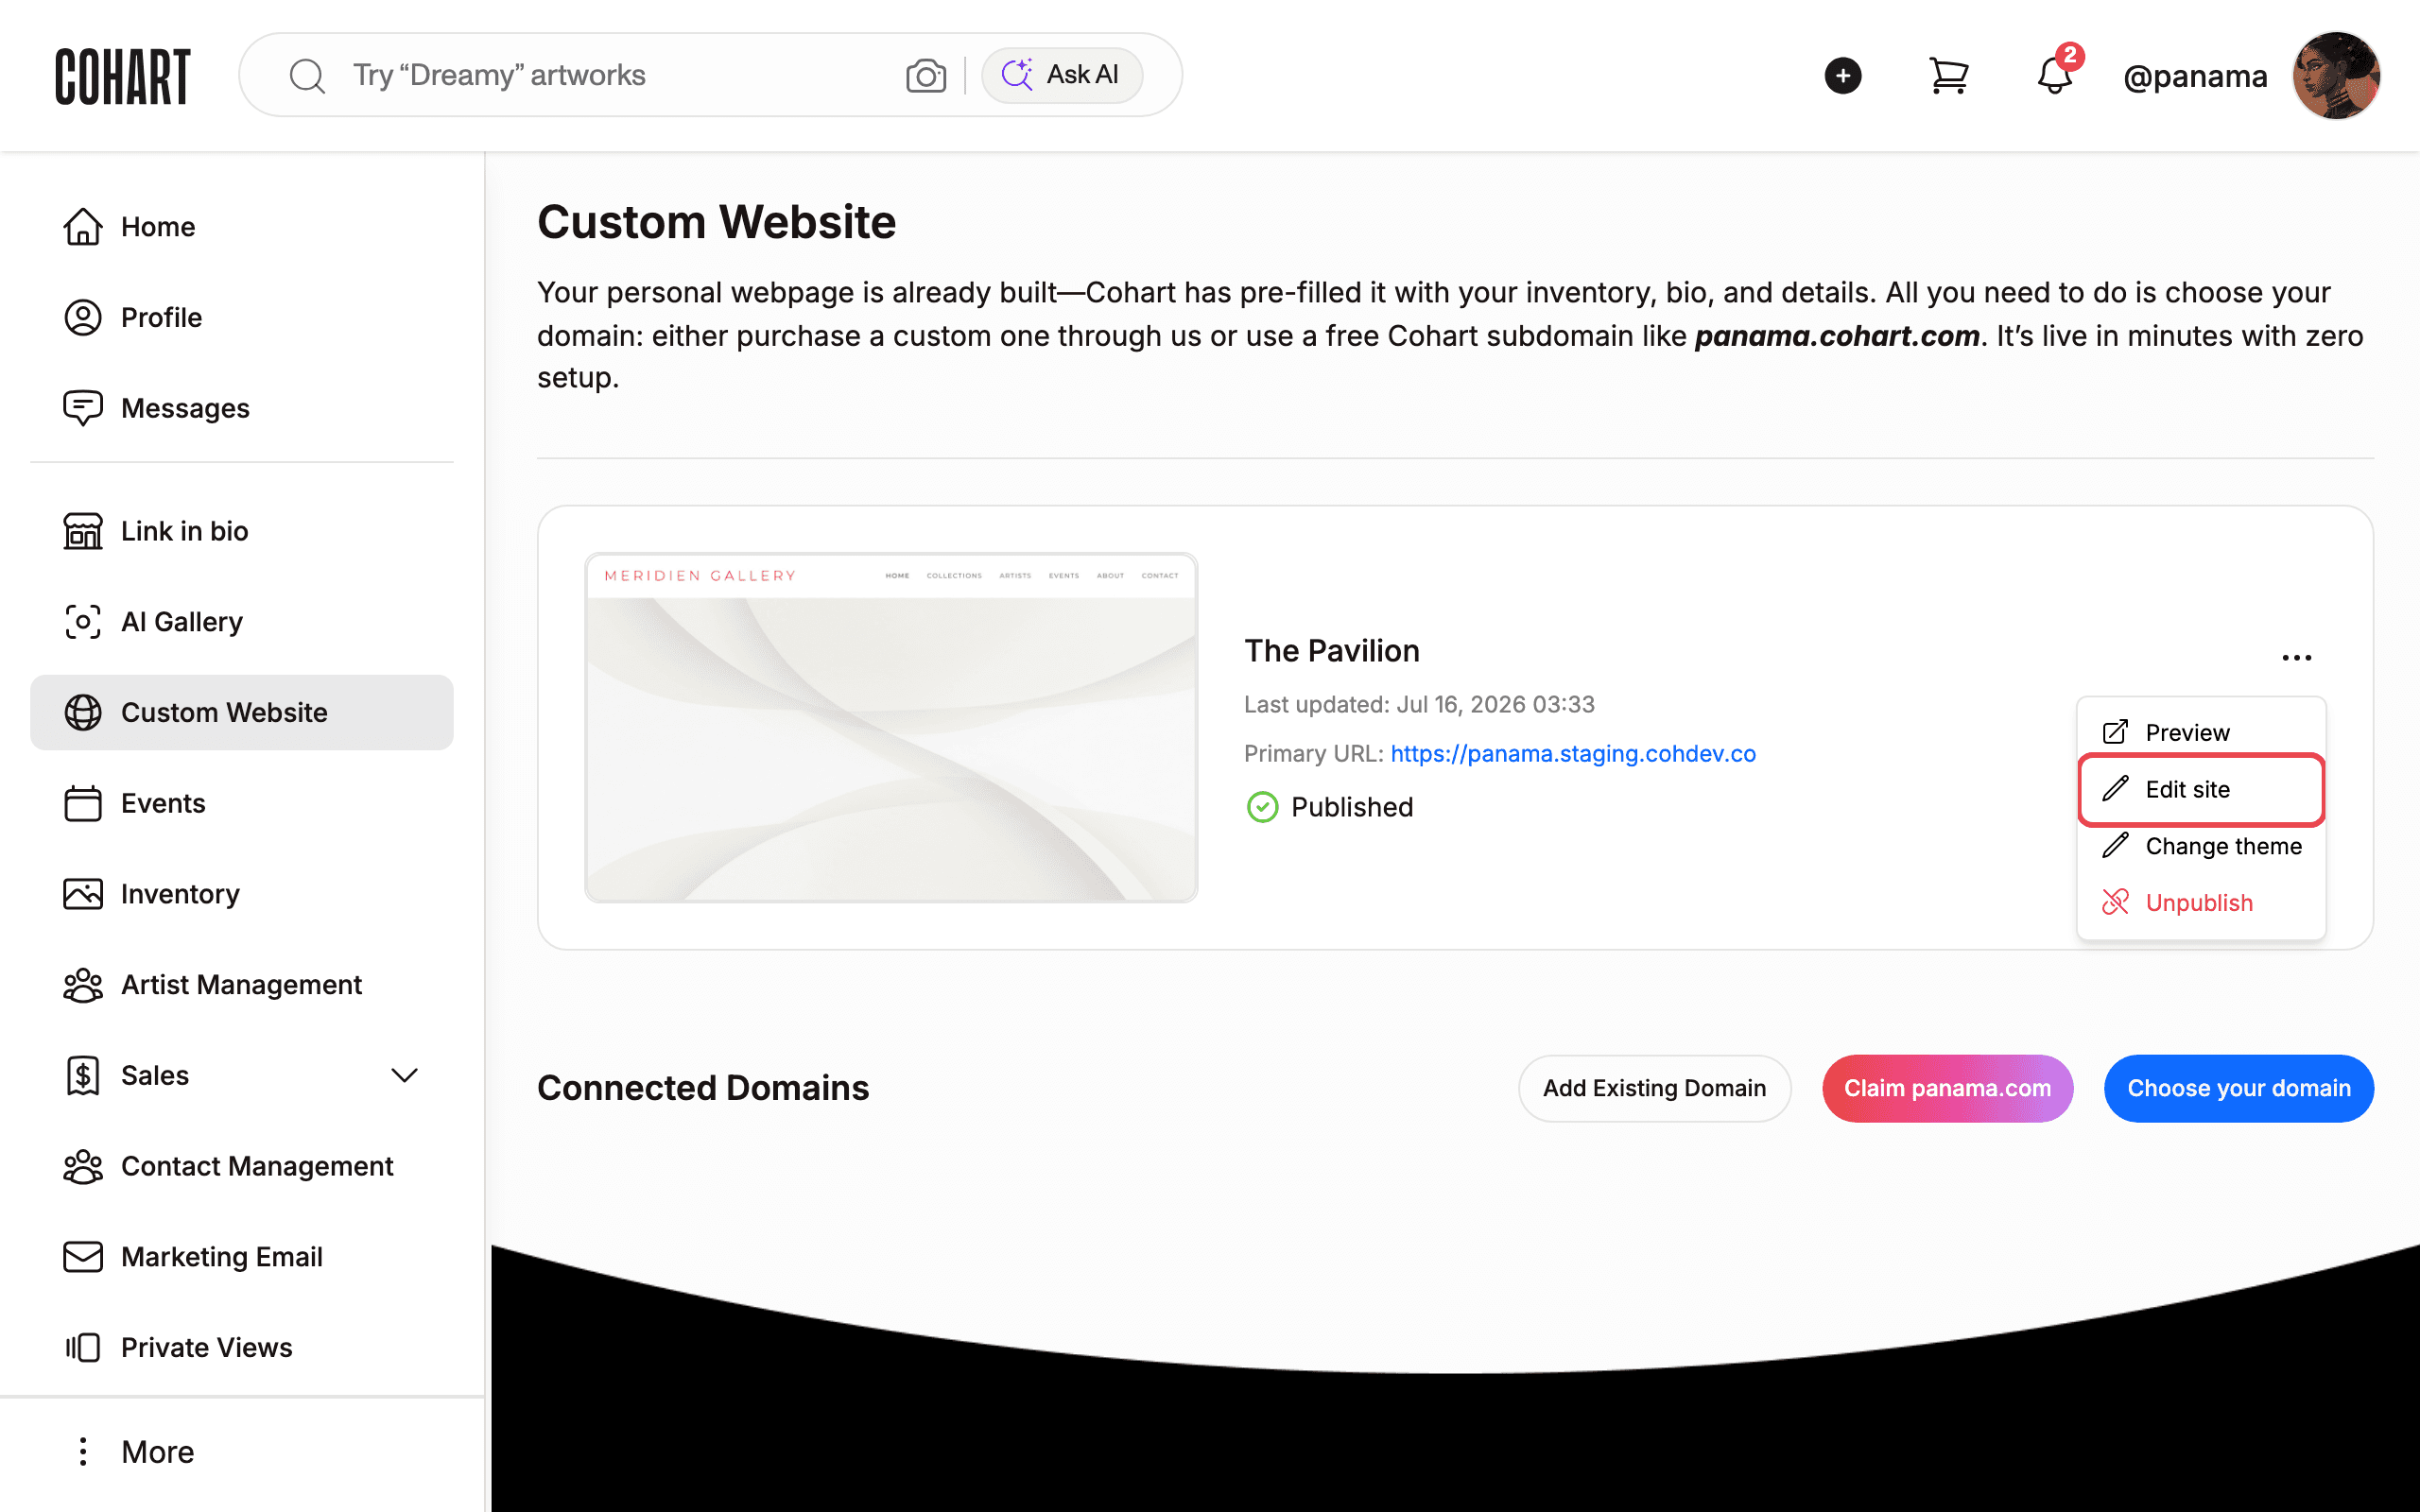
Click the three-dot menu on the right of your site card. Click Edit site to edit config, or Change theme to restyle.
The menu offers Preview, Edit site, Change theme, and Unpublish. Do not click Unpublish unless you want to take your site offline.
4. Edit your site config
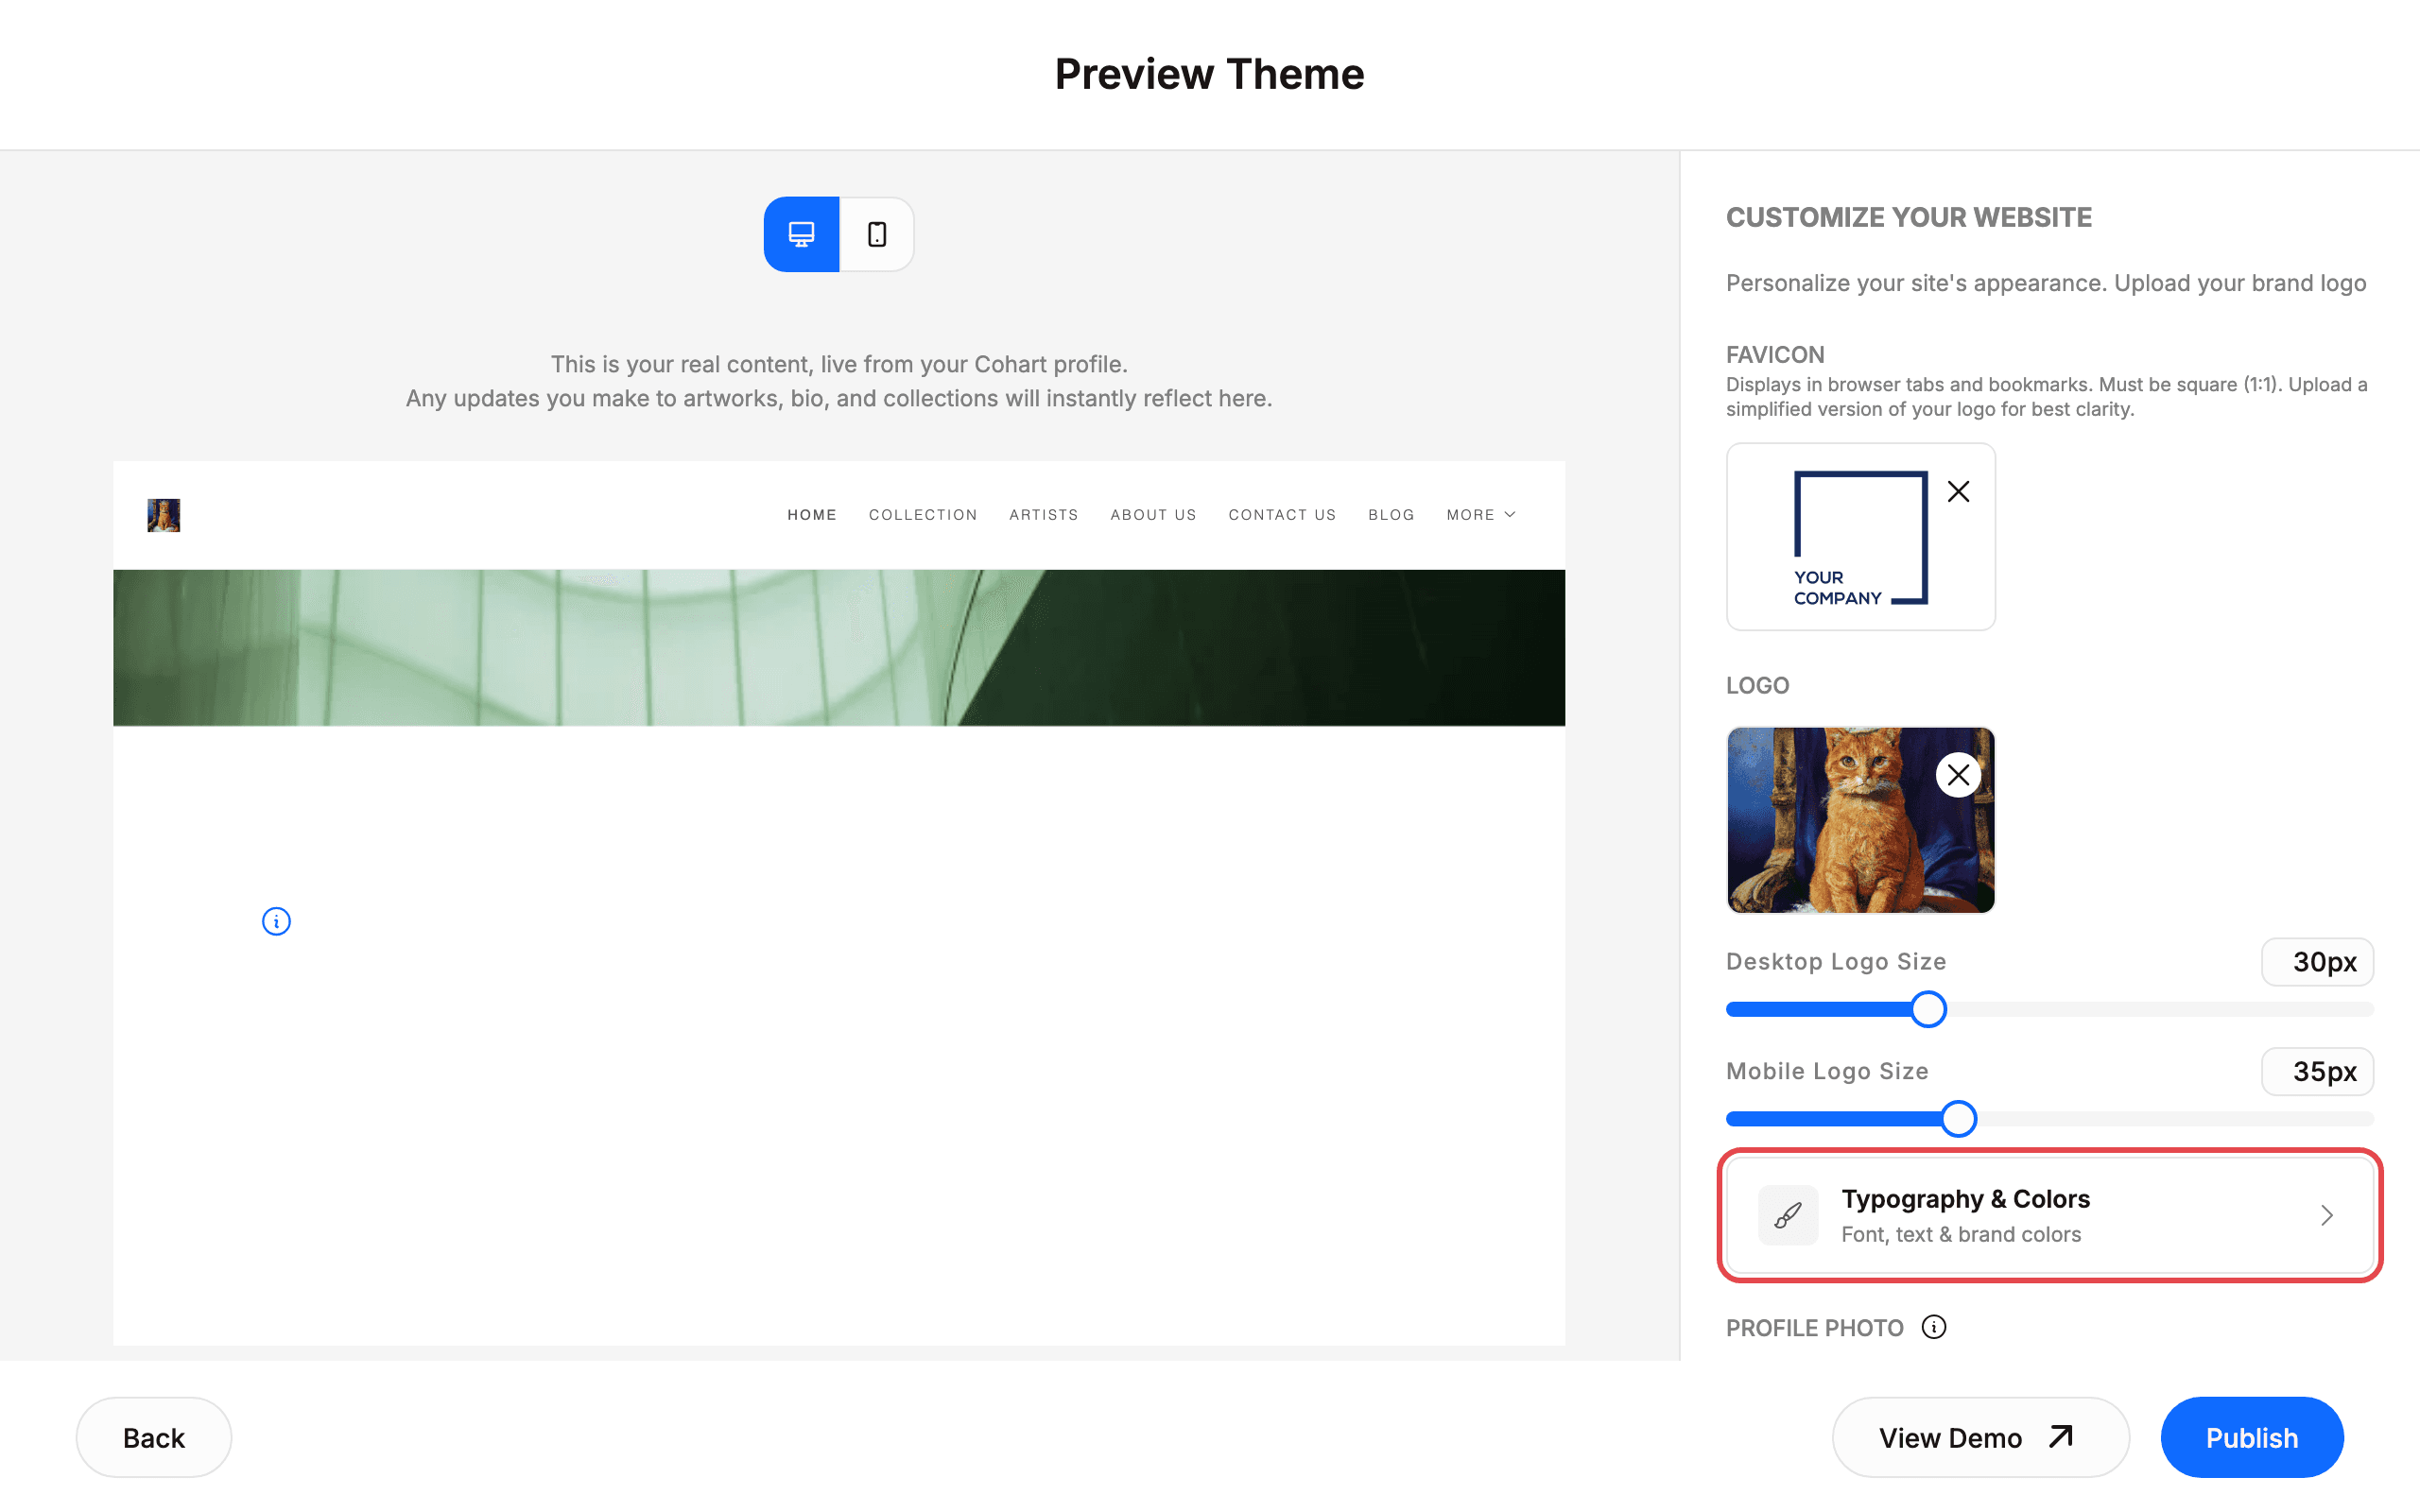
After you click Edit site, a new tab opens with header Preview Theme. On the right, find CUSTOMIZE YOUR WEBSITE. Update your branding here.
You can update FAVICON (must be square 1:1), LOGO with Desktop Logo Size (30px) and Mobile Logo Size (35px) sliders, Typography & Colors for Font, text & brand colors, PROFILE PHOTO via Upload file, and ADDRESS and ADDRESS 2. The left side shows This is your real content, live from your Cohart profile. Any updates you make to artworks, bio, and collections will instantly reflect here. Use the desktop/mobile toggle at the top to check both layouts. Use Back to return without publishing.
5. Manage pages and publish
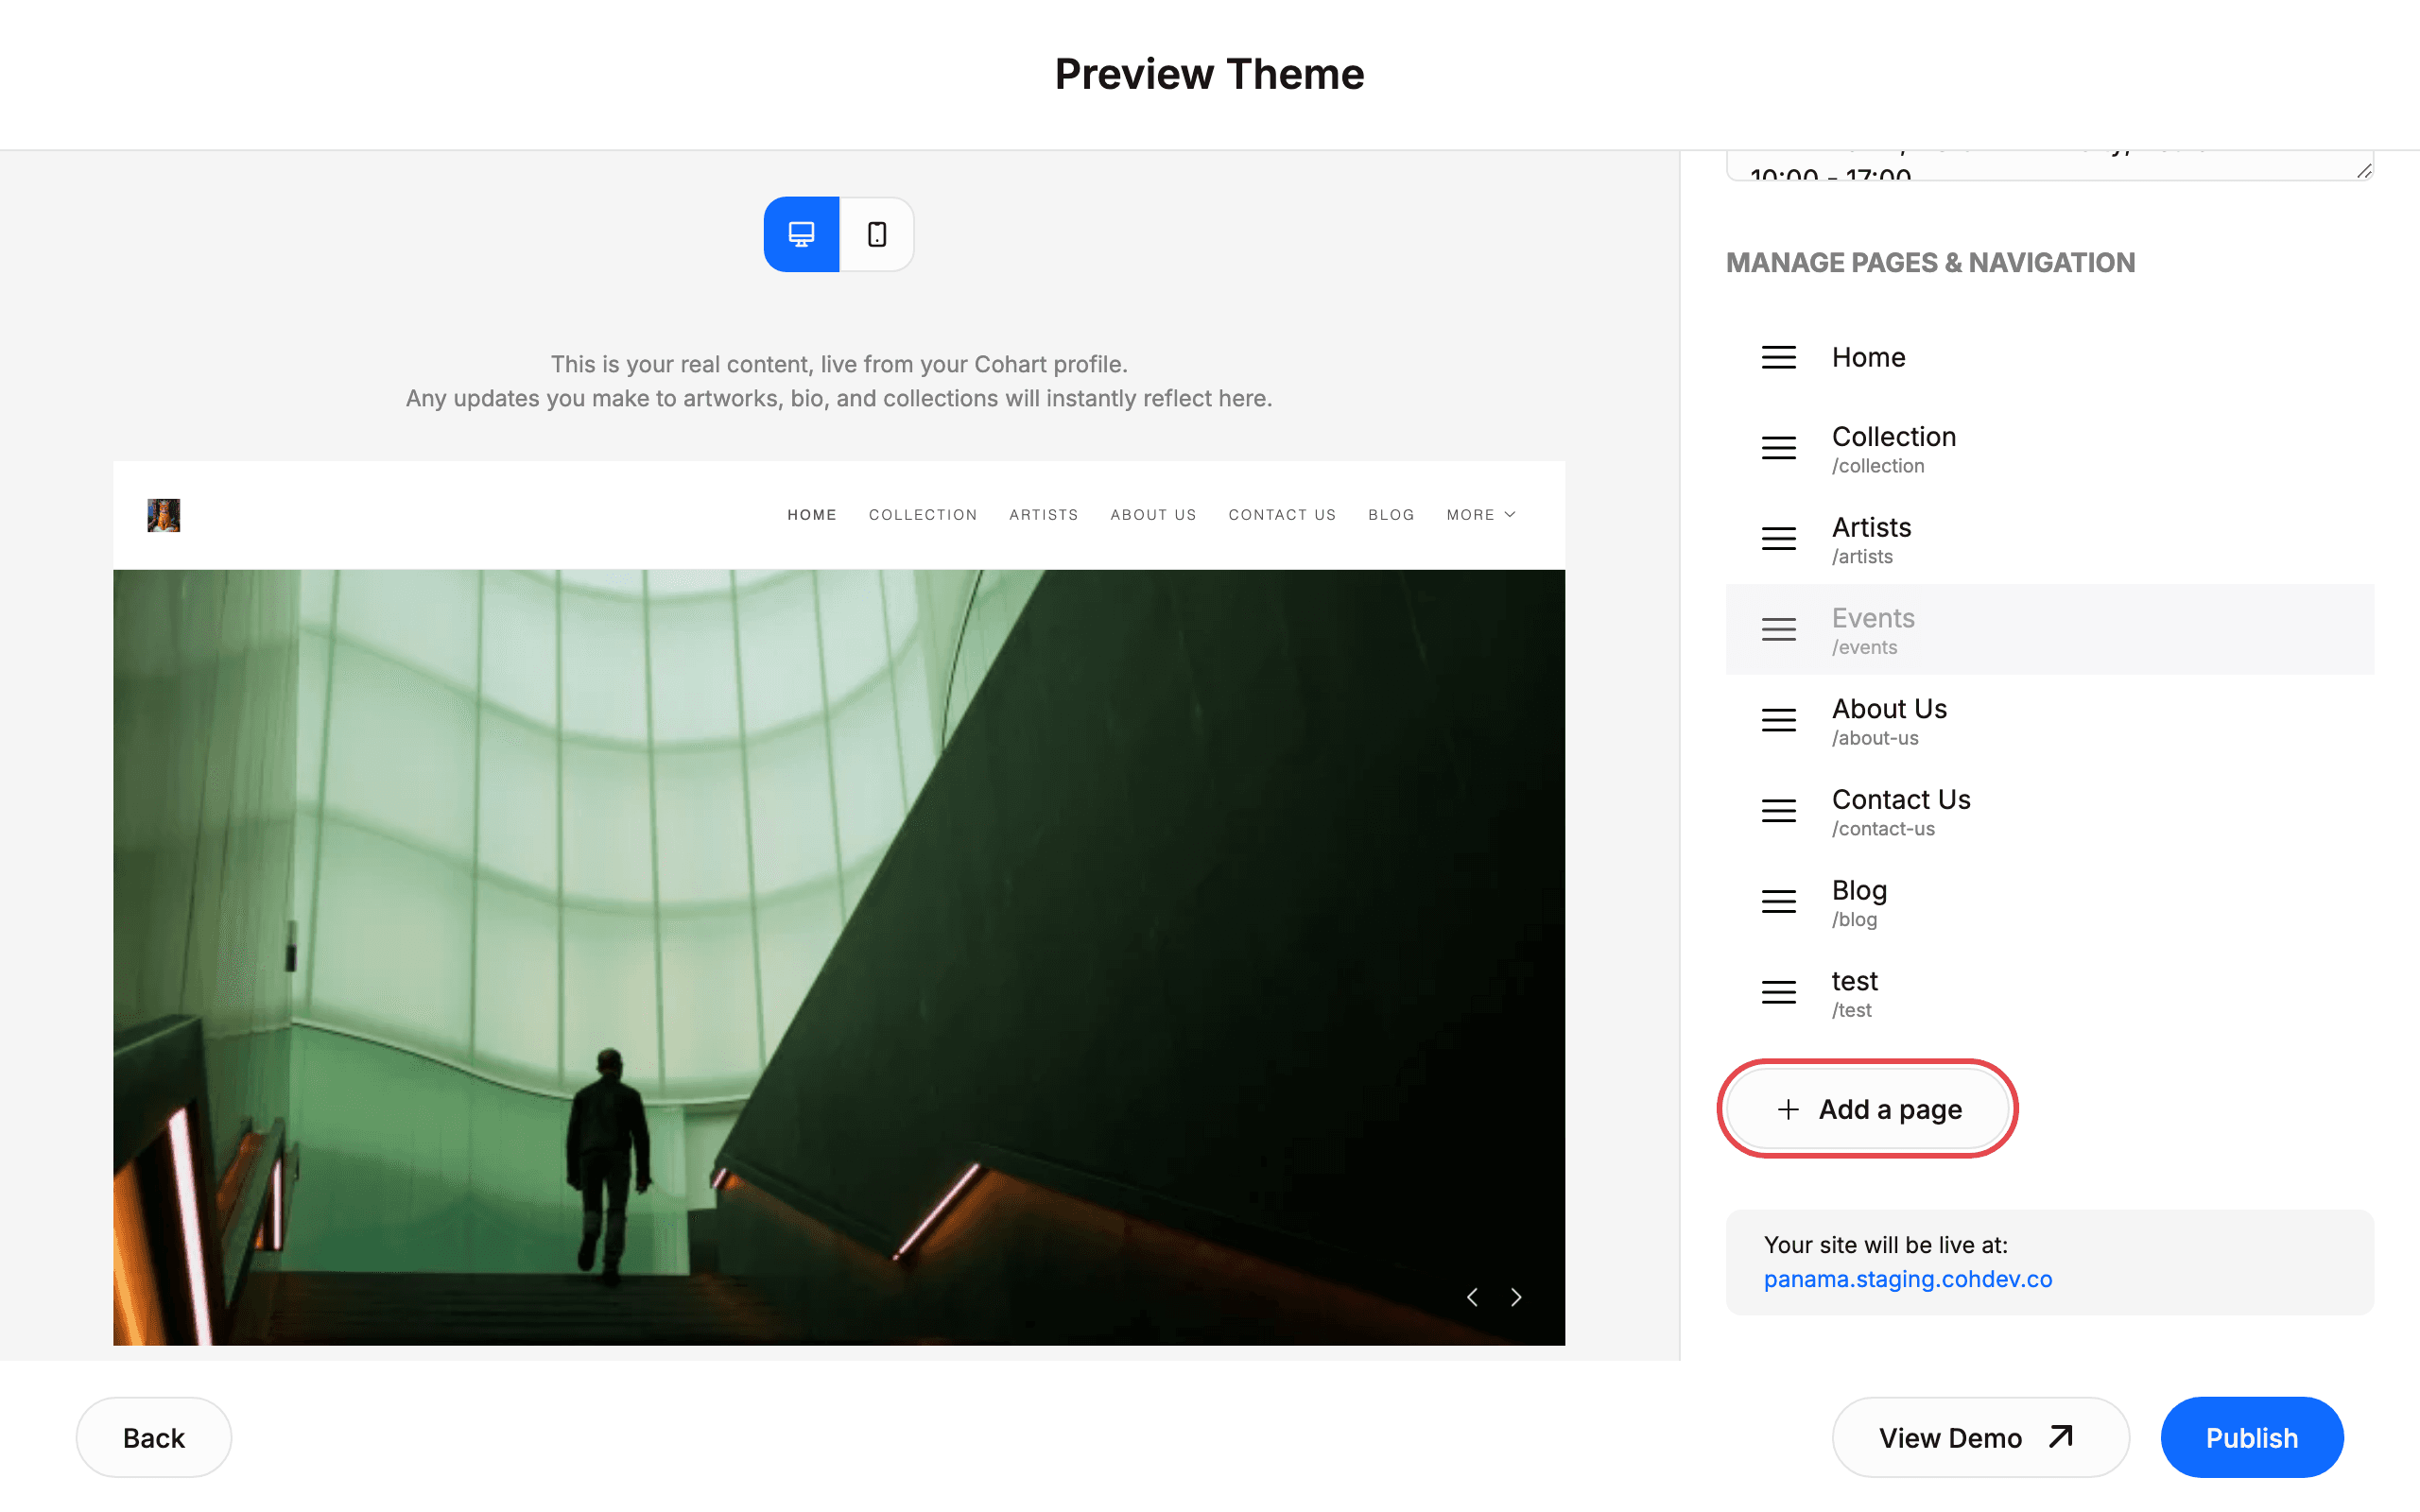
Scroll the right panel to MANAGE PAGES & NAVIGATION. Click Add a page to add a page. Check your pages list, then publish.
The list shows your pages (for example Home, Collection, Artists, Events, About Us, Contact Us, and Blog). Below, see Your site will be live at: followed by your site address. Click View Demo to preview, then click Publish to apply your changes. Click Back to return to Custom Website without publishing.
6. Change your theme
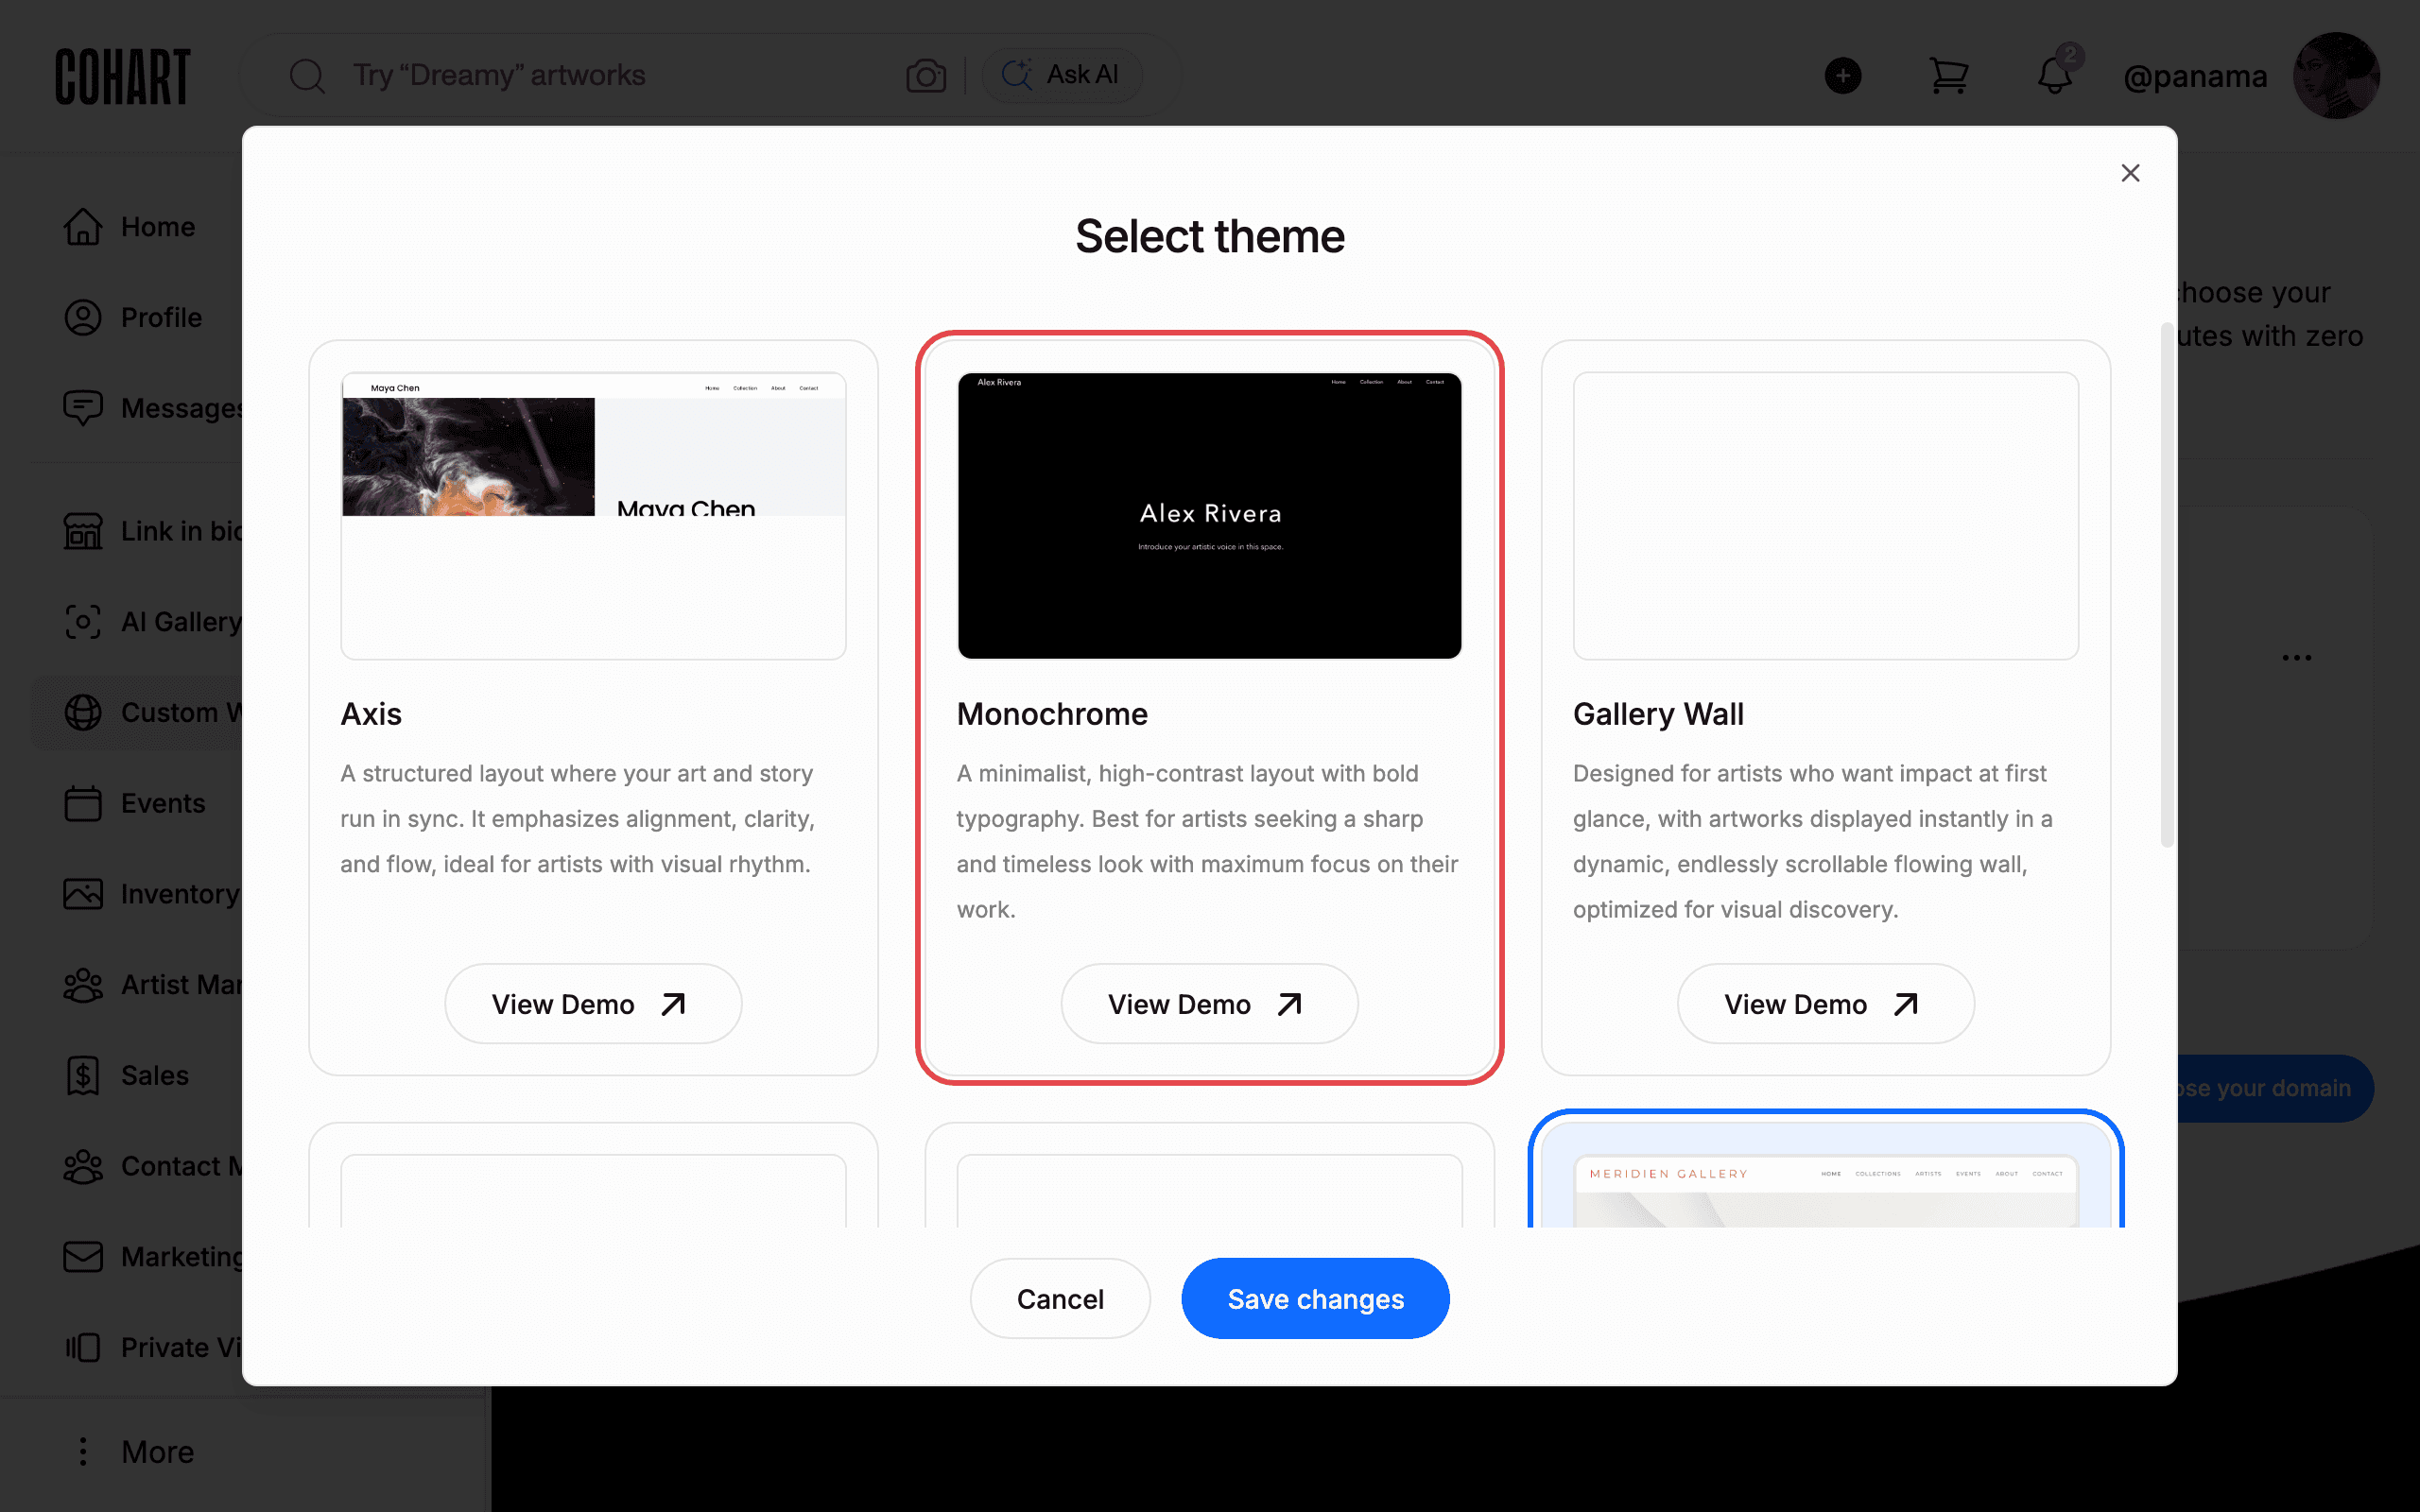
Back on Custom Website, open the three-dot menu again and click Change theme. In the Select theme dialog, click a theme card, then click Save changes.
Themes include Axis, Monochrome, Gallery Wall, The Minimalist, The Classic, and The Pavilion. Each card has a View Demo link. For example, Monochrome is described as a minimalist, high-contrast layout with bold typography. Click View Demo to open a demo in a new tab. Click Cancel to close without saving, or Save changes to apply. Use Close (X) to dismiss.
7. Visit your live site
Back on Custom Website, click your Primary URL: link to open your live site.
Confirm the card still shows Published. Use Add Existing Domain, the Claim … option labeled with your own domain, or Choose your domain under Connected Domains if you want a custom domain.
Tips
- Check Last updated and Published on your site card to confirm your last publish worked.
- Respect upload rules. FAVICON must be square (1:1). PROFILE PHOTO shows Supported formats: PNG, JPG. Max: 2MB.
- Click Cancel, Back, or Close if you only want to look. Never click Publish, Save changes, the Claim … option, or Unpublish unless you mean to change your live site.
- The edit page links to support for connecting a custom domain, and shows Connect your URL and Your site will be live at: with your site address.
Troubleshooting
- Preview Theme preview or Select theme cards show blank white → previews take several seconds to load → wait for navigation labels like HOME, COLLECTION, ARTISTS to appear.
- A Custom Website click misses → a hidden mobile menu and the desktop sidebar can overlap → click the sidebar entry again.