How to Manage Platform Email Campaigns
Overview
Platform Email Campaigns are the enrollment-based drip emails Cohart itself sends to buyers and sellers — reminders and follow-ups triggered by behavior, not by a contact list. They exist so each user receives the right follow-up at the right time automatically, instead of one-off blasts to everyone. This area is for platform operators with the Master role, not for sellers; sellers run their own sends from Marketing Email instead. Each campaign enrolls users when something happens, such as artwork saved to a moodboard or followed artists posting new work, then sends a timed sequence with cooldowns and stop conditions such as a purchase or inquiry. Your work here affects every enrolled user across the platform: editing content, triggers, cooldowns, or activation changes who gets emailed and when, and the unsubscribes report tracks platform-wide opt-outs separately from seller lists. By the end, you will be able to review any campaign’s details, enrollments, and reports, read the platform unsubscribes, and build a new drip email step by step.
Before you start
- A Cohart account with the Master (platform-operator) role — the Master section of the sidebar is only visible to platform operators.
- A chosen enrollment trigger and the email content ready: subject (EMAIL SUBJECT is required), preview text, and any artwork or layout blocks. Decide the drip timing, cooldowns, and stop conditions before activating.
- Clicking Create new campaign immediately creates an empty Inactive draft, and each click creates another one — give it a CAMPAIGN NAME before leaving. Activating a campaign starts emailing enrolled users platform-wide, so use Send test email and Save while experimenting.
- Effects to know: an activated campaign sends to every user who matches its trigger until it is stopped or paused; reports and enrollment tables are read-only, so reviewing them changes nothing.
Steps
1. Sign in
Sign in with your operator account.
2. Open Platform Email Campaigns
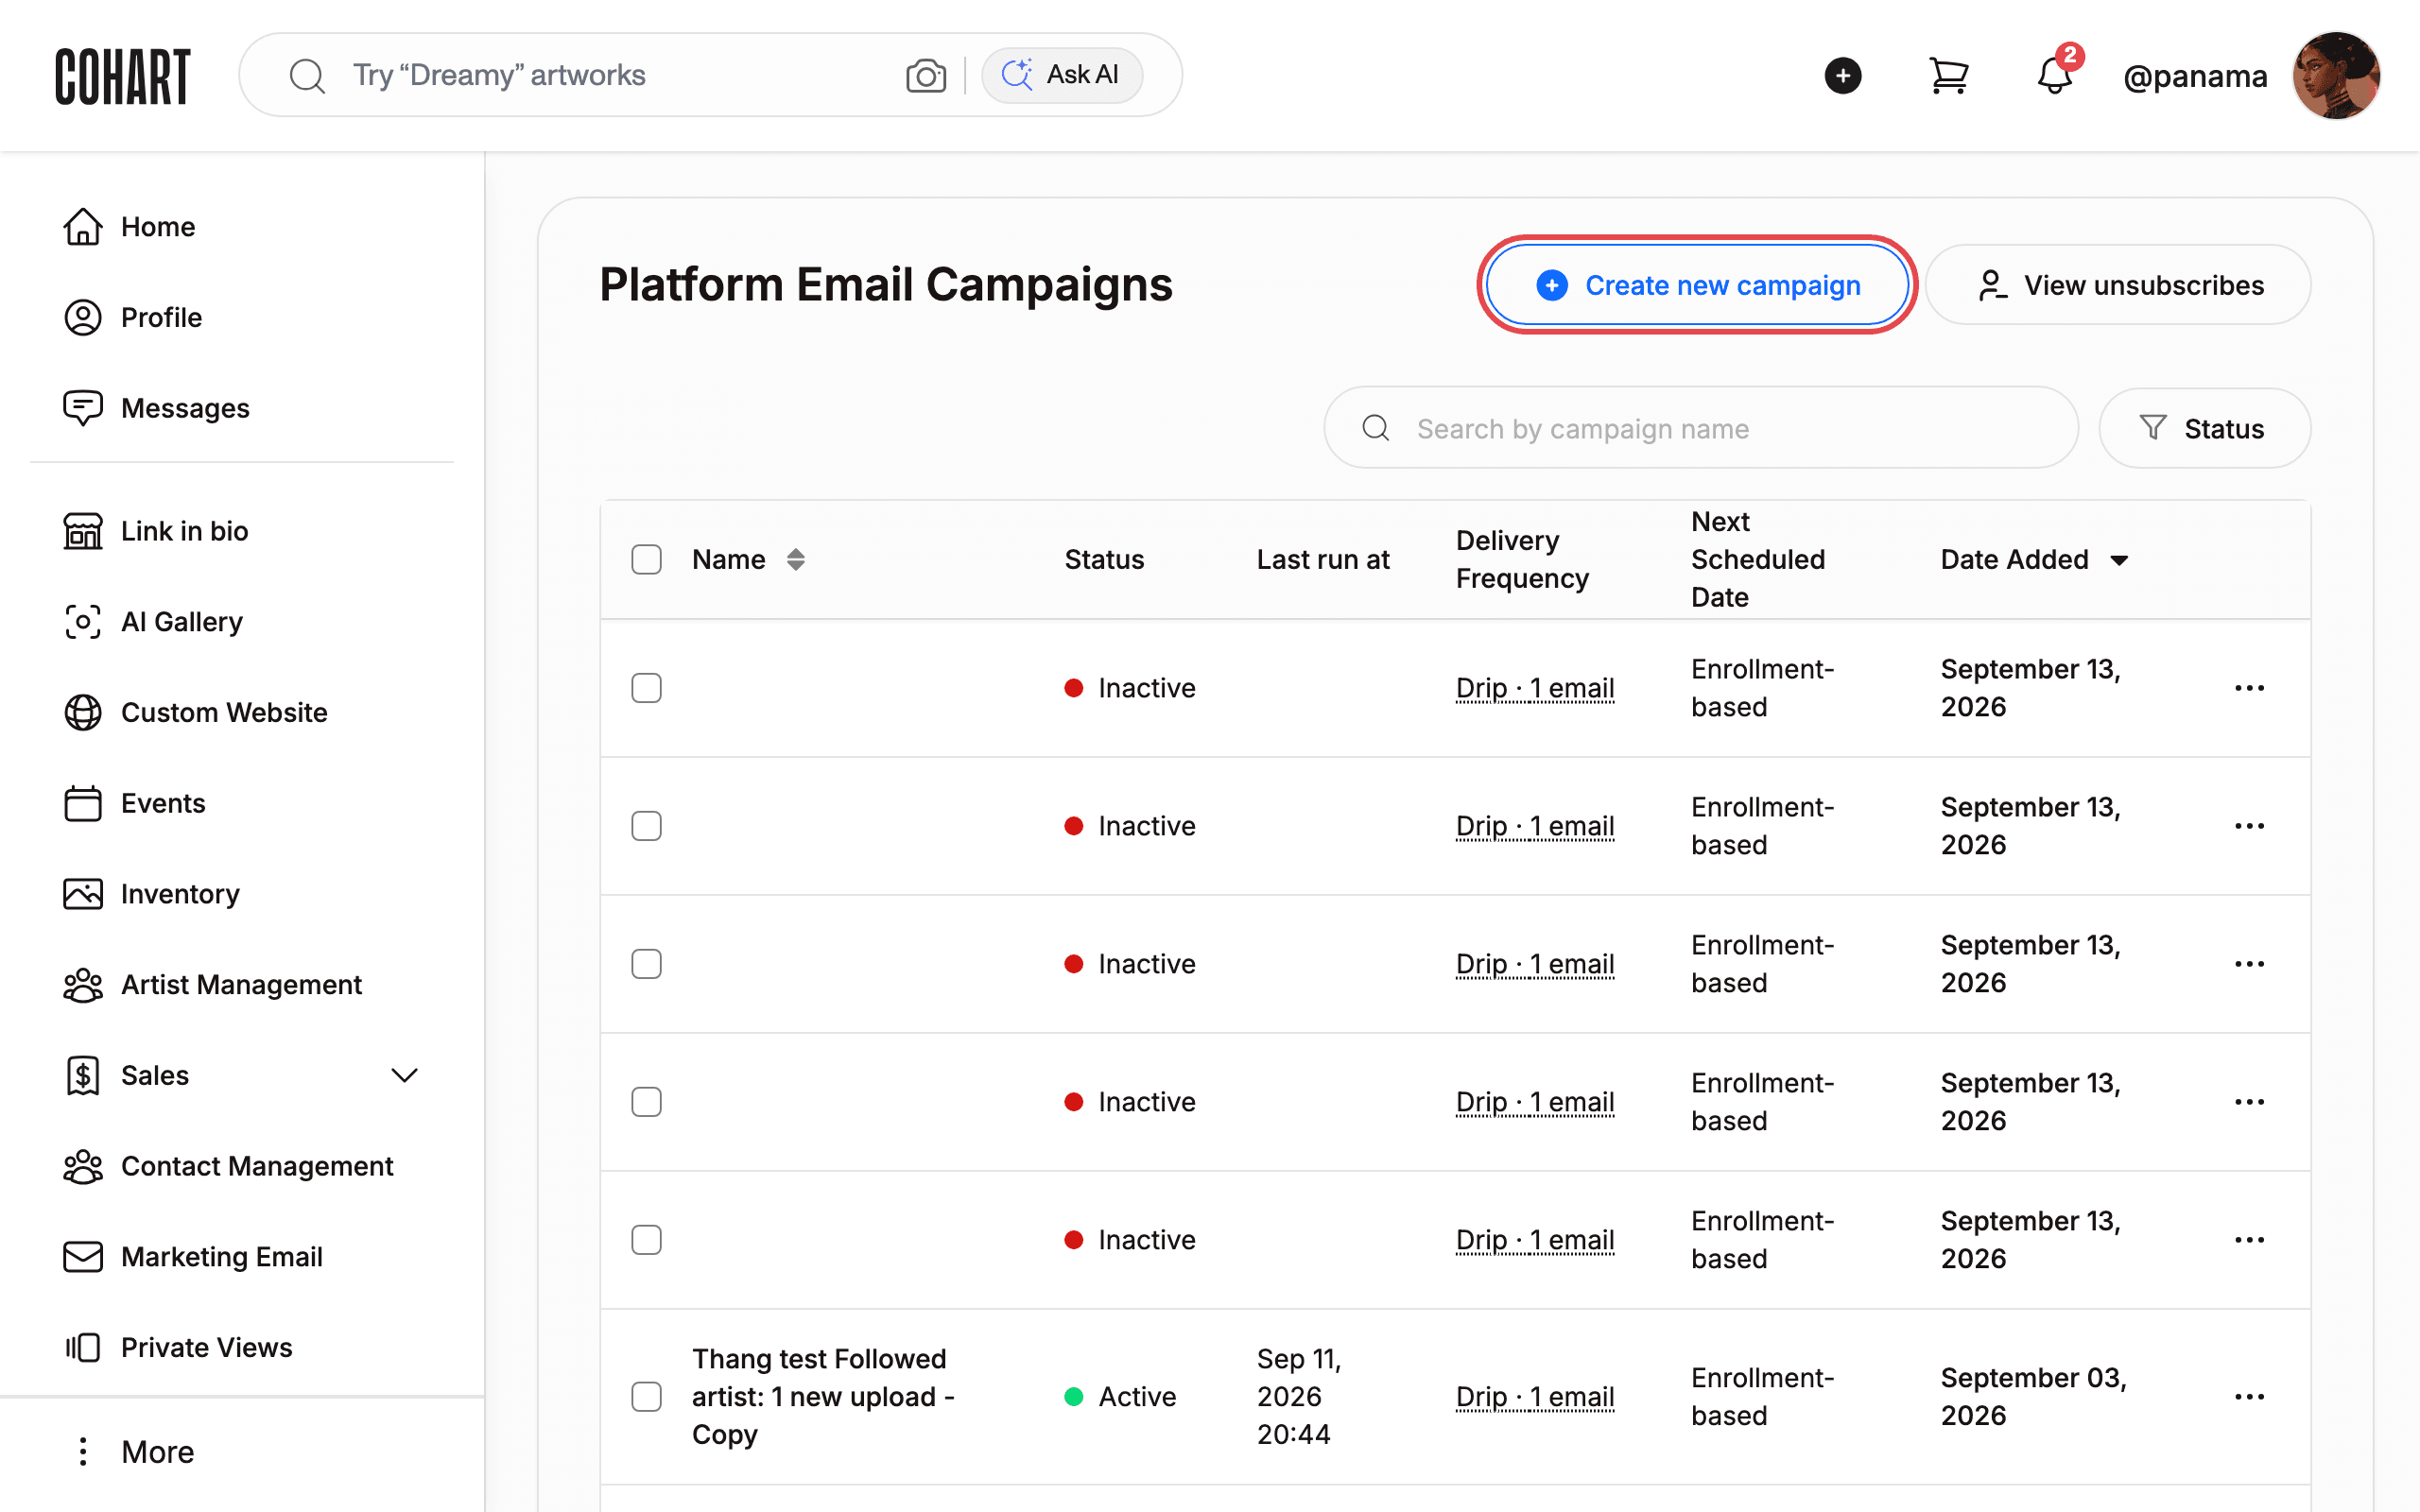
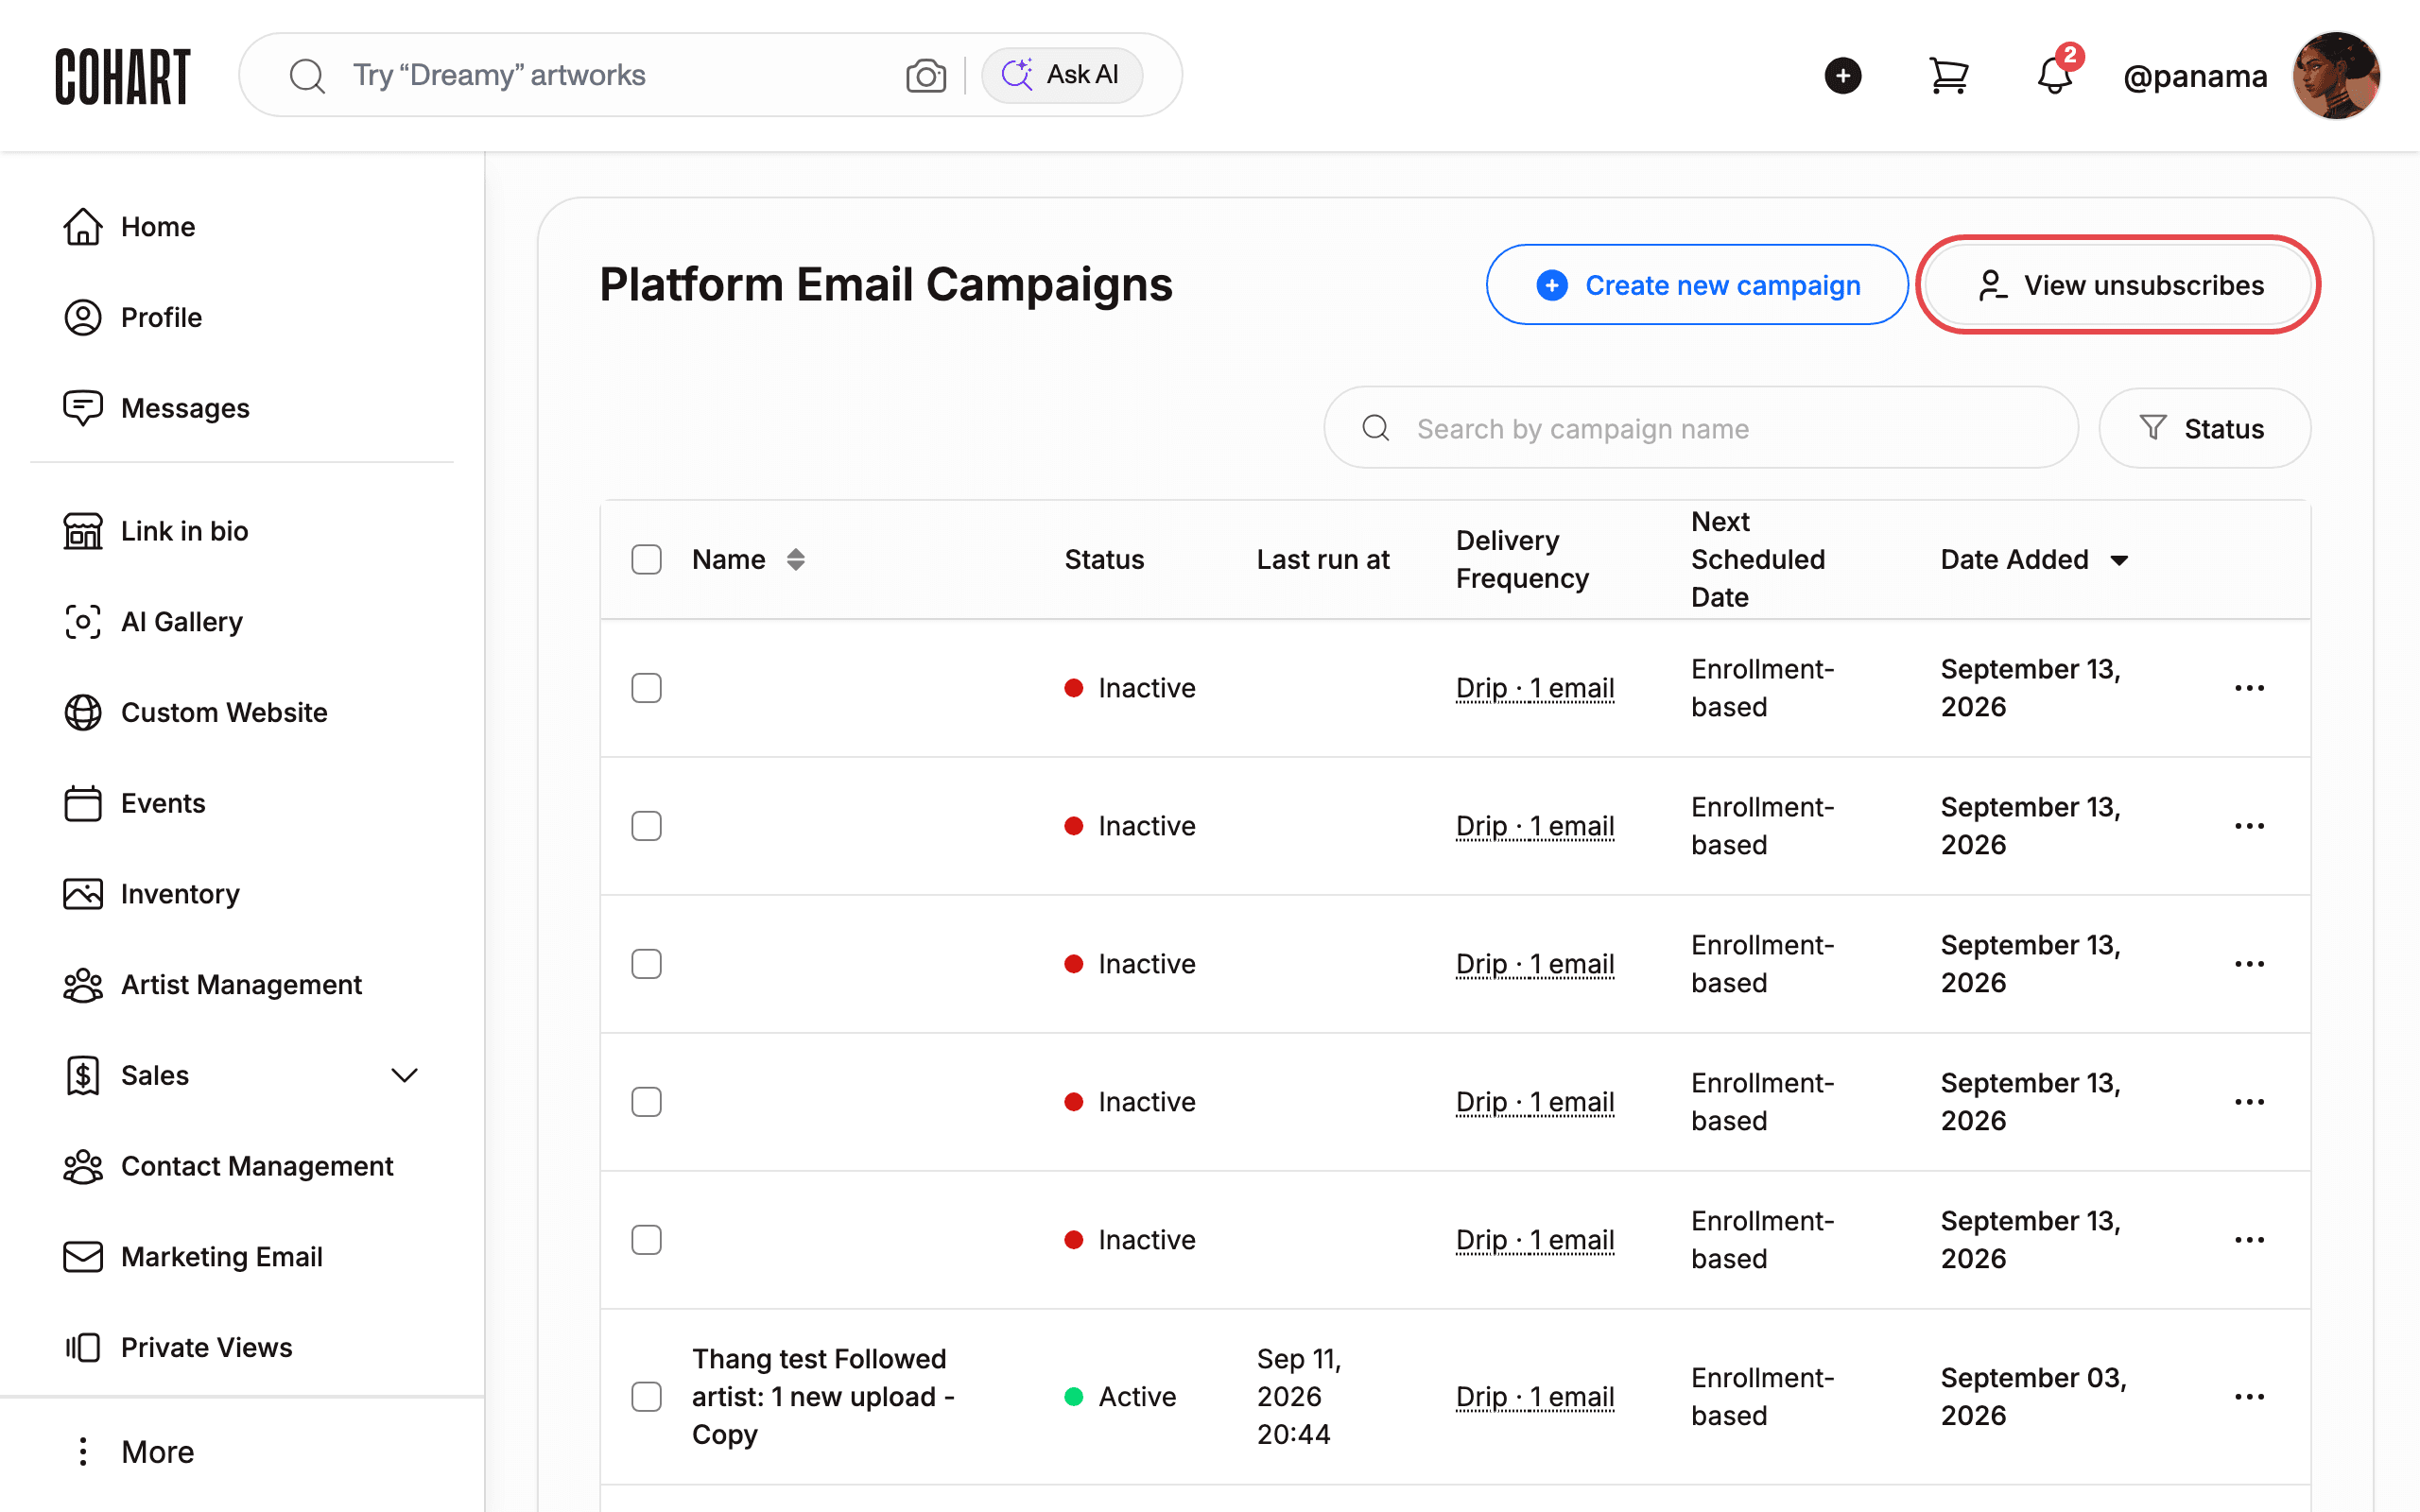
In the left sidebar, open the Master section. Click Marketing Email. Verify the heading reads Platform Email Campaigns. The page header offers Create new campaign and View unsubscribes. The table columns are Name, Status, Last run at, Delivery Frequency, Next Scheduled Date, and Date Added.
3. Search the campaign table
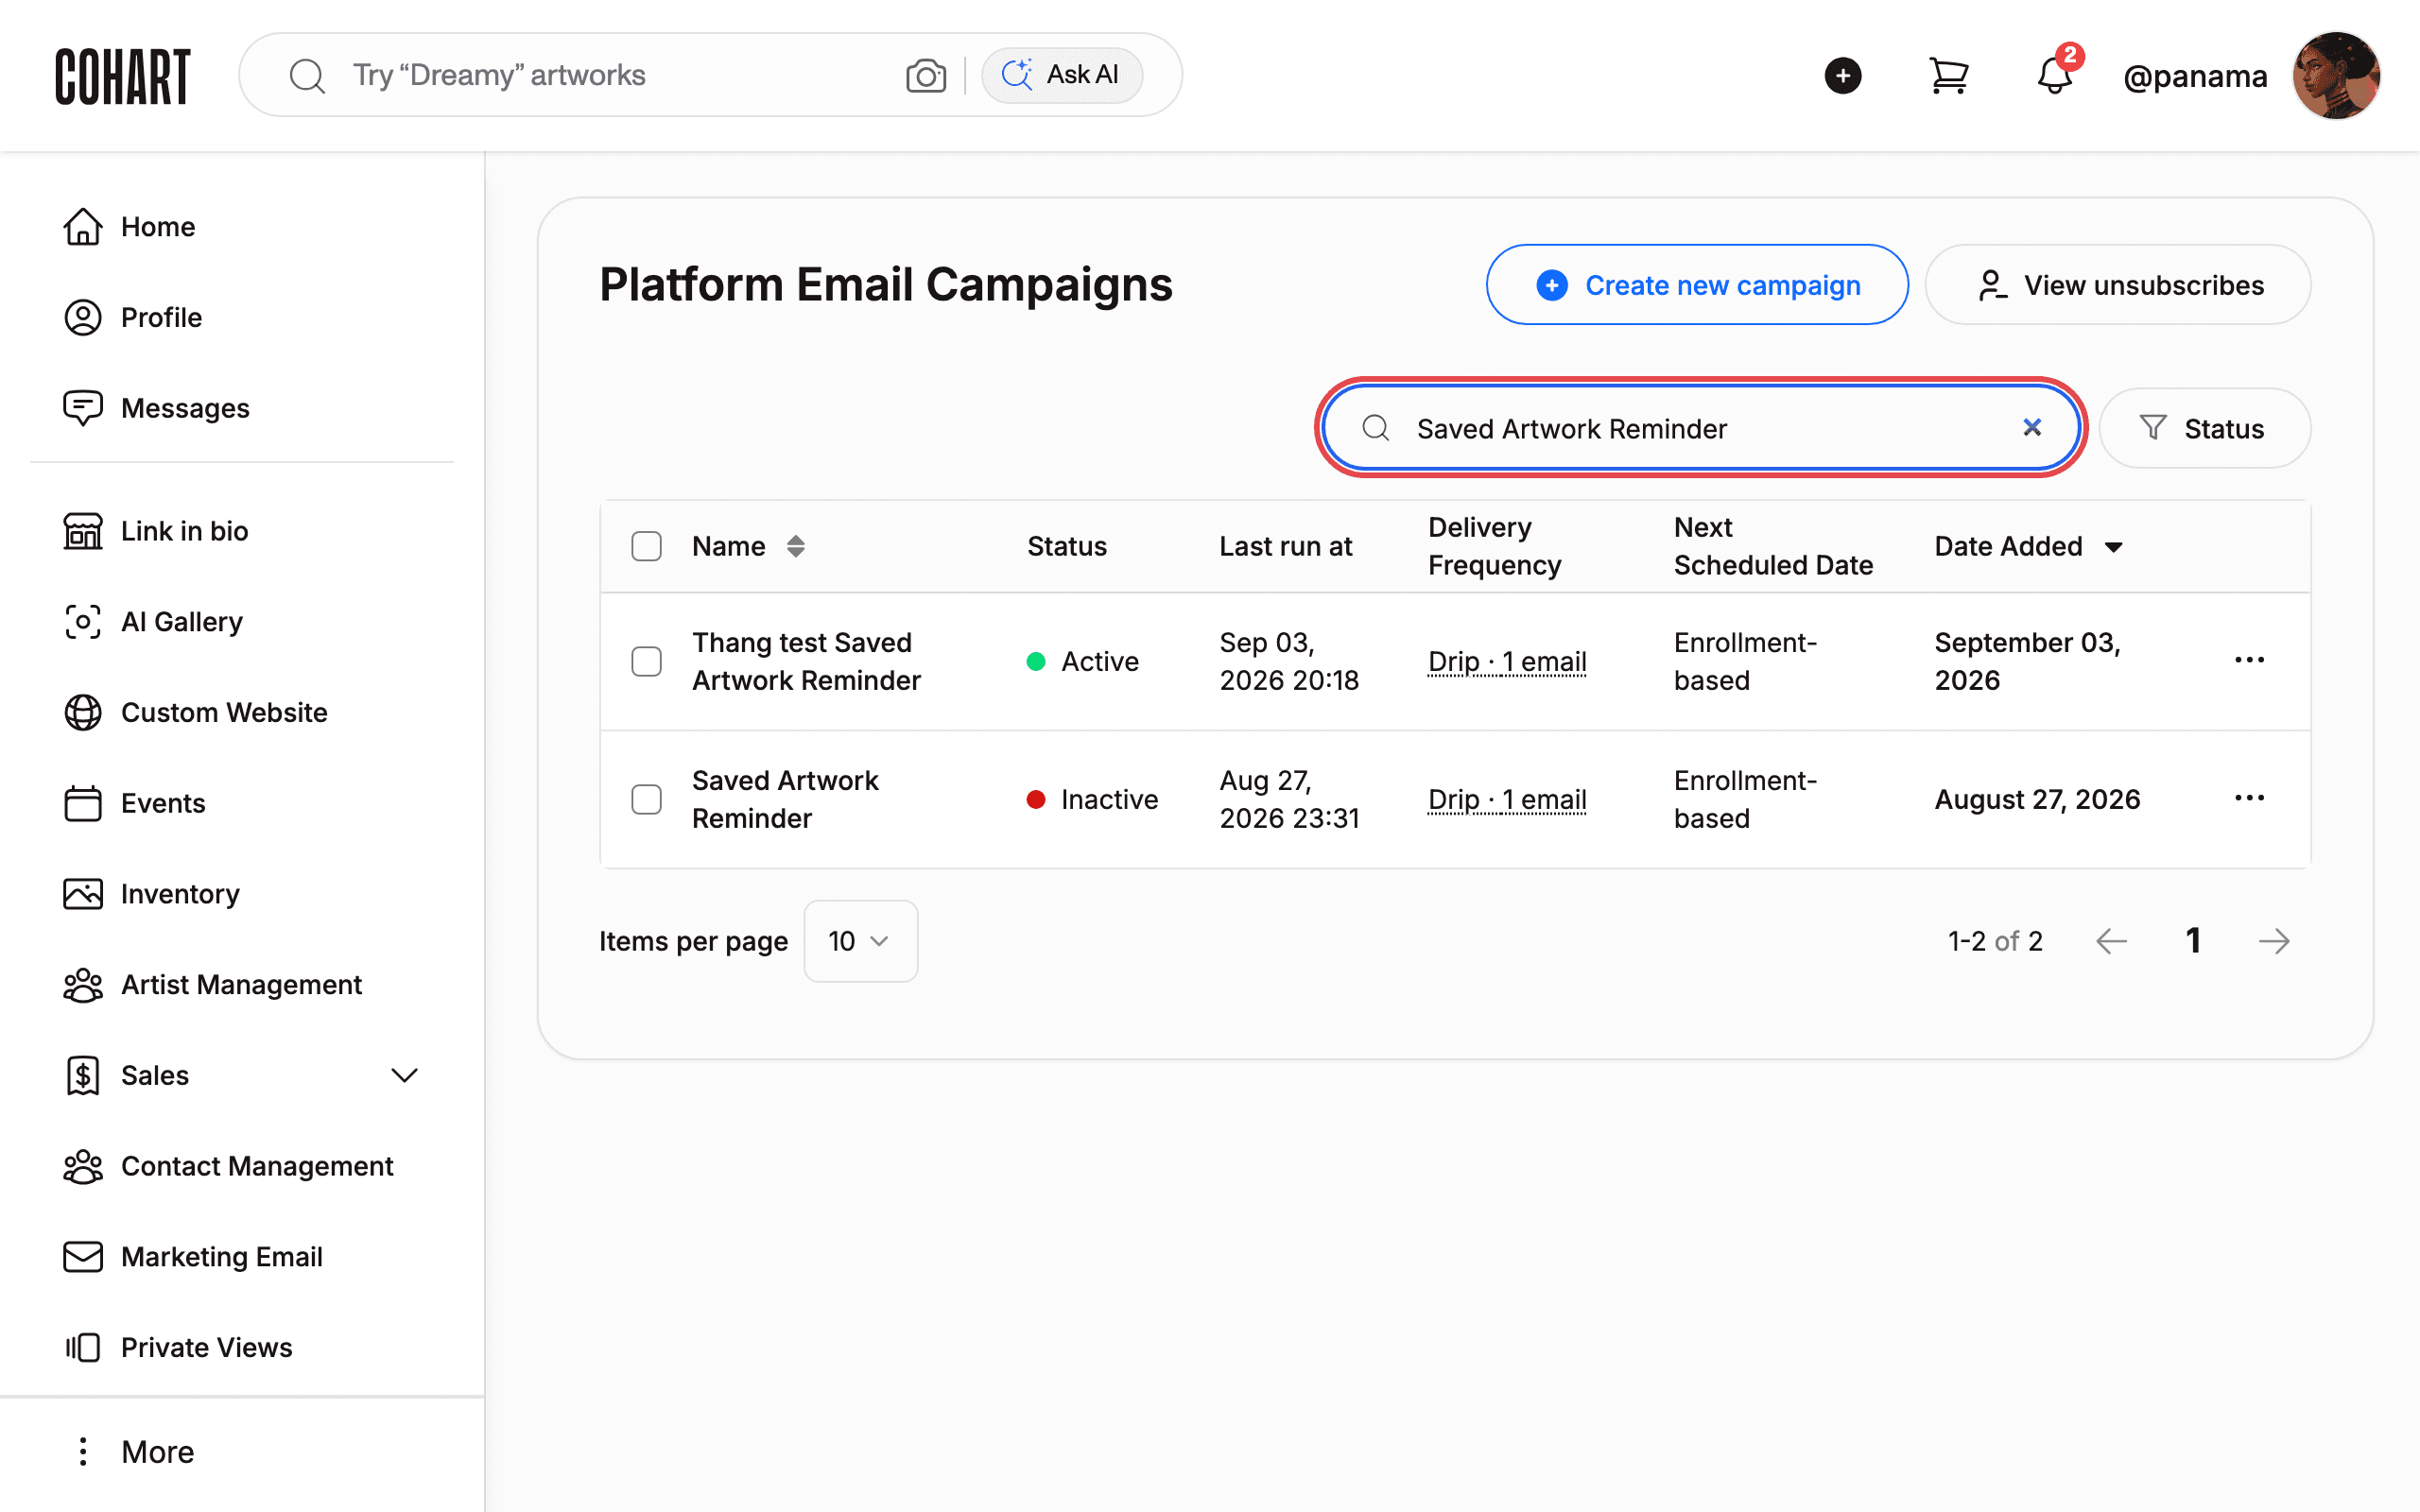
Click the Search by campaign name field. Type a campaign name, for example Saved Artwork Reminder. Use the Status button to filter by status. Use the Name and Date Added column headers to sort. Change Items per page (for example 10) and use the page numbers at the bottom.
4. Open a campaign to review its details
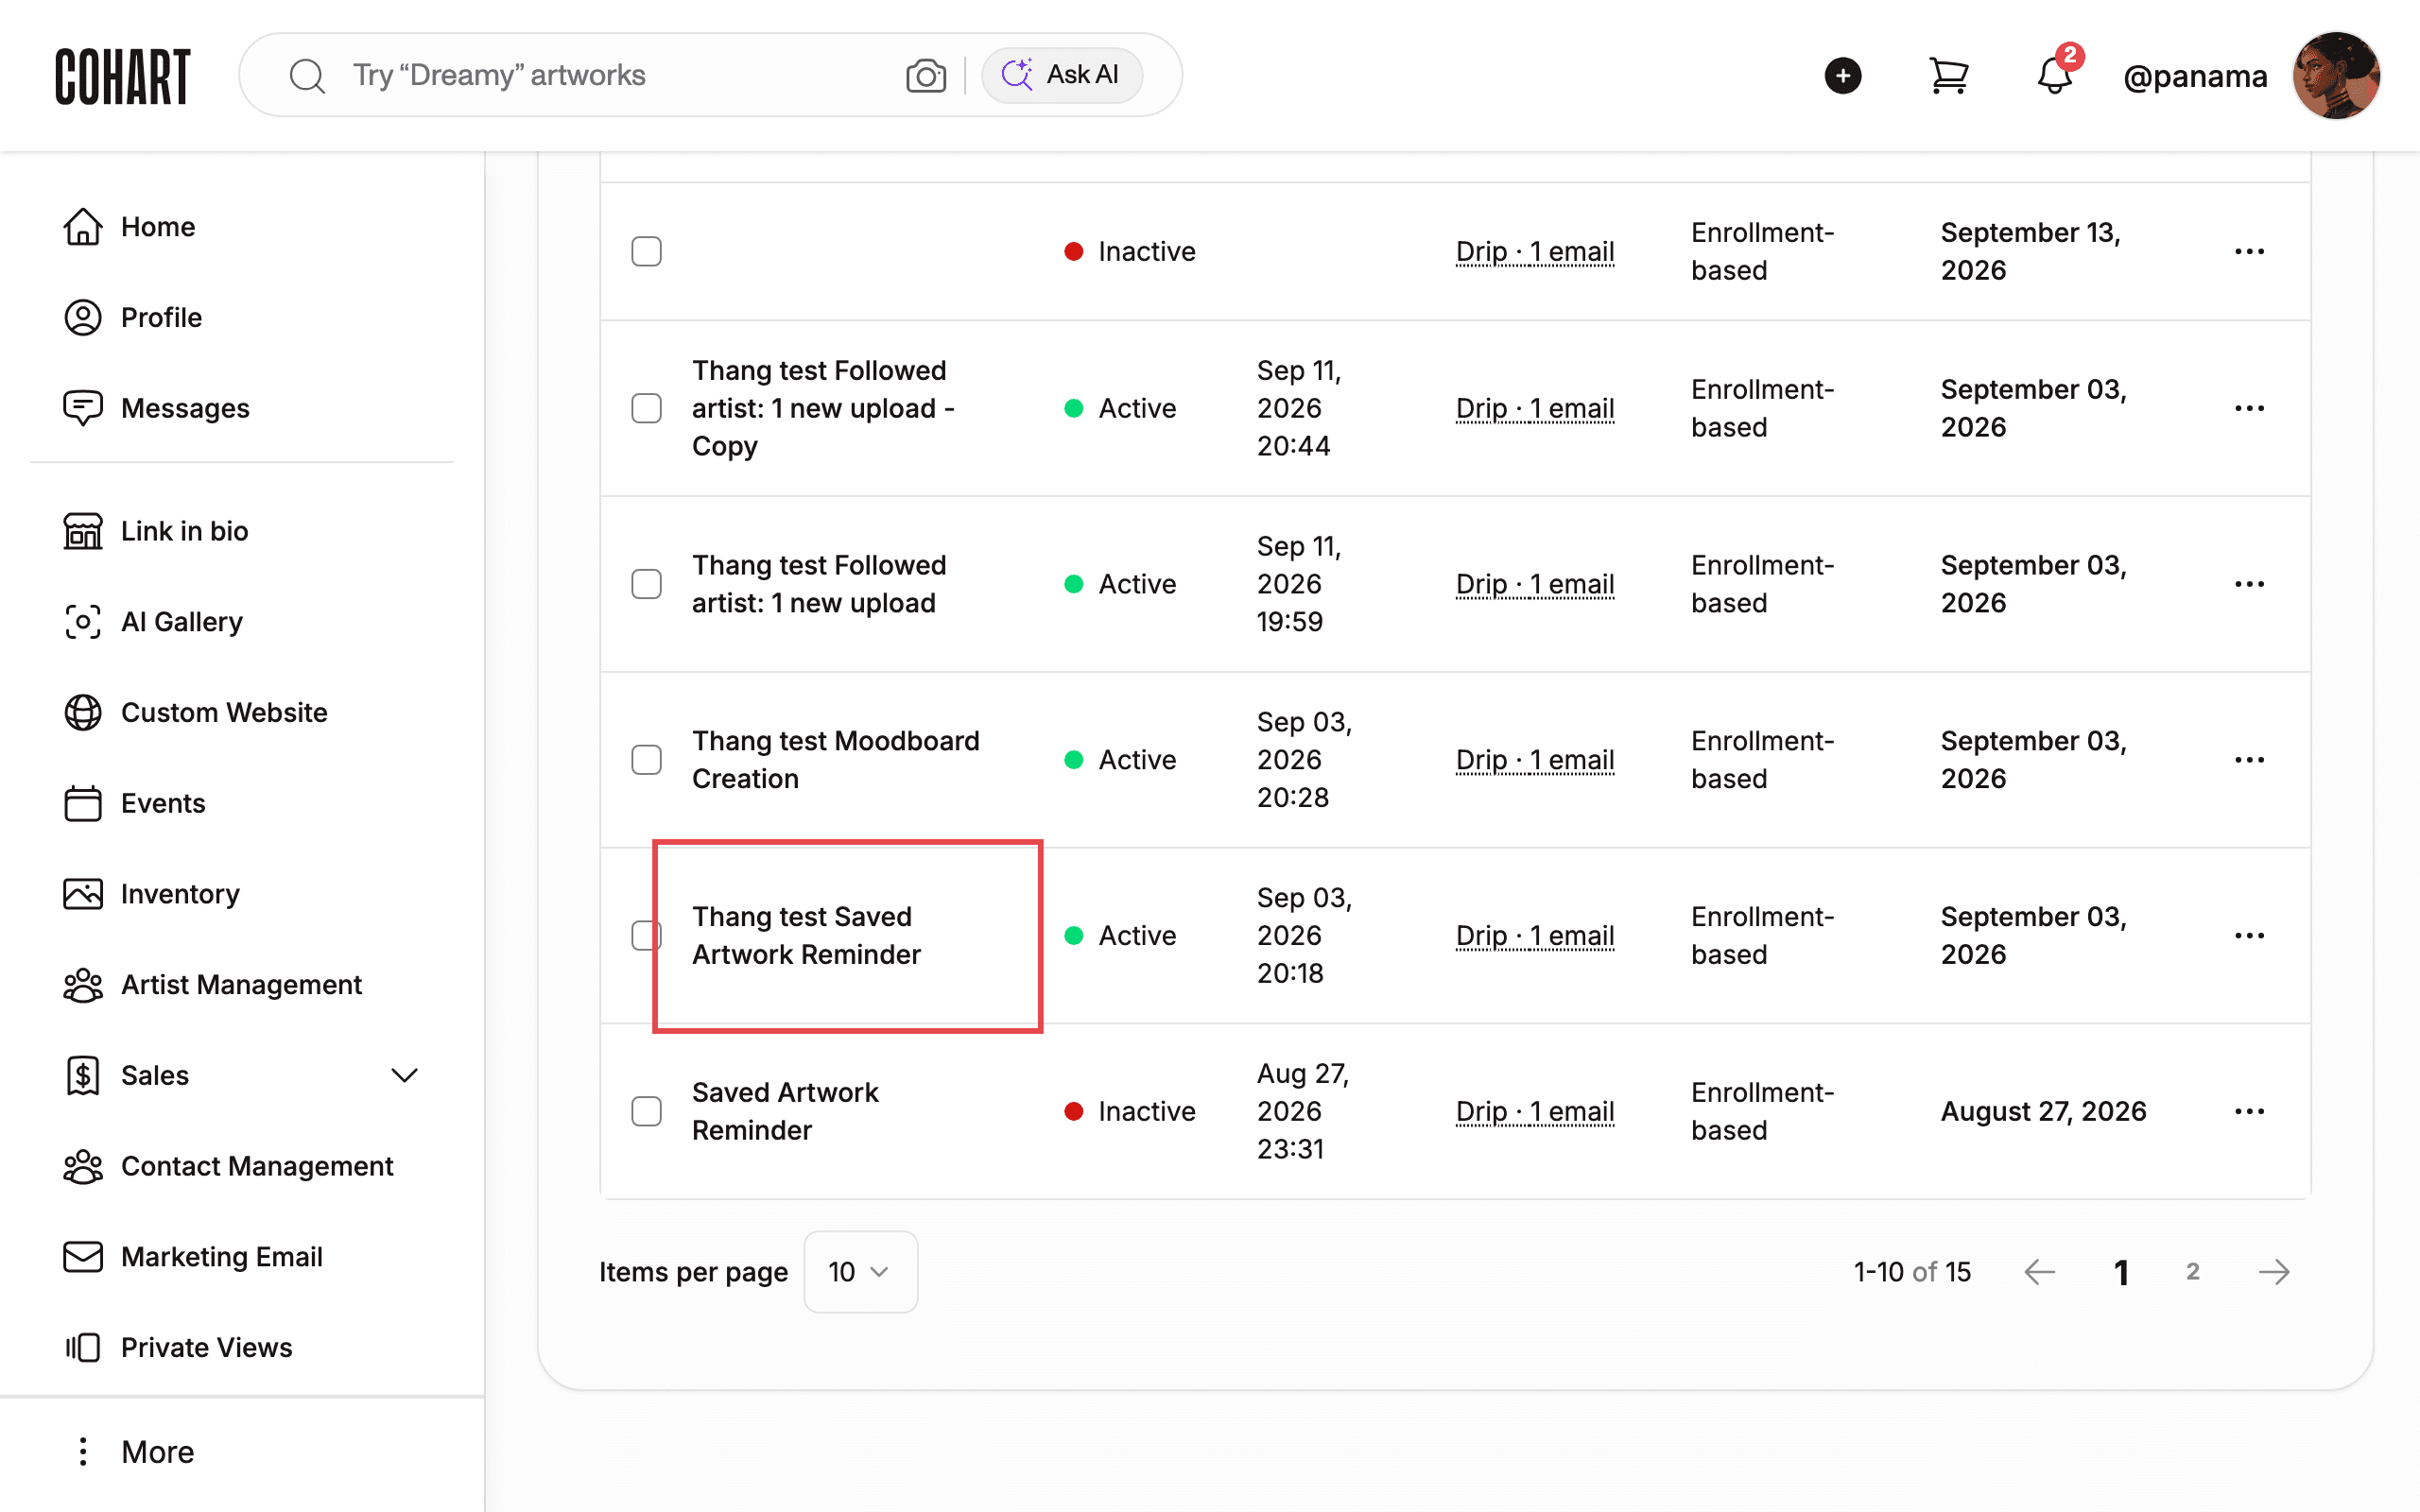
Click a campaign name in the Name column, for example Saved Artwork Reminder. Each row also shows Status (Active with a green dot or Inactive with a red dot), Last run at, Delivery Frequency (for example Drip · 1 email), and Enrollment-based scheduling. Use the three-dot menu at the end of a row for row actions.
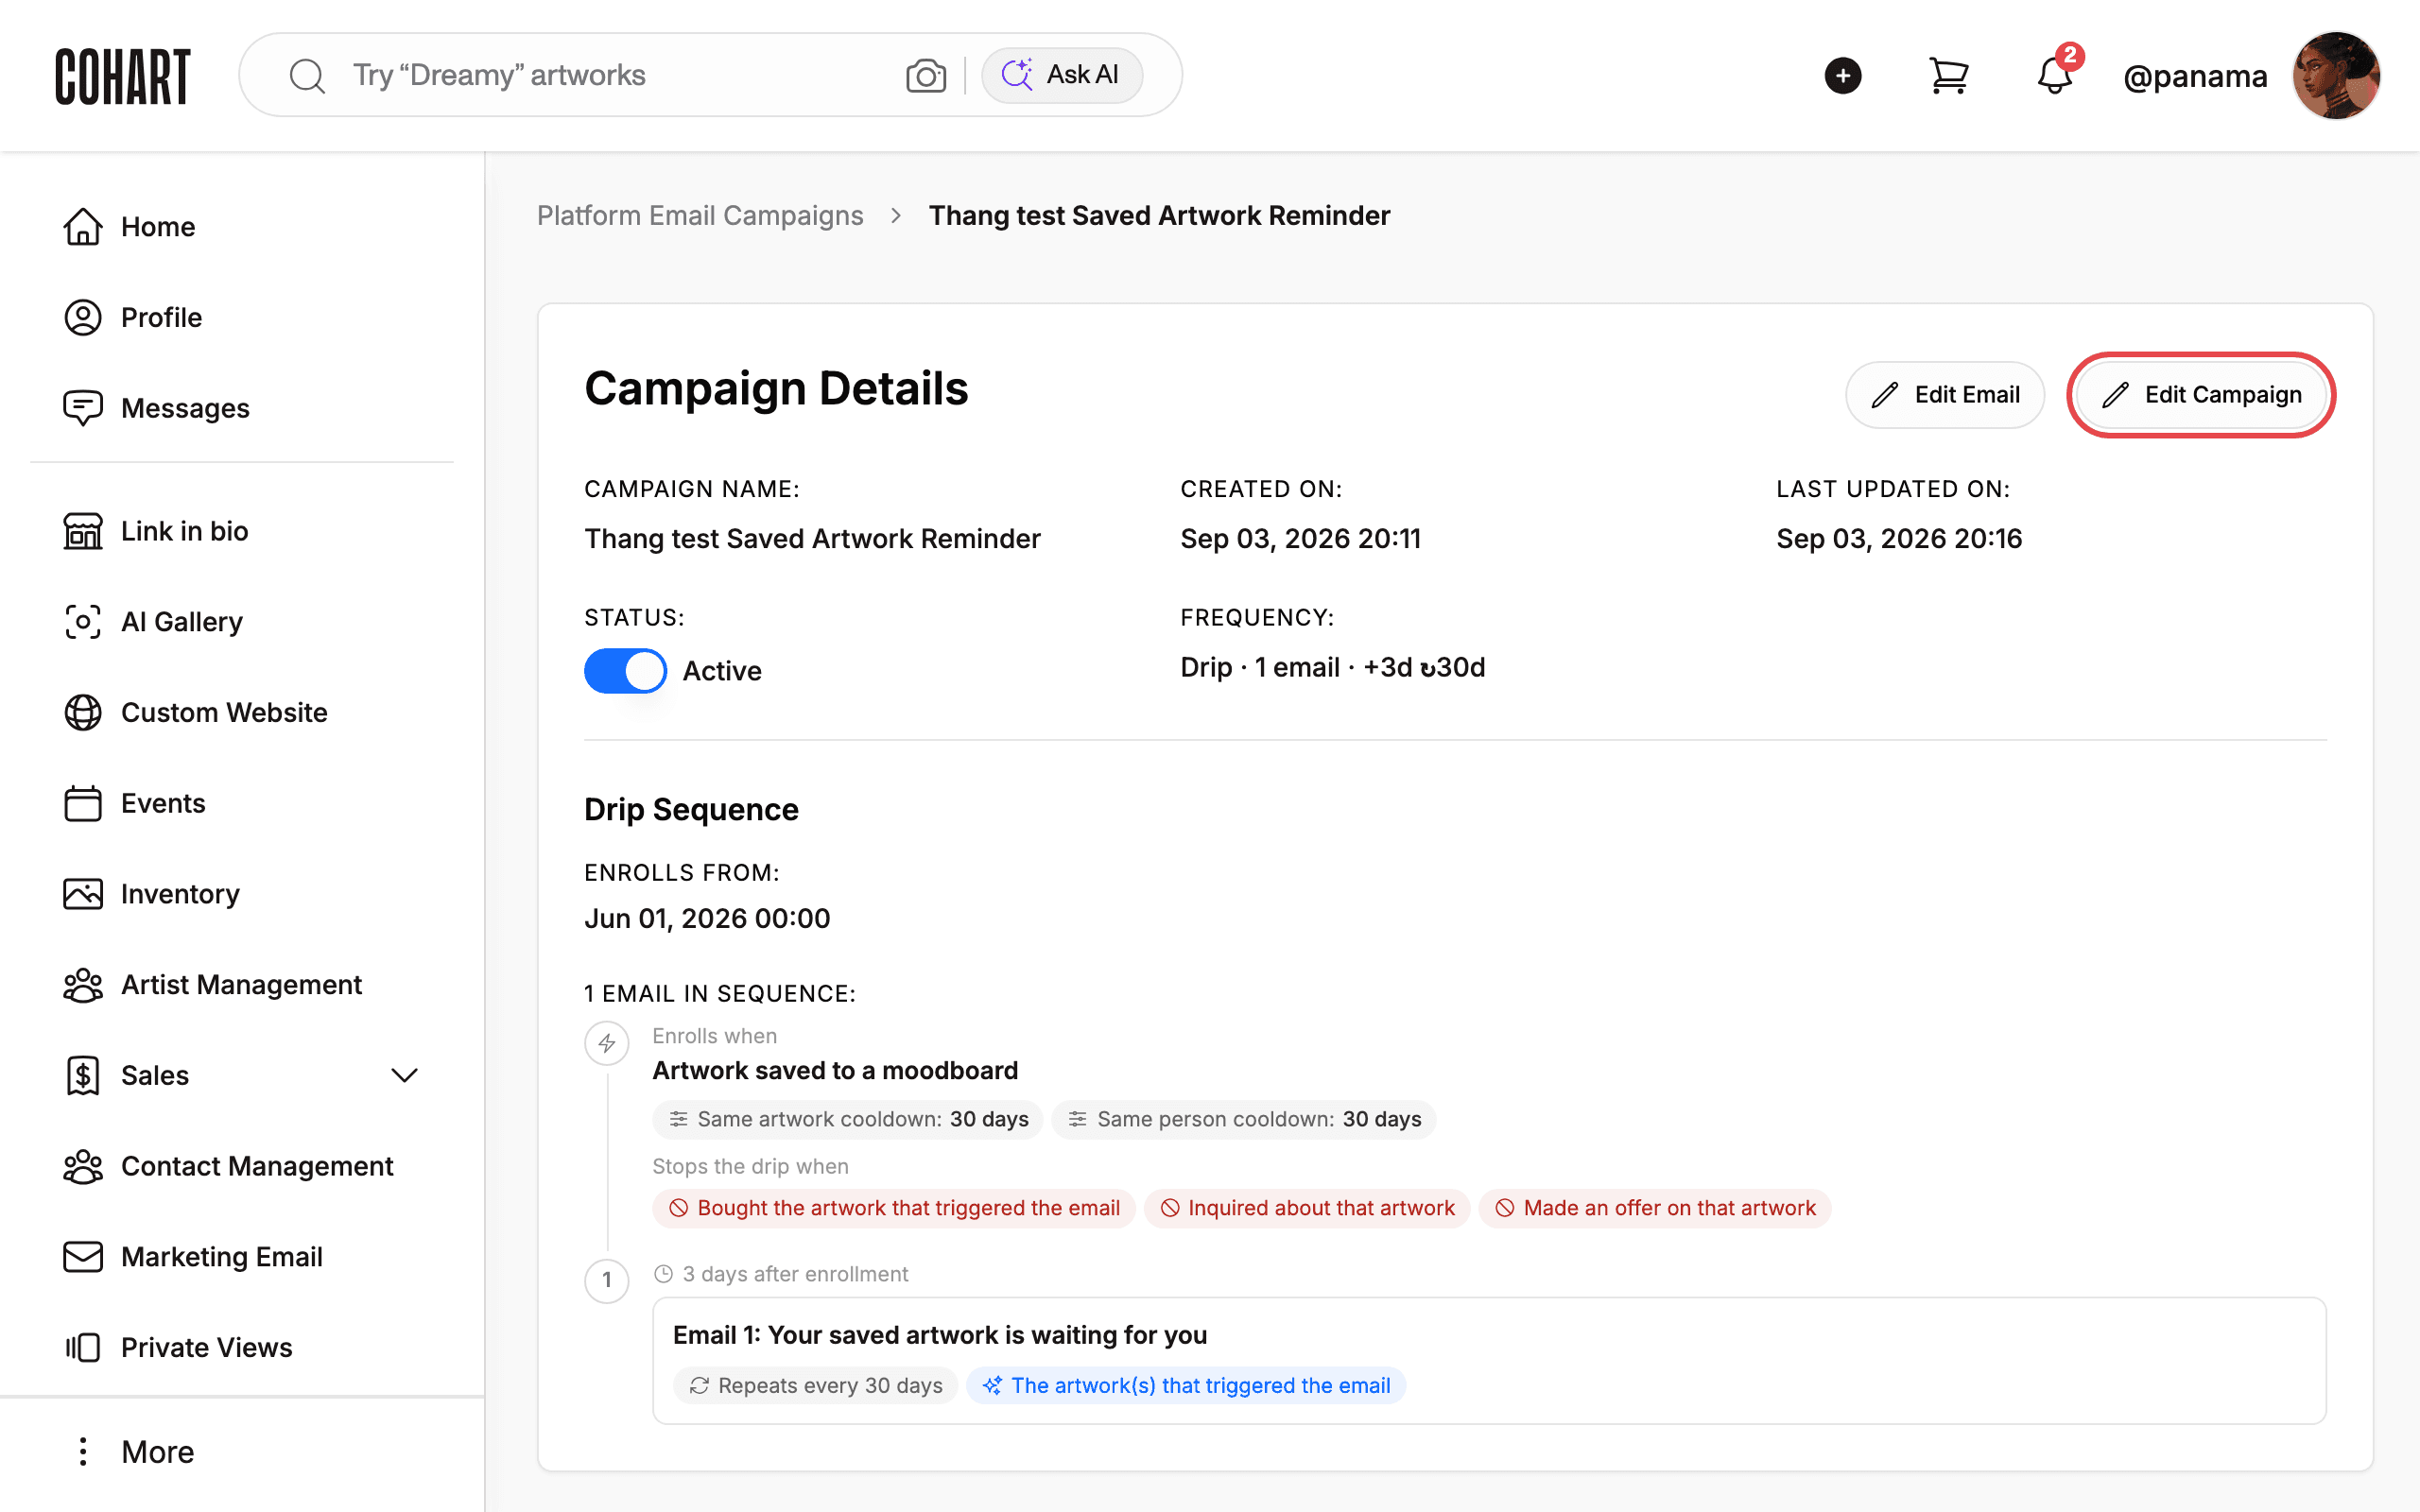
5. Review campaign details and reports
Read CAMPAIGN NAME:, CREATED ON:, LAST UPDATED ON:, STATUS:, and FREQUENCY:. Read the Drip Sequence section, including ENROLLS FROM:, the trigger under Enrolls when (for example Artwork saved to a moodboard), cooldowns, and stop conditions. Click Edit Campaign to change settings. You can also click Edit Email to edit content only. Scroll down to see Reports (Delivery rate, Open rate, CTR, Bounce rate, Unsubscribe rate) and the Enrollments table. Use Refresh to reload enrollments. Use Search by recipient’s email, name, or username to find a recipient. Use Stop or Resume in the enrollment rows to control a recipient.
6. Open the unsubscribes report
Return to Platform Email Campaigns. Click View unsubscribes.
7. Review unsubscribes with filters
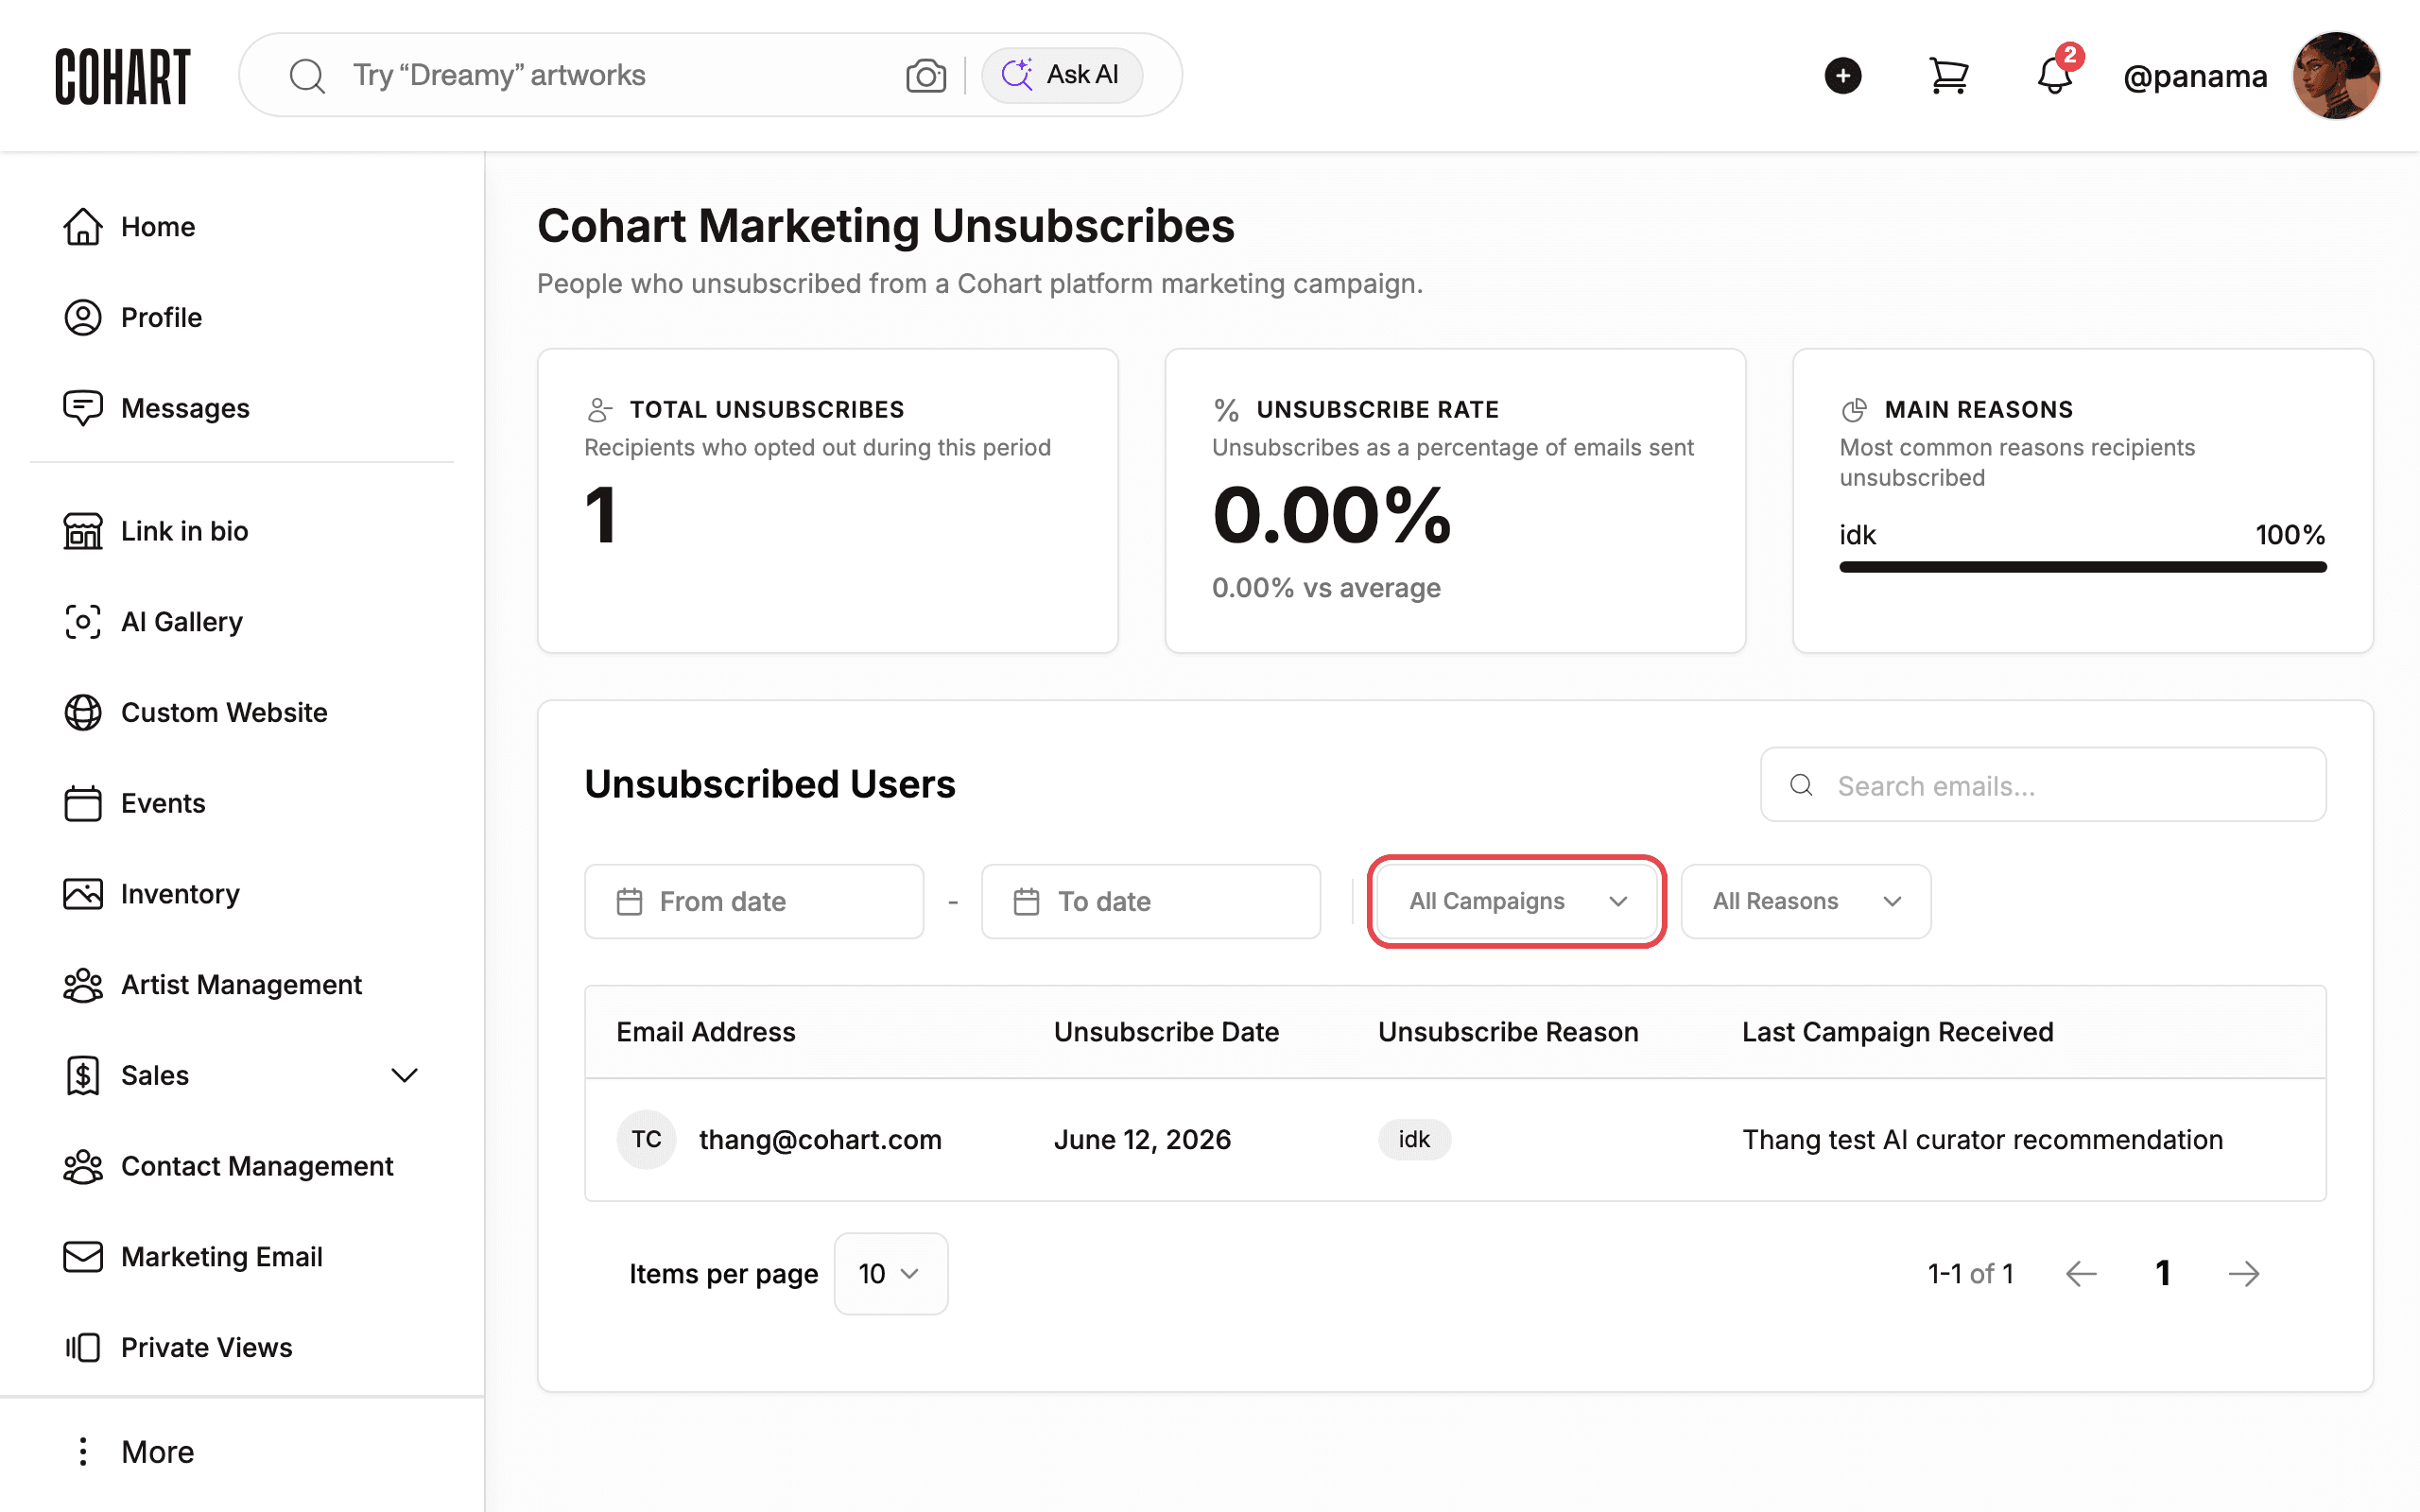
Read the summary cards: TOTAL UNSUBSCRIBES, UNSUBSCRIBE RATE, and MAIN REASONS. Filter the Unsubscribed Users table with From date, To date, All Campaigns, and All Reasons. Type an address in Search emails… to find a recipient. The table columns are Email Address, Unsubscribe Date, Unsubscribe Reason, and Last Campaign Received.
8. Create a new campaign
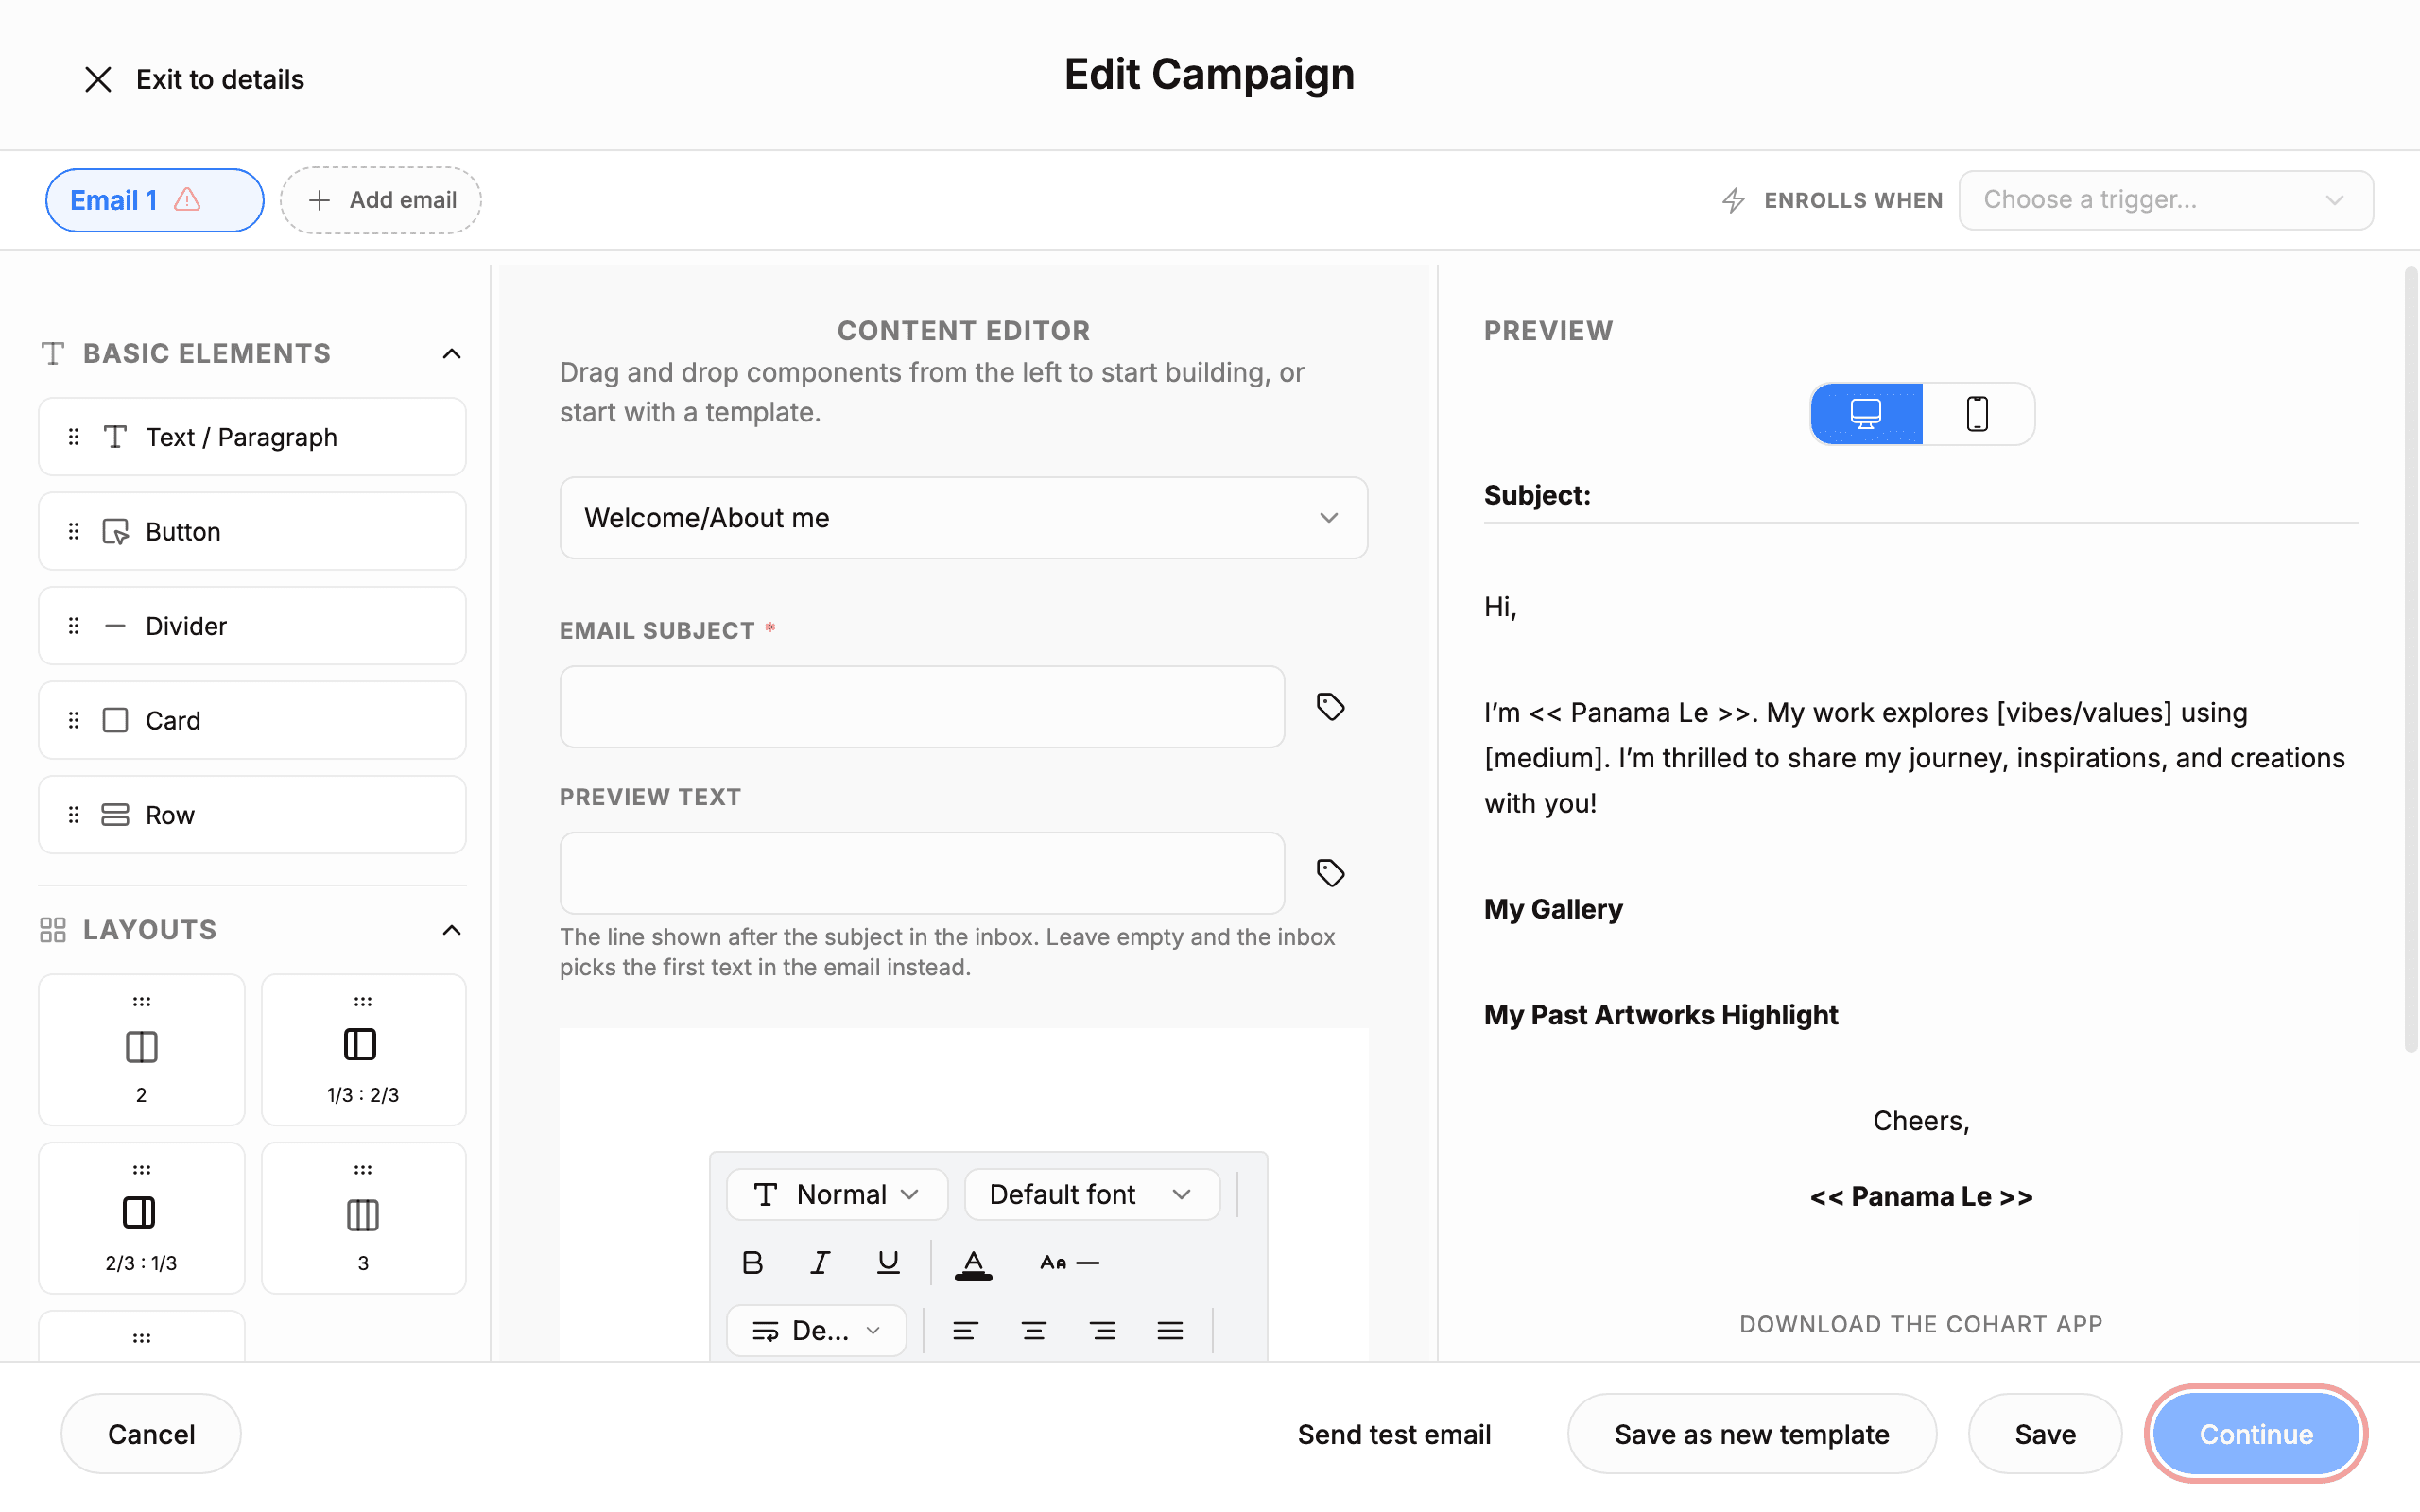
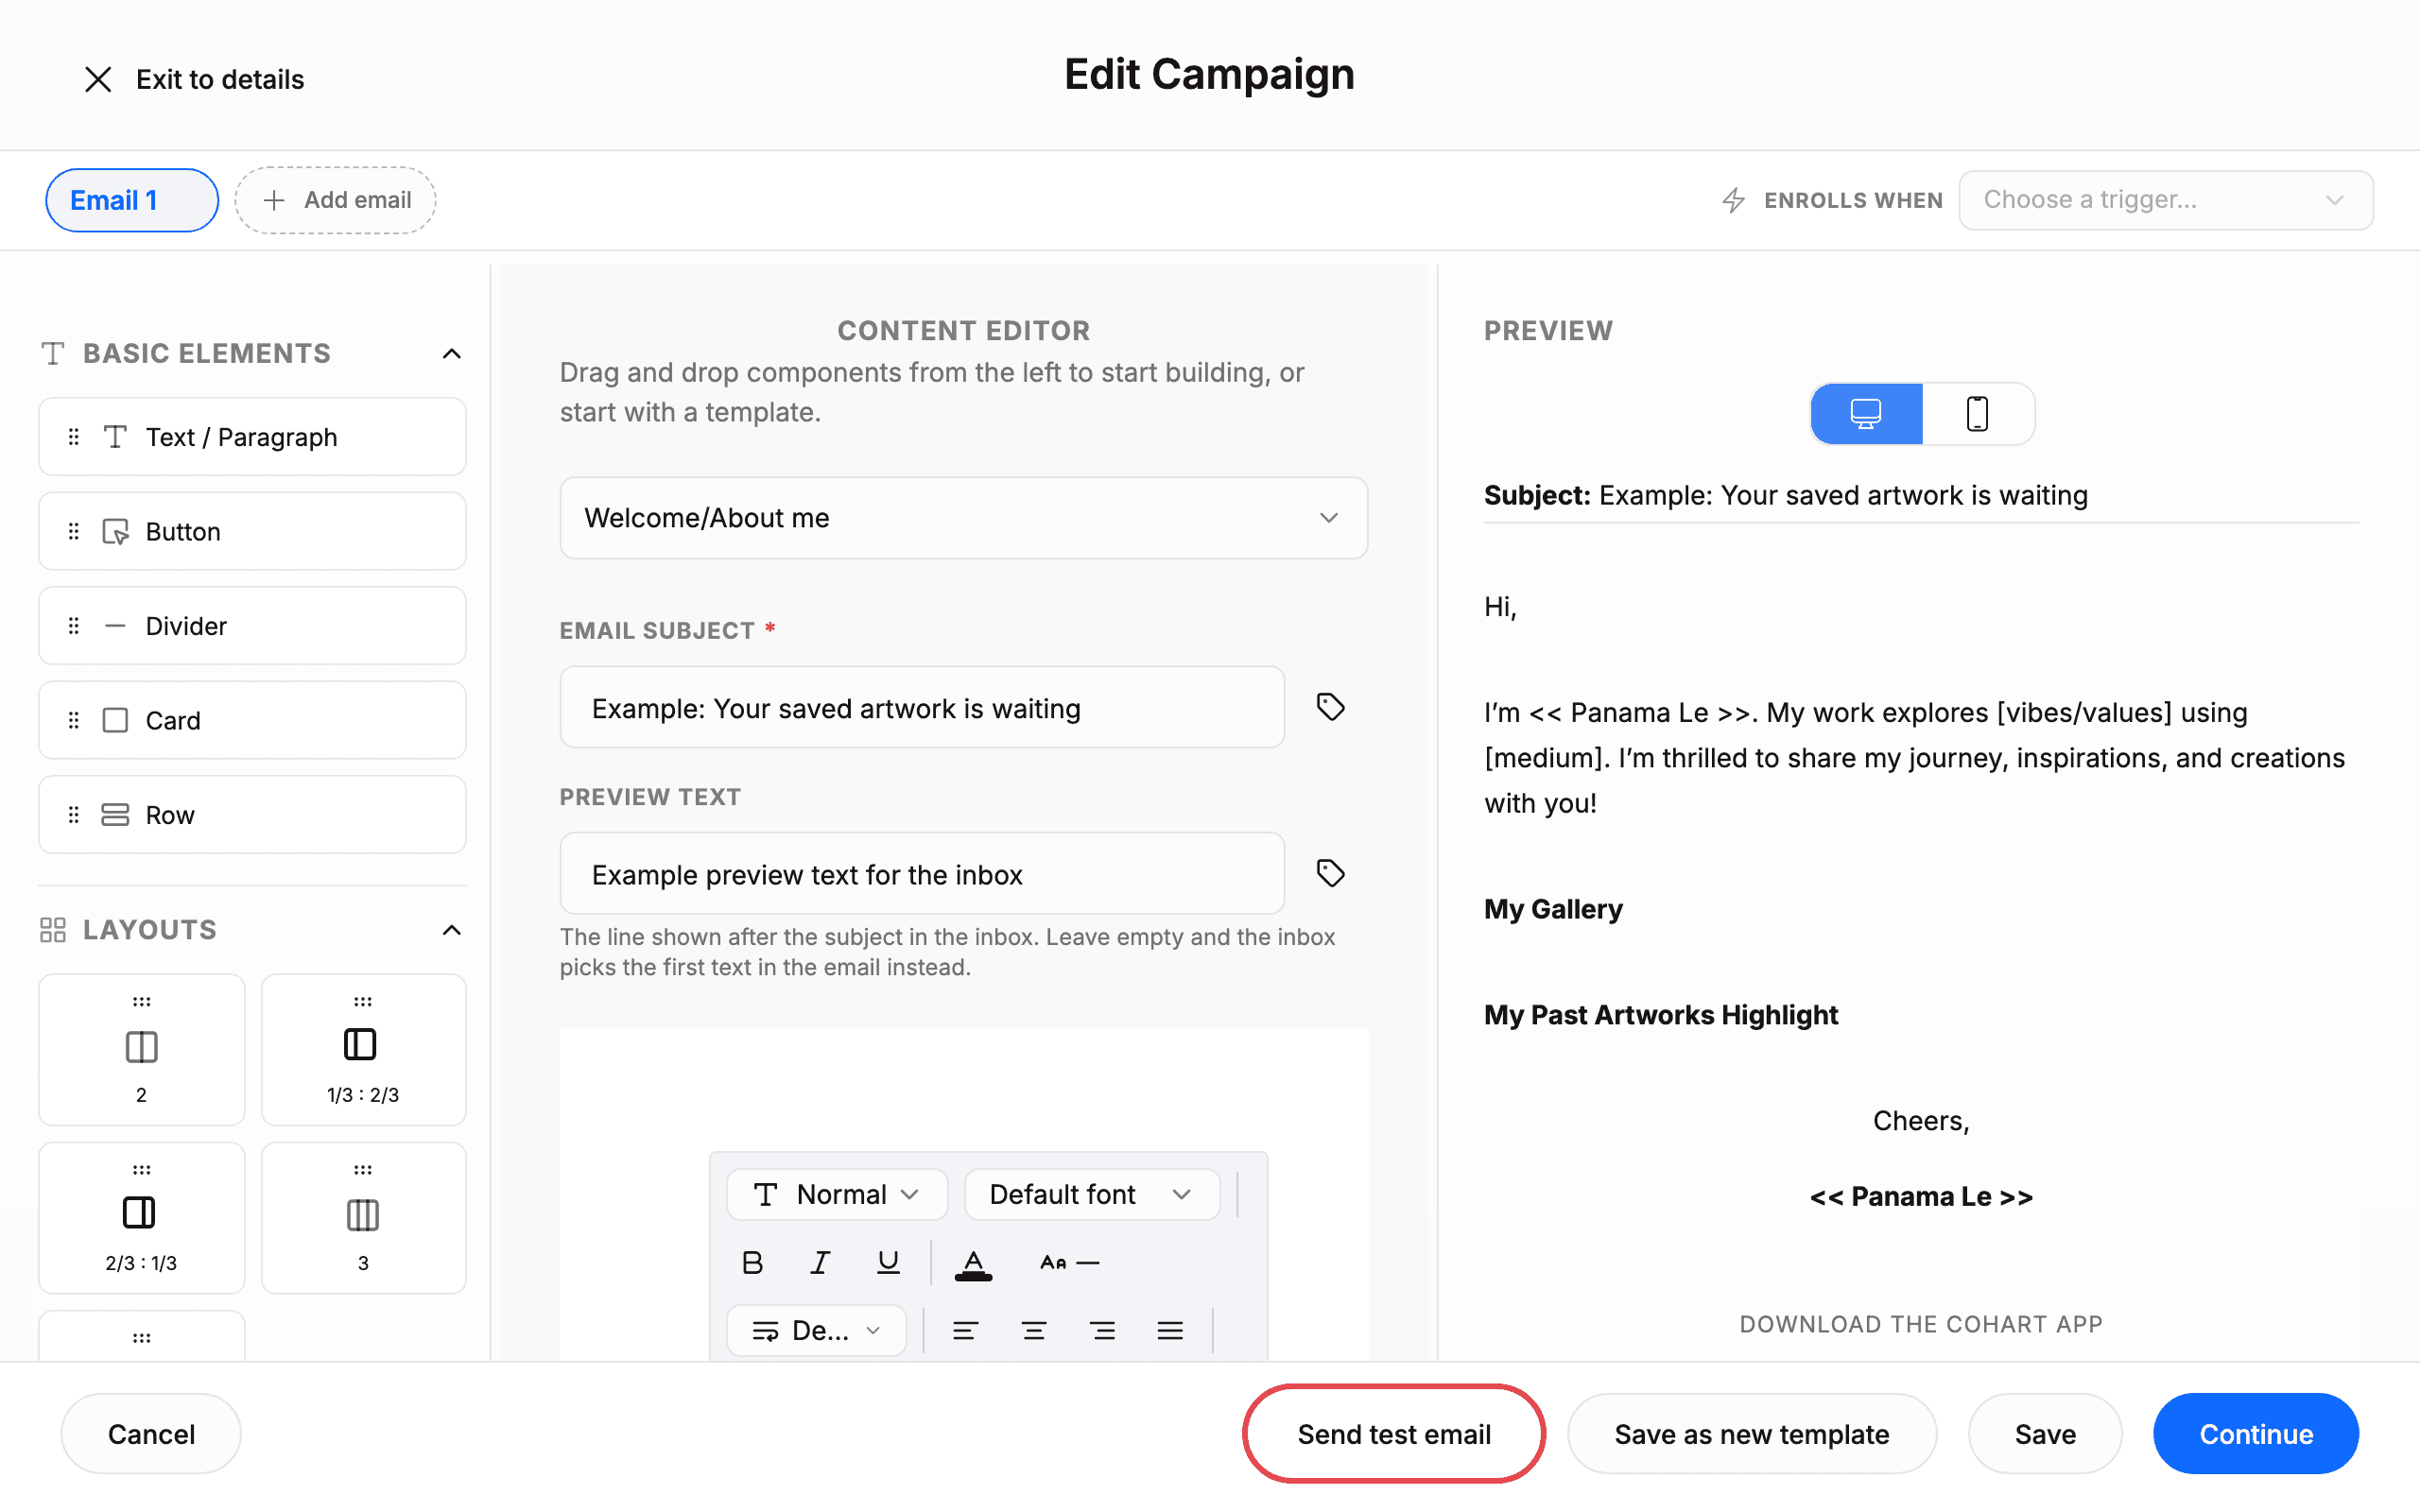
Return to Platform Email Campaigns. Click Create new campaign. Wait for the Edit Campaign editor to load. Clicking Create new campaign creates an empty Inactive draft immediately and opens the editor. The editor header shows Exit to details, Email 1, Add email, and ENROLLS WHEN. The bottom bar shows Cancel, Send test email, Save as new template, Save (which reads Saving while autosaving), and Continue. Use Exit to details to leave without editing. Use Cancel to discard changes.
9. Choose who enrolls with a trigger
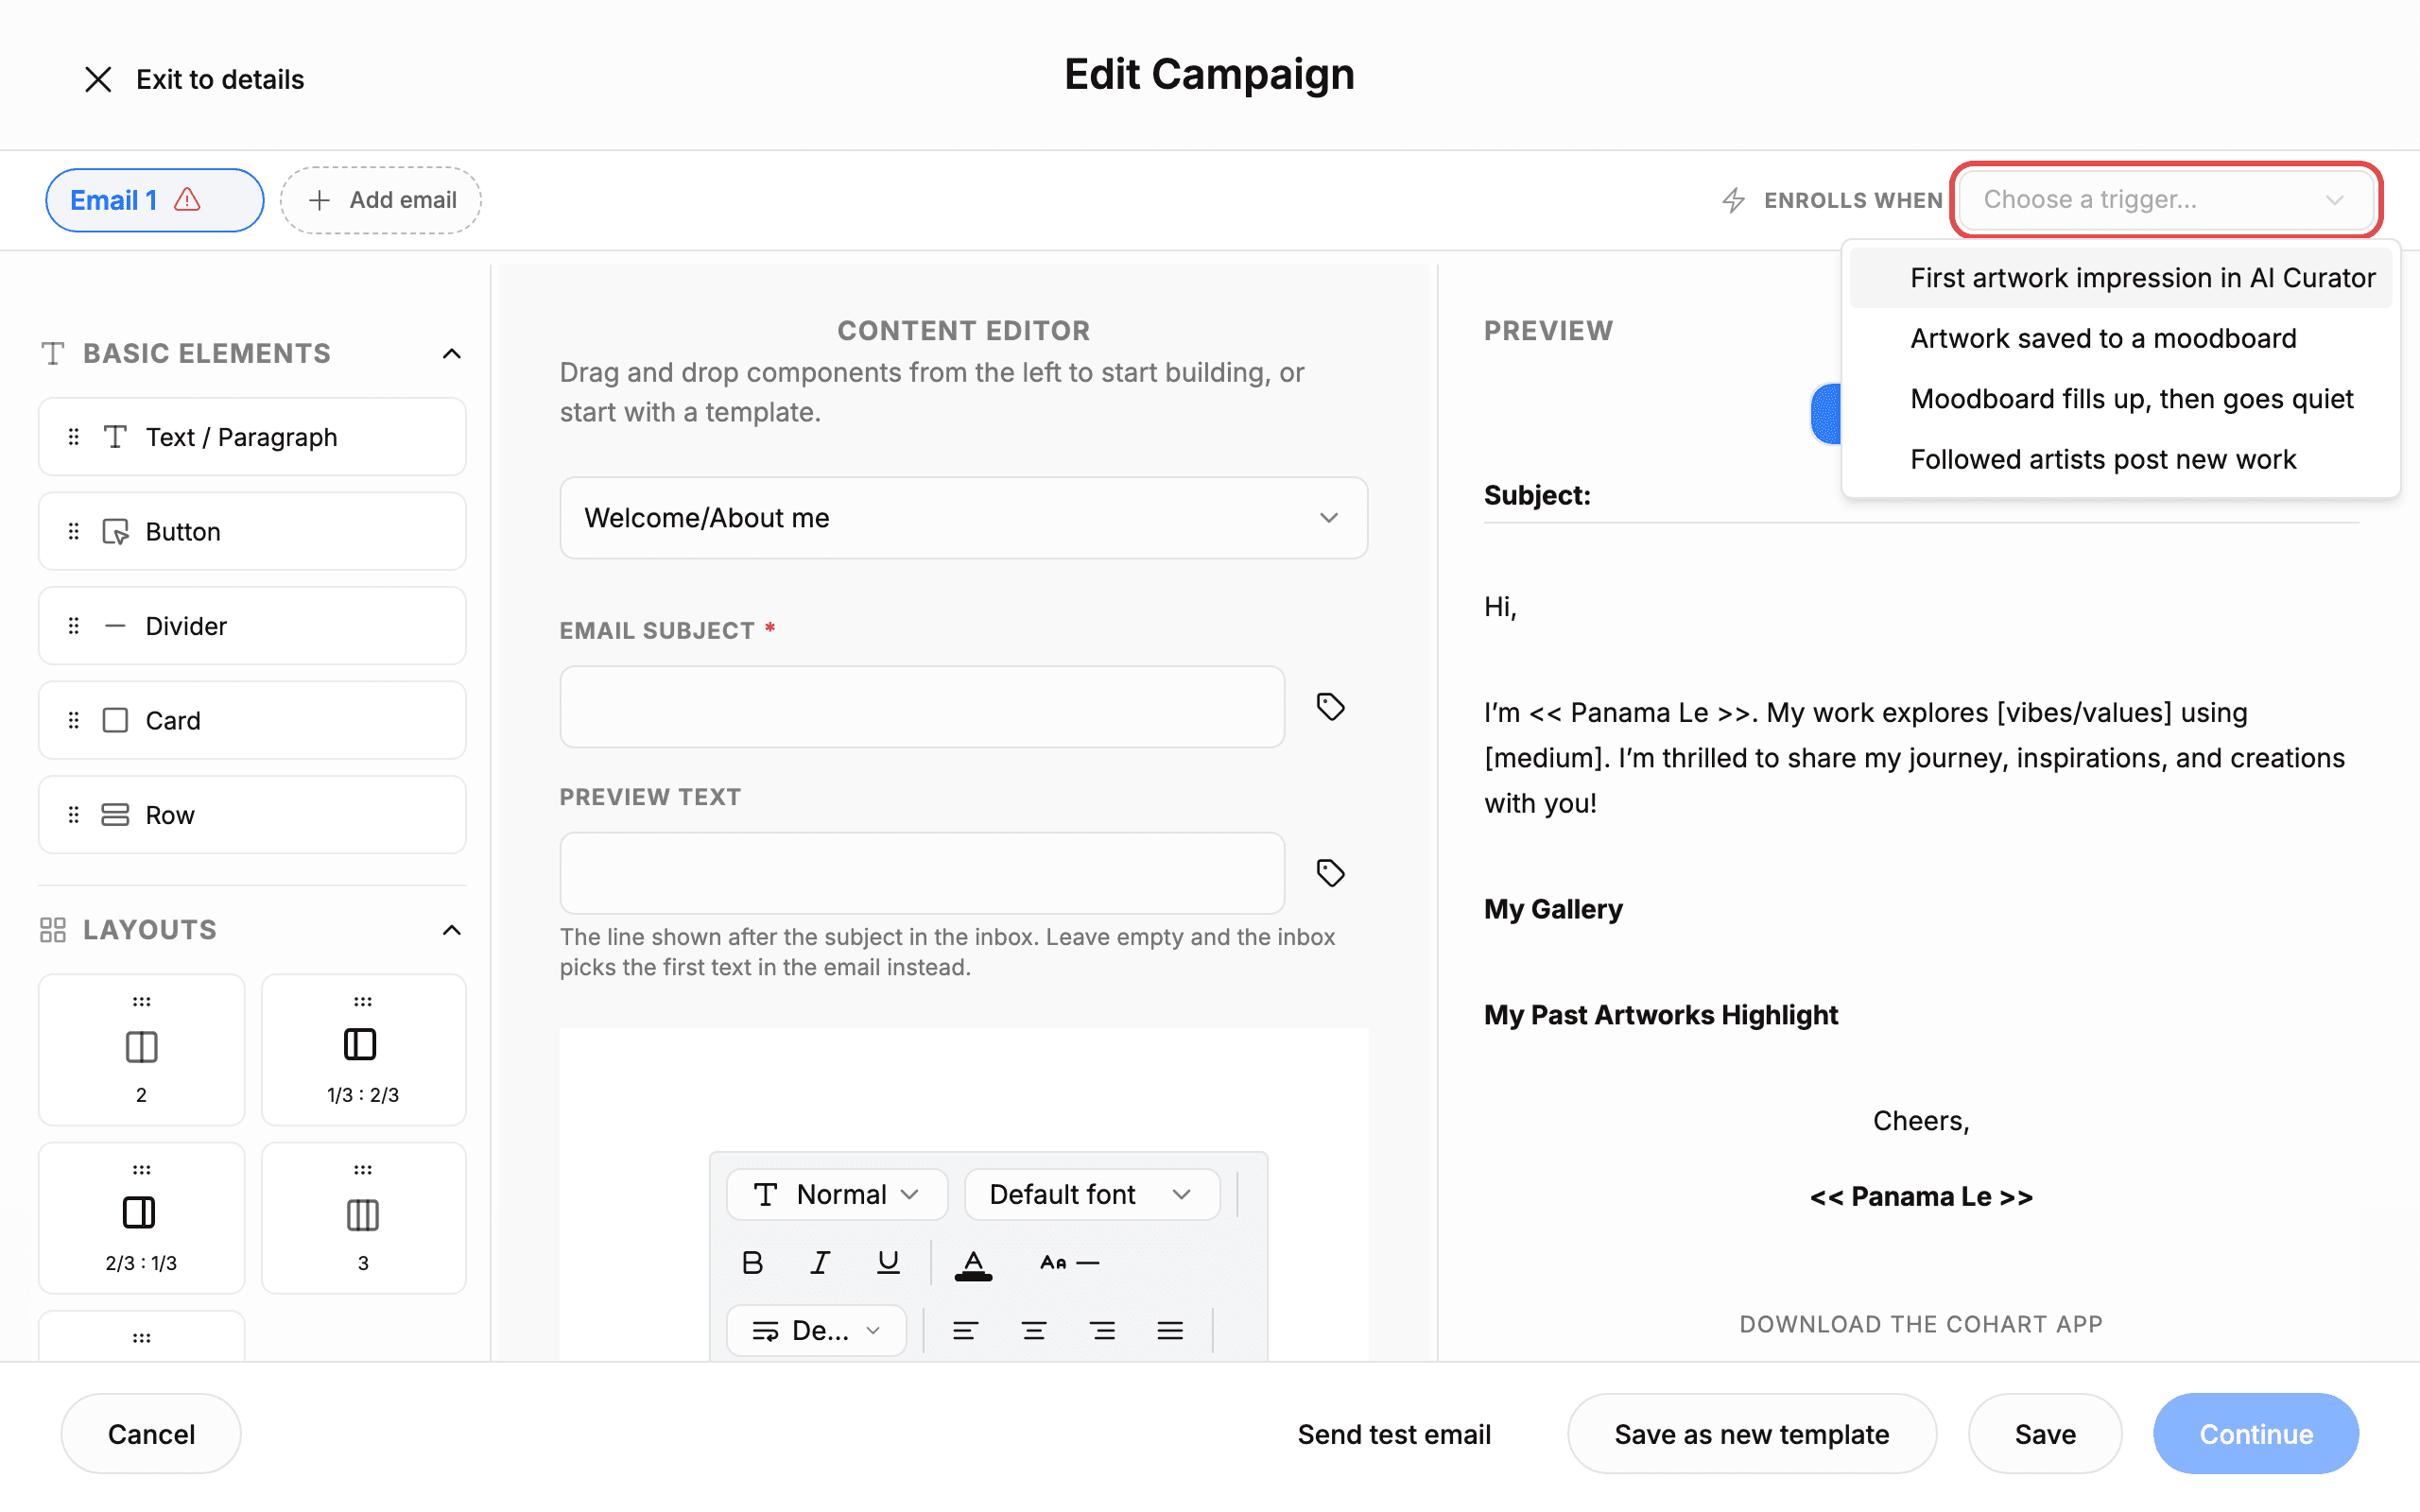
Click Choose a trigger… under ENROLLS WHEN. Select one of the four triggers: First artwork impression in AI Curator, Artwork saved to a moodboard, Moodboard fills up, then goes quiet, or Followed artists post new work. A drip targets users who trigger an event, not a contact list. The trigger decides who enters the sequence. You can change it later from the campaign settings.
10. Build the email subject and content
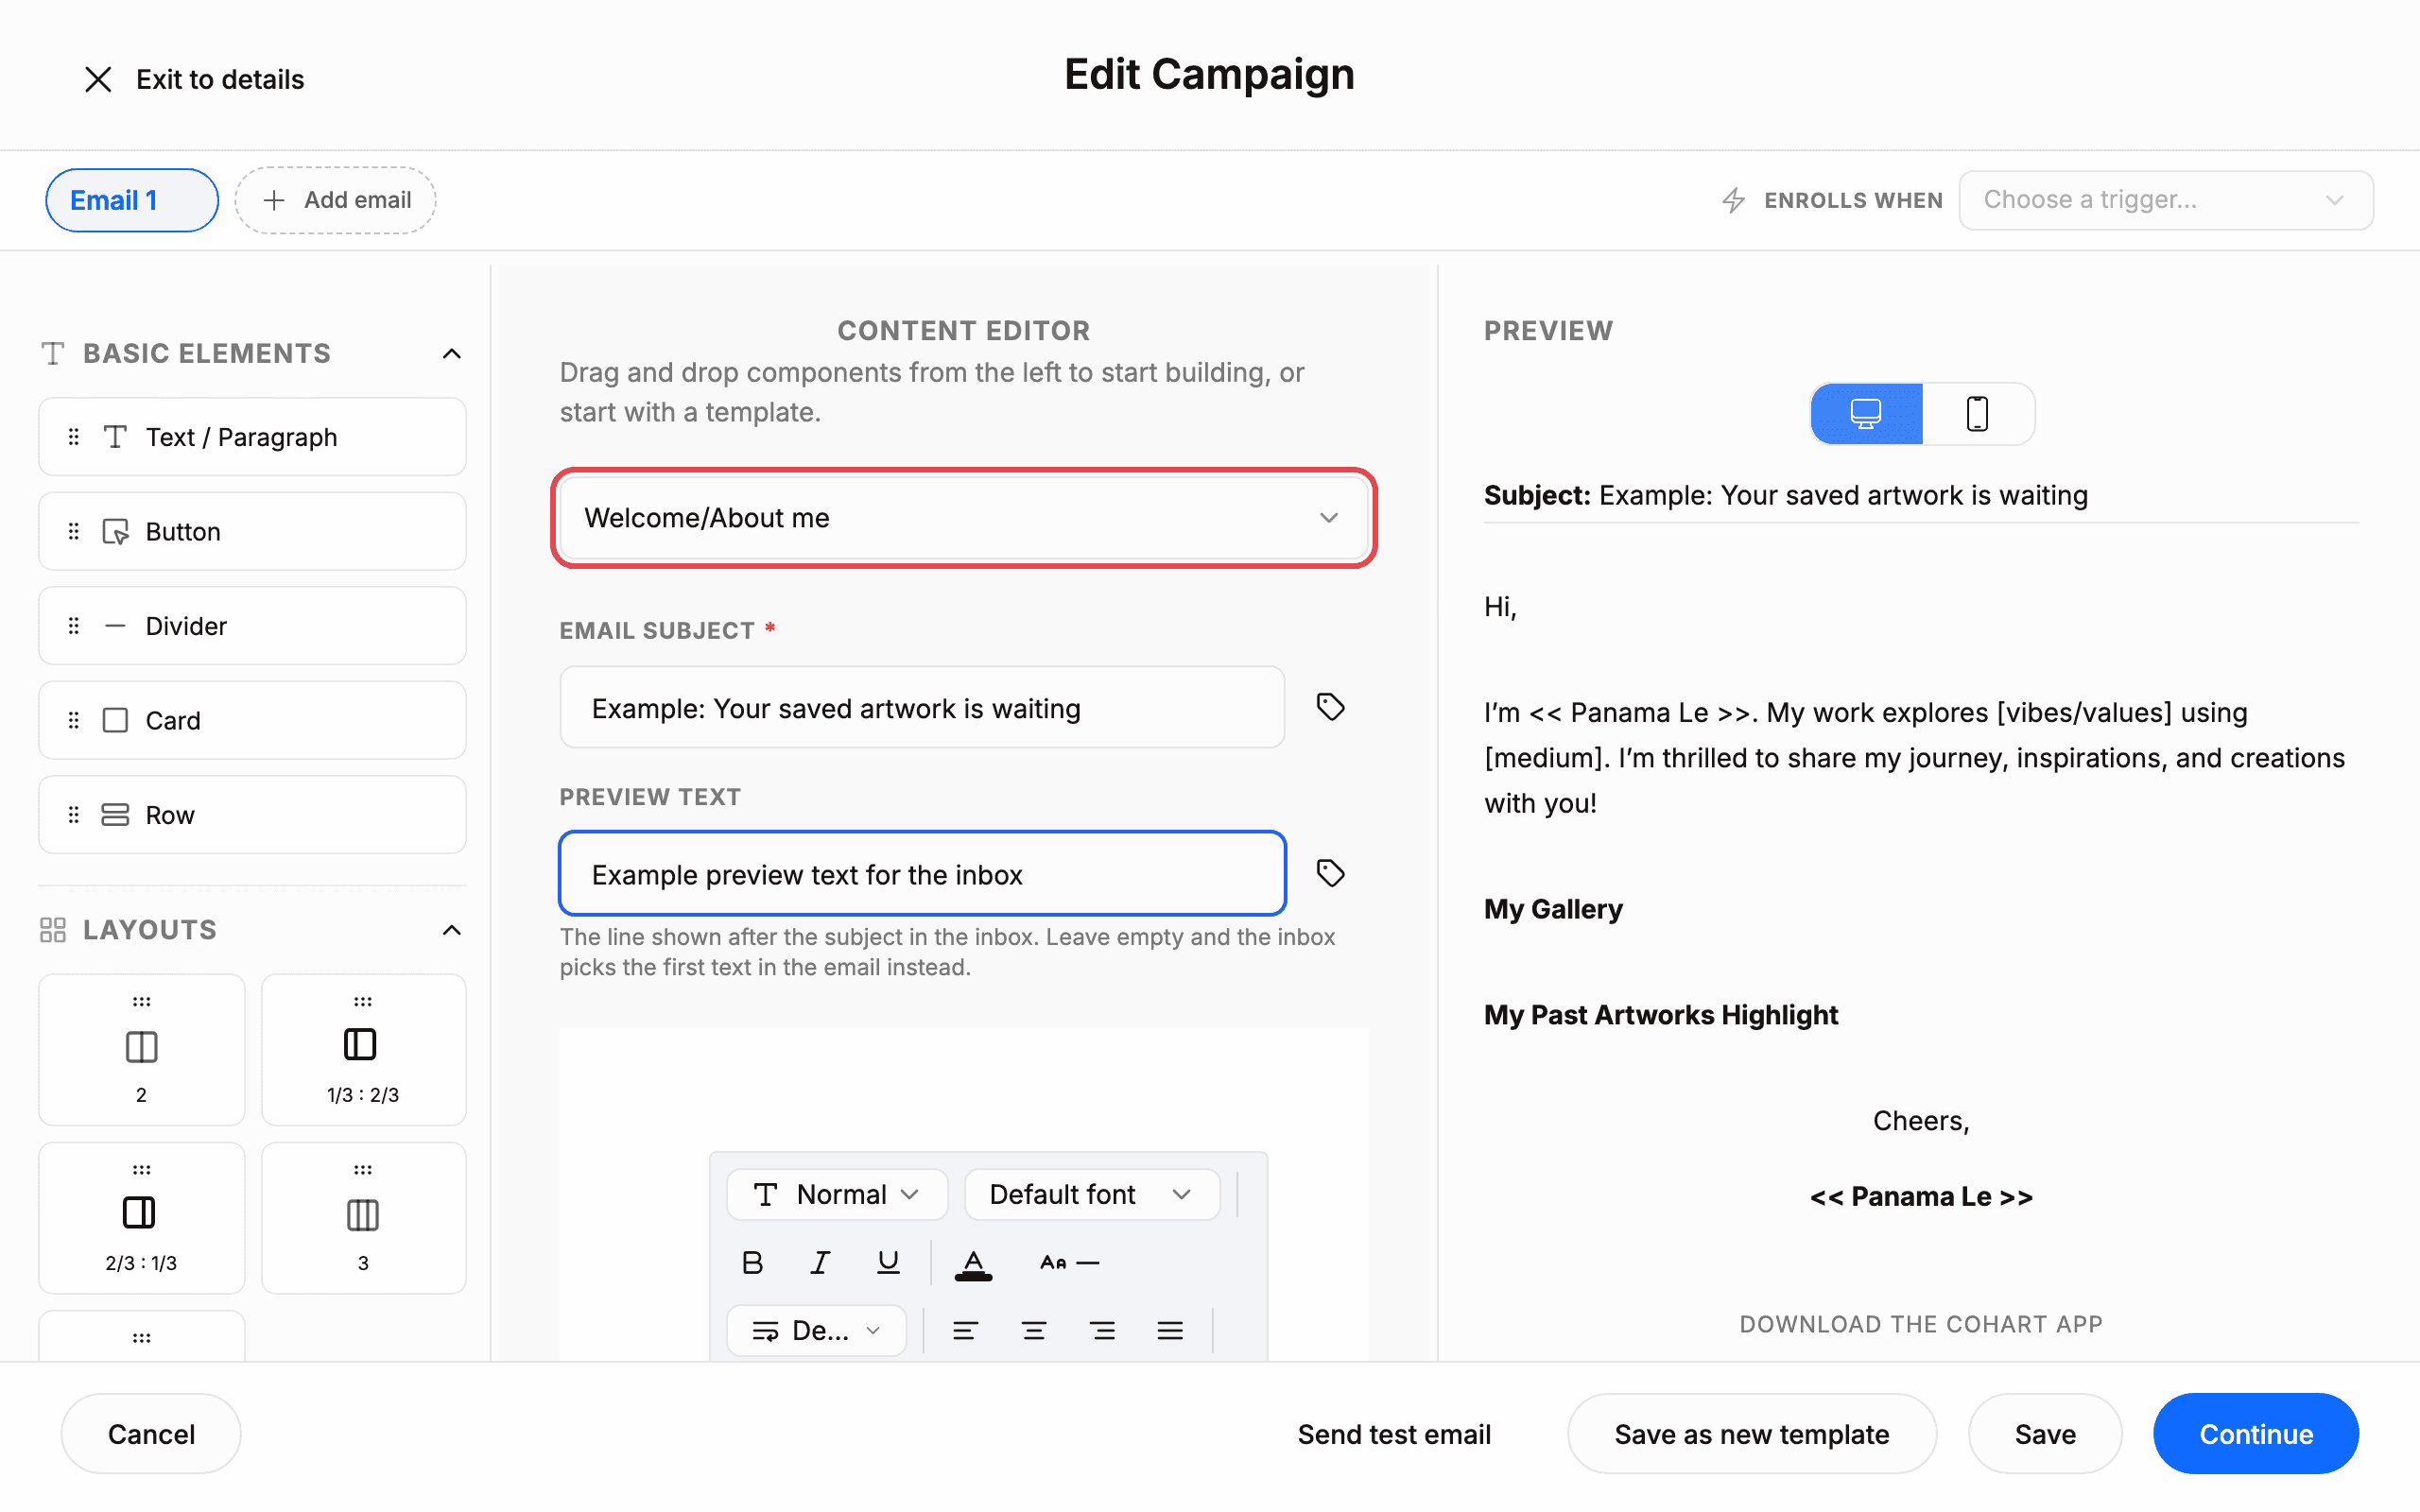
Pick a starting template from the template selector (for example Welcome/About me). Type your subject in EMAIL SUBJECT*. Type inbox preview copy in PREVIEW TEXT. EMAIL SUBJECT* is required. The Email 1 tab shows a warning icon until the subject is filled. The help text under PREVIEW TEXT reads: “The line shown after the subject in the inbox. Leave empty and the inbox picks the first text in the email instead.” Everything you type appears live in the PREVIEW panel under Subject:. Format body text with the toolbar (Normal, Default font, bold, italic, underline, text color, alignment). Click Add email at the top to add another step to the drip sequence.
11. Add dynamic artwork and layout blocks
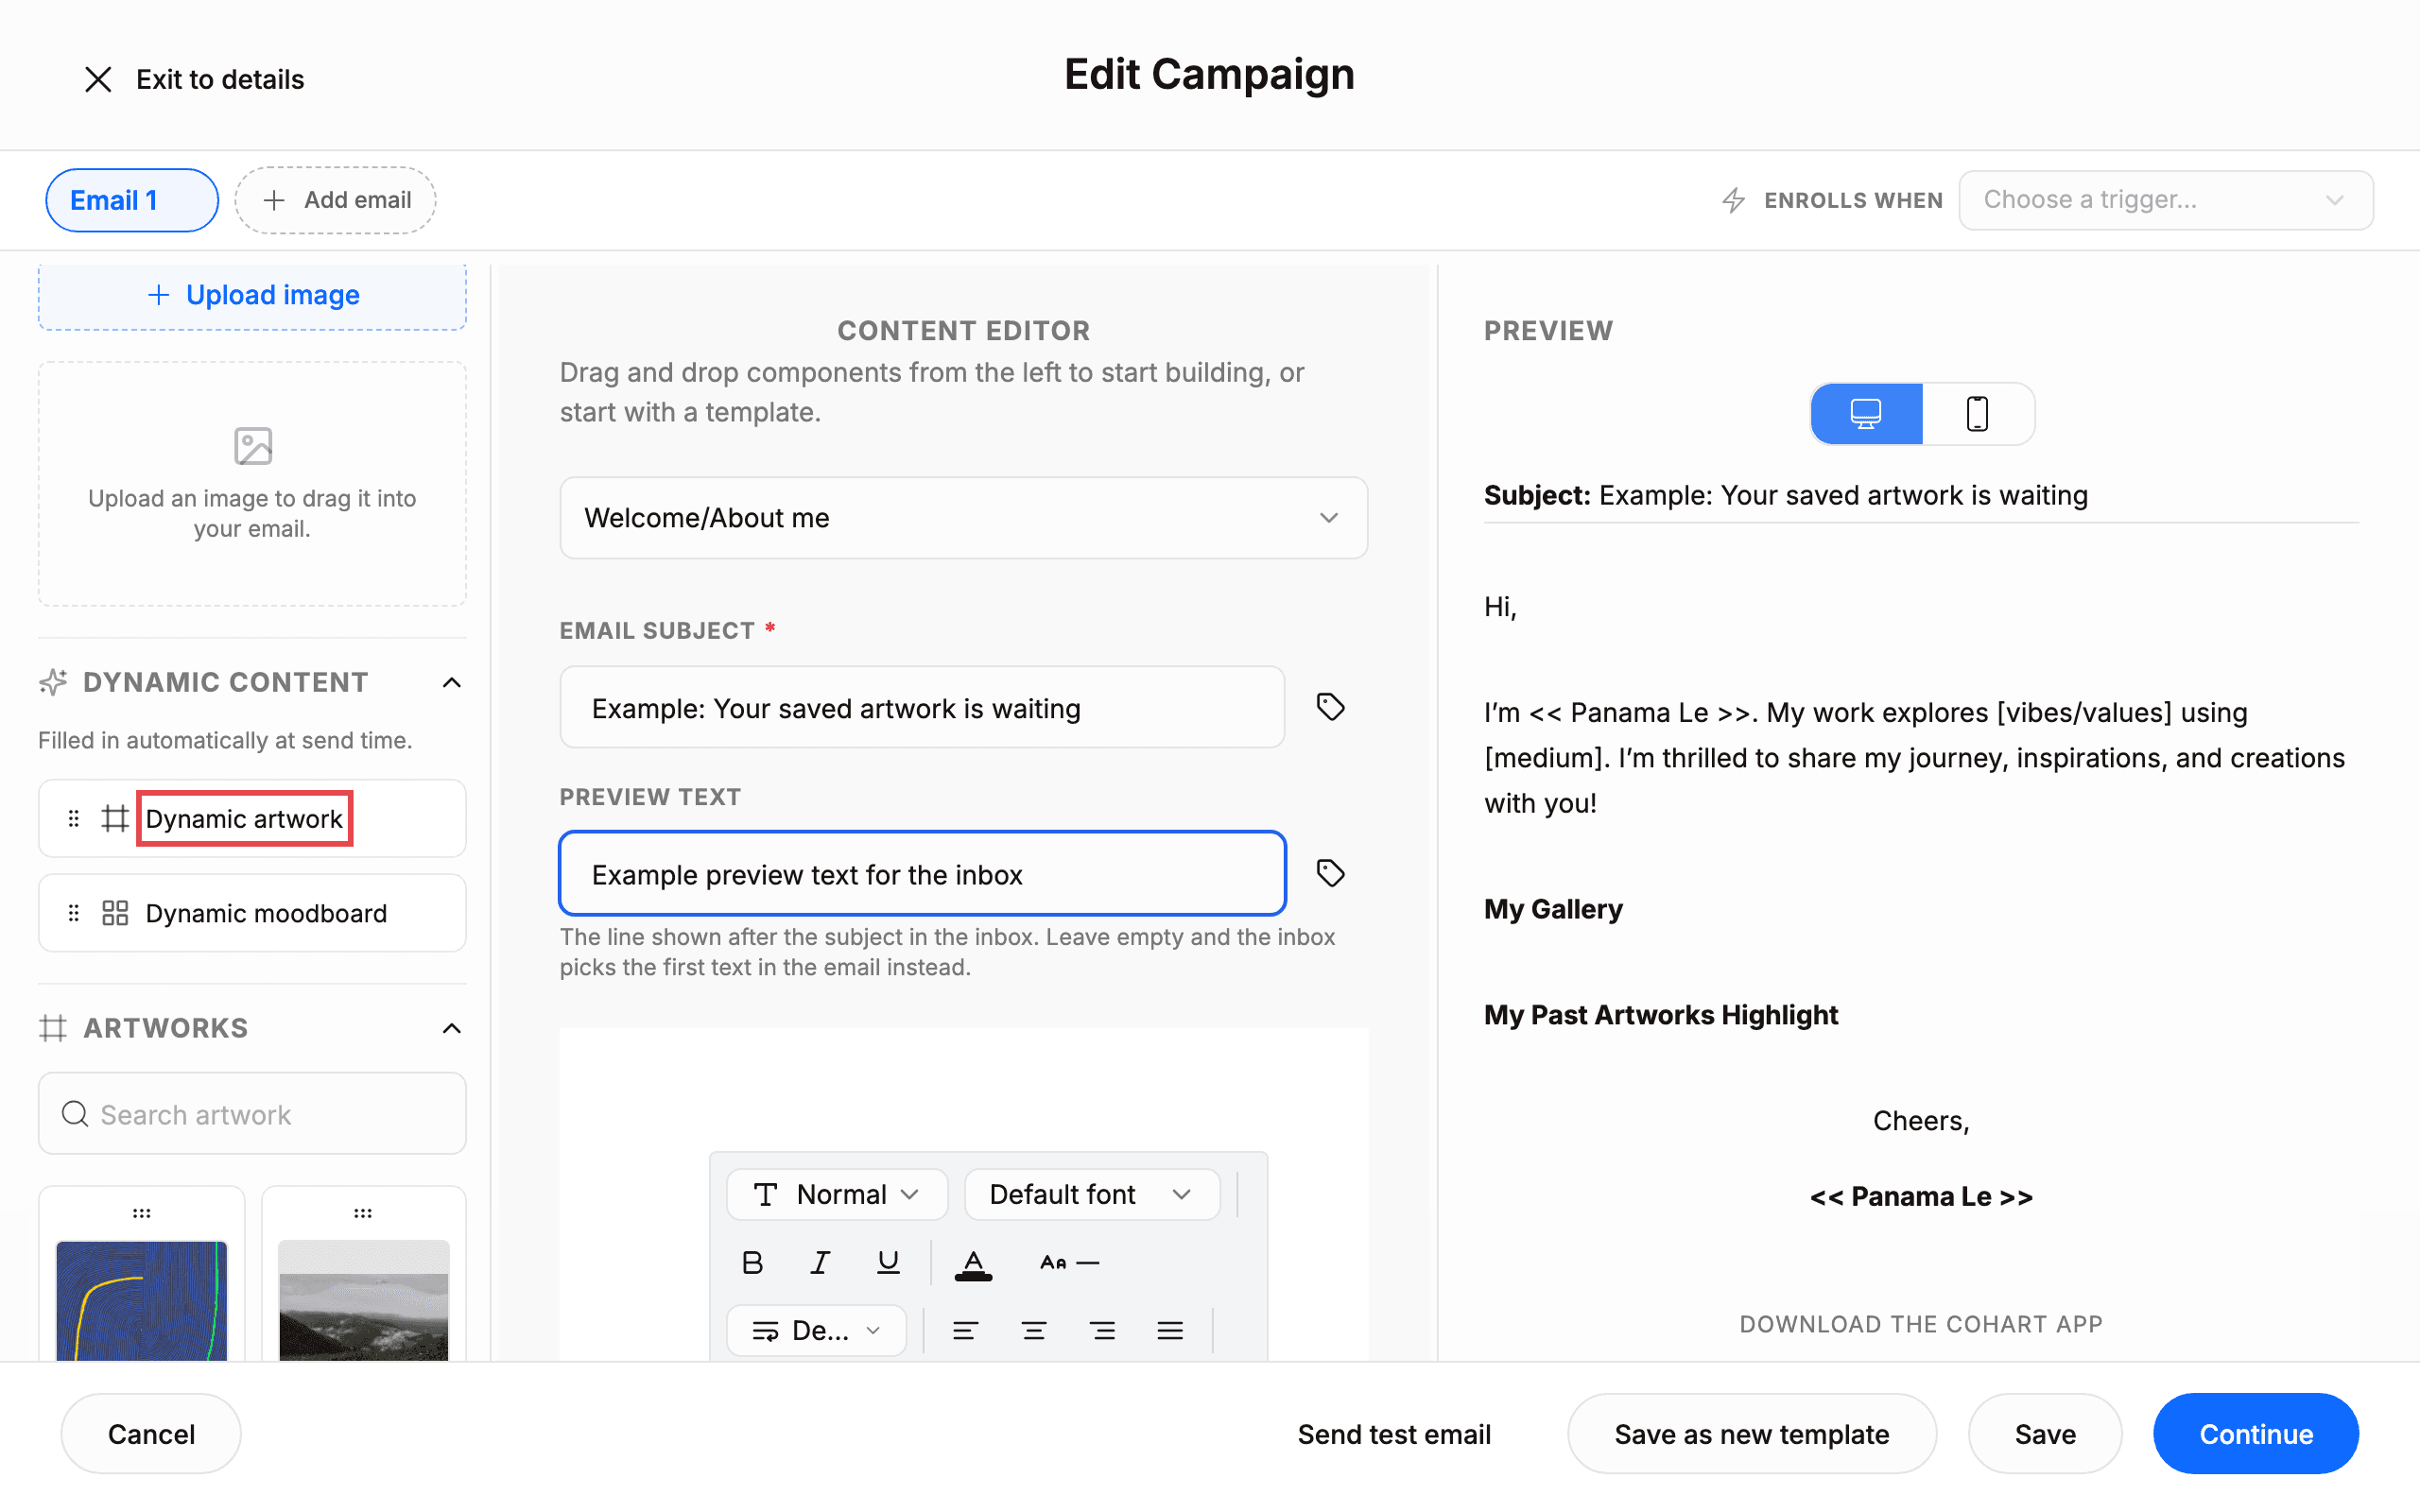
Drag a block from the left palette into the CONTENT EDITOR. Use BASIC ELEMENTS (Text / Paragraph, Button, Divider, Card, Row) for static content. Use LAYOUTS (2, 1/3 : 2/3, 2/3 : 1/3, 3, 4) to arrange columns. Use IMAGES with Upload image (“Upload an image to drag it into your email.”) for custom graphics. Use DYNAMIC CONTENT (Dynamic artwork, Dynamic moodboard) for blocks marked “Filled in automatically at send time.” — these personalize each send with the artwork that triggered the email. Use ARTWORKS with Search artwork to find and insert a specific artwork. Use EMAIL PADDING and EMAIL BACKGROUND to adjust spacing and background. The PREVIEW panel renders personalization with sample recipient data so you can check the layout before sending.
12. Configure name, cooldowns, and schedule
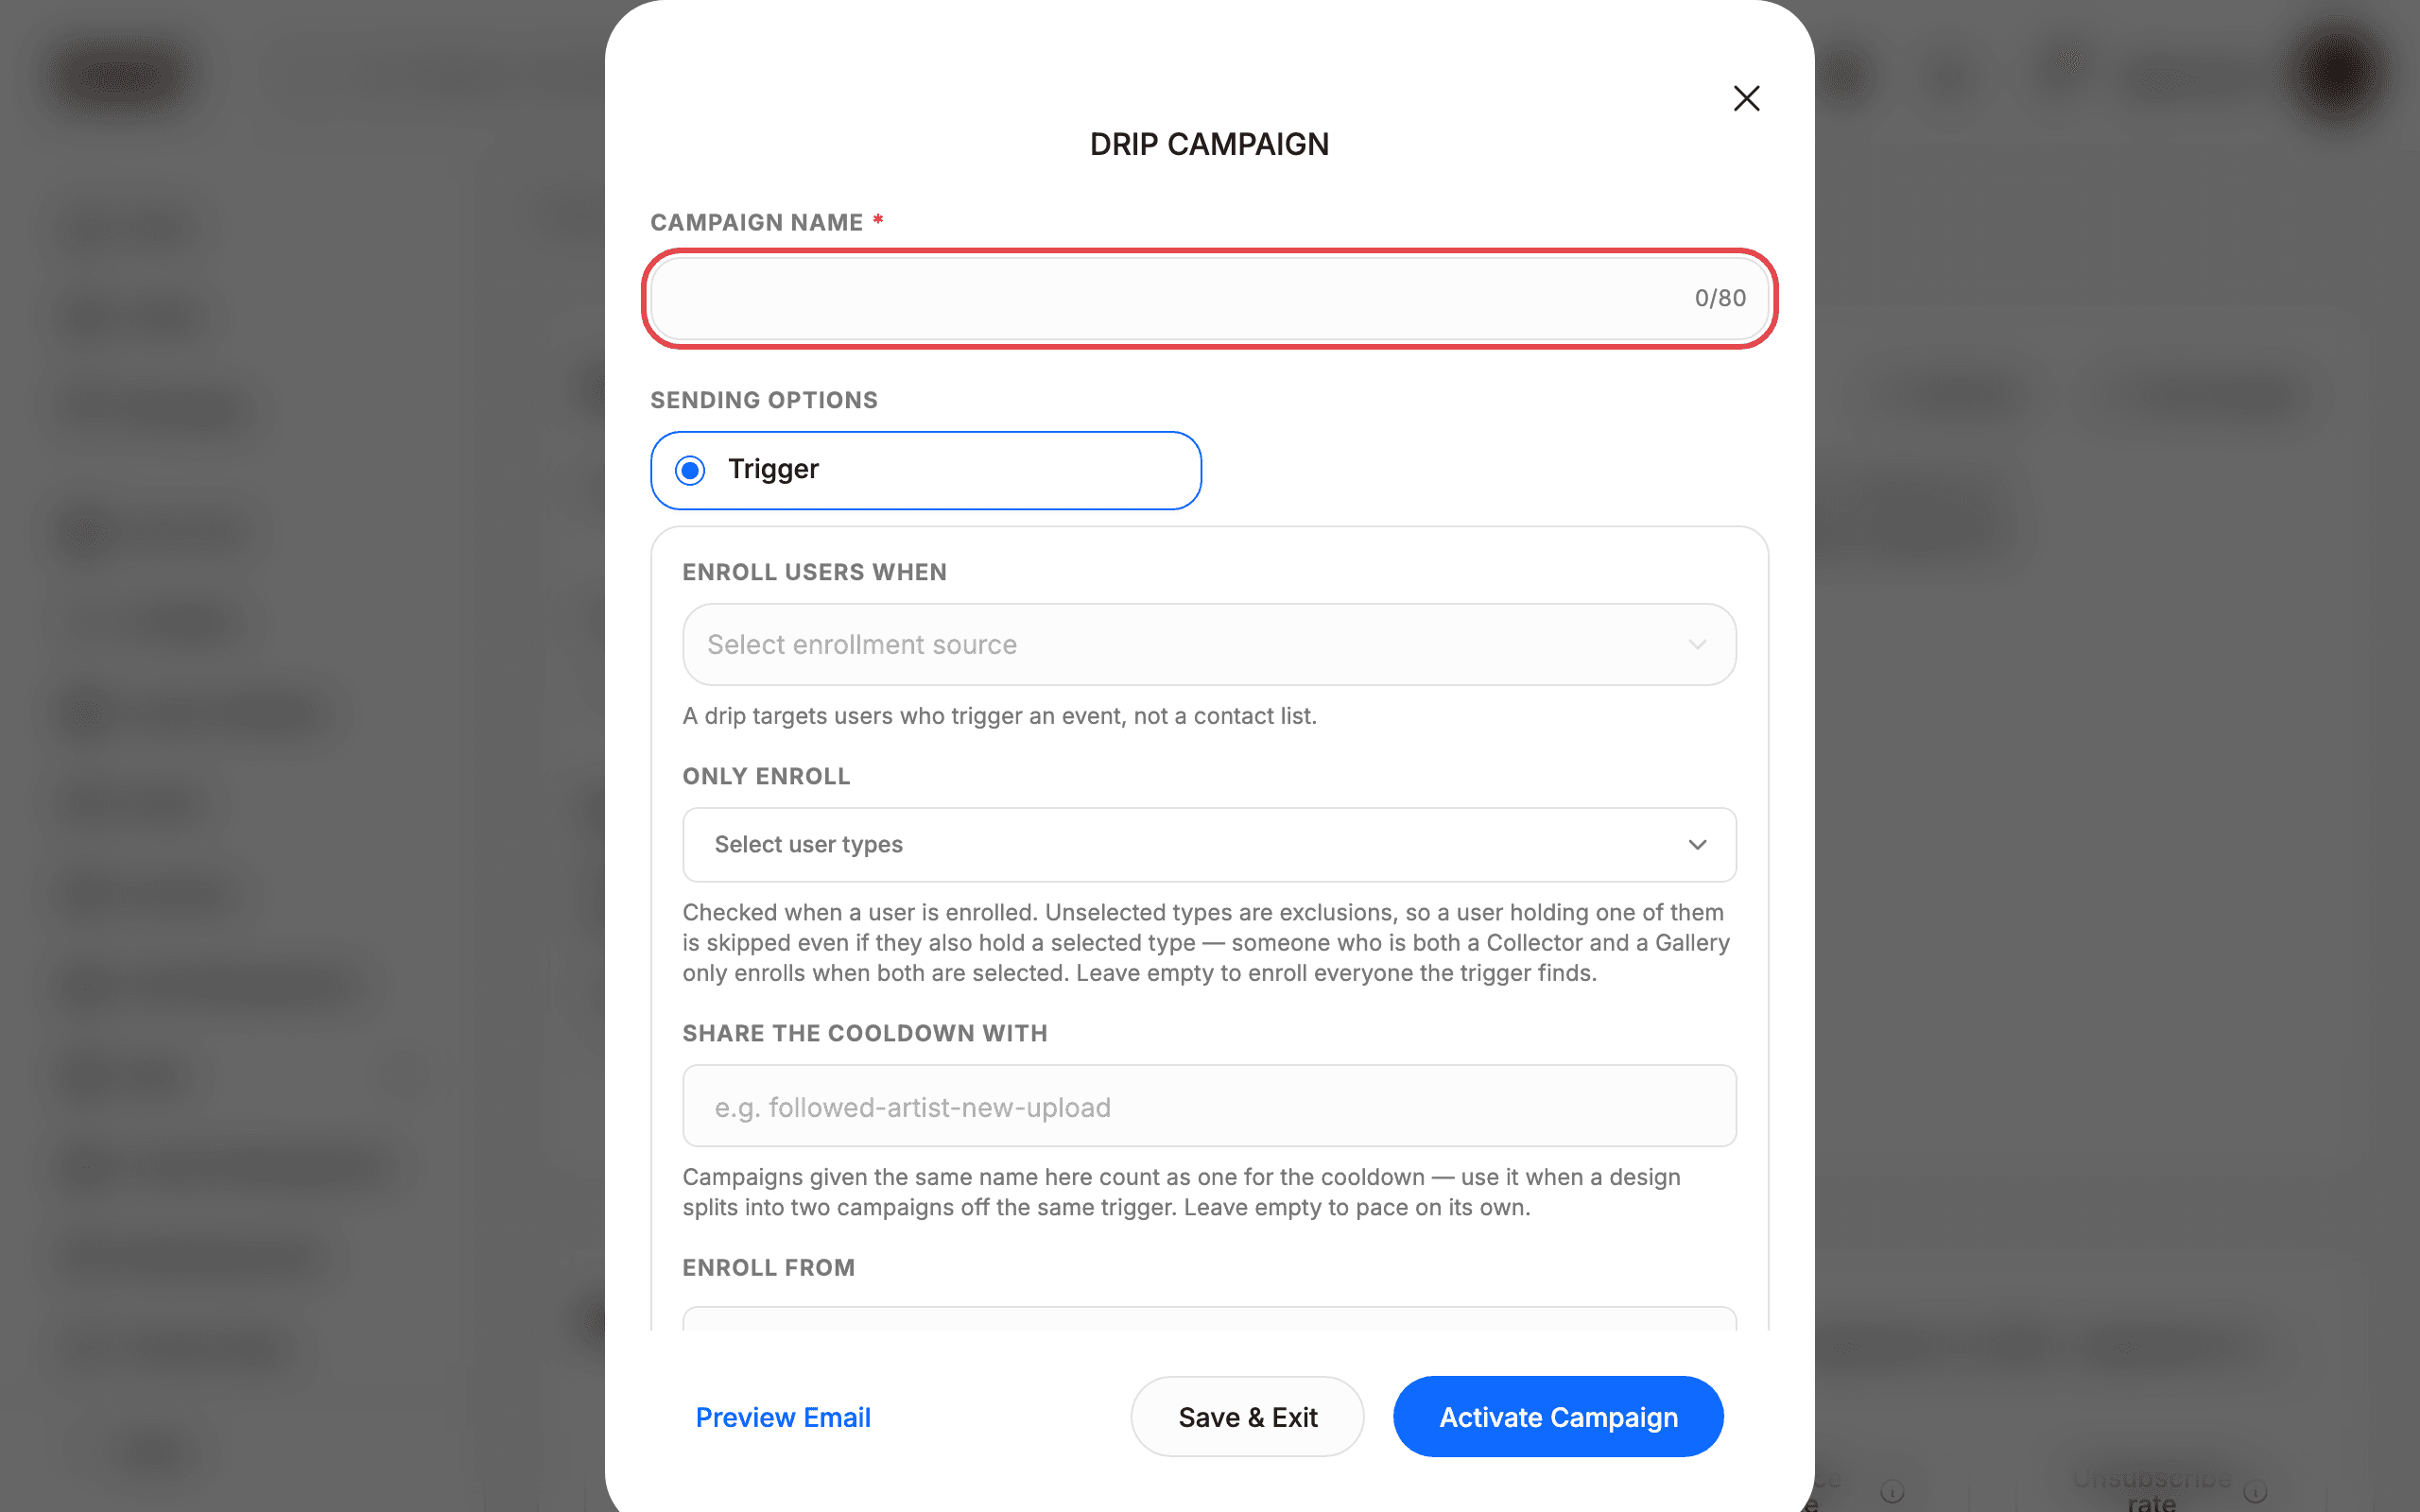
Open the campaign detail page. Click Edit Campaign. Type the campaign name in CAMPAIGN NAME* (limit 0/80 characters). The DRIP CAMPAIGN dialog contains: SENDING OPTIONS with the Trigger toggle; ENROLL USERS WHEN with Select enrollment source (“A drip targets users who trigger an event, not a contact list.”); ONLY ENROLL with Select user types (unselected types are exclusions); SHARE THE COOLDOWN WITH (for example followed-artist-new-upload); ENROLL FROM (for example MM/DD/YYYY hh:mm); STOP THE WHOLE DRIP WHEN (shows Select a trigger first until a trigger is chosen); and DRIP SCHEDULE with Someone enrolls, SEND AFTER ENROLLMENT in Day(s) (also Minute(s), Hour(s), Week(s), Month(s)), EMAIL 1, and REPEAT THIS EMAIL. On configured campaigns the detail page additionally shows Same artwork cooldown and Same person cooldown (for example 30 days), stop conditions such as Bought the artwork that triggered the email, Inquired about that artwork, and Made an offer on that artwork, plus per-email timing such as 3 days after enrollment with Repeats every 30 days. Click Save & Exit to keep changes without activating. Click Activate Campaign to turn the campaign on. Click Preview Email to review the content first.
13. Preview, send a test, and continue
Check the PREVIEW panel with the desktop and mobile toggle buttons. Click Send test email to receive a preview in your inbox. Click Continue to proceed to the next setup step. Use Save as new template to reuse this design in other campaigns. Use Save (or wait for Saving to finish) before clicking Continue. Do not click Send test email with real recipient data — it sends an actual email.
Tips
- Campaigns here are Enrollment-based — they send to users who trigger an event — with a Drip frequency (for example Drip · 1 email); some use more emails. There is no one-time broadcast type on this page.
- Clicking Create new campaign creates an empty draft immediately and opens the campaign editor. Each click creates another draft with a blank name and Inactive status.
- New drafts appear at the top of the list with an empty Name and today’s Date Added. Give the campaign a name in CAMPAIGN NAME* before leaving the editor.
- In the editor, EMAIL SUBJECT* is required. The Email 1 tab shows a warning icon until the subject is filled.
- While the editor autosaves, the save button reads Saving. Wait for it to finish before clicking Continue.
- The unsubscribes page can show
0.00%rates when few emails were sent. This is expected for new campaigns.
Troubleshooting
- Campaign data does not load on the campaign list → you are not signed in with a Master-operator account → sign in first with an operator account.
- Campaign table shows only grey placeholder bars → the table loads slowly → wait a few seconds for Active or Inactive to appear, then try searching again.
- STOP THE WHOLE DRIP WHEN reads Select a trigger first → no enrollment trigger is chosen yet → pick the trigger in ENROLLS WHEN first.
- Enrollments table is empty or shows No results. → the campaign is new or rows are still loading → click Refresh if rows show Loading….