How to Manage Platform Pricing
Overview
Platform Pricing is where the platform’s cut of every payment is defined, so this page controls how fees are computed across the marketplace. It is for platform operators with the Master role — sellers never see or edit these schemes. A pricing scheme combines ordered conditional rules (segmented by subscription plan, total sales amount, or purchase source), a fee type of Percentage, Fixed, or Mixed, optional additional fees that stack on top, and a fallback rule for payments that match nothing. Assigning groups decides which accounts each scheme applies to, and archiving retires old schemes while the default scheme can never be archived. Because Save and enable activates a scheme immediately, your edits change what future payments collect. By the end, you will be able to read the Active and Archived tables and build a new scheme field by field.
Before you start
- A Cohart account with the Master (platform-operator) role. The Master section of the sidebar is only visible to platform operators.
- The scheme’s name, its conditional rules (each with a rule name, condition, and fee type), and the groups it should apply to. Know which purchase sources, plans, or sales thresholds each rule must match, since rules run in order and the first match wins.
- There is no preview step — Save and enable activates the scheme immediately and changes fees on future matching payments. Use Save and disable or Close unless you mean to change live fees.
- Effects to know: editing a scheme changes what the platform collects on future matching payments across every account in its groups, and the default scheme can never be archived. Reading the tables and opening a scheme is safe — only saving changes fees.
Steps
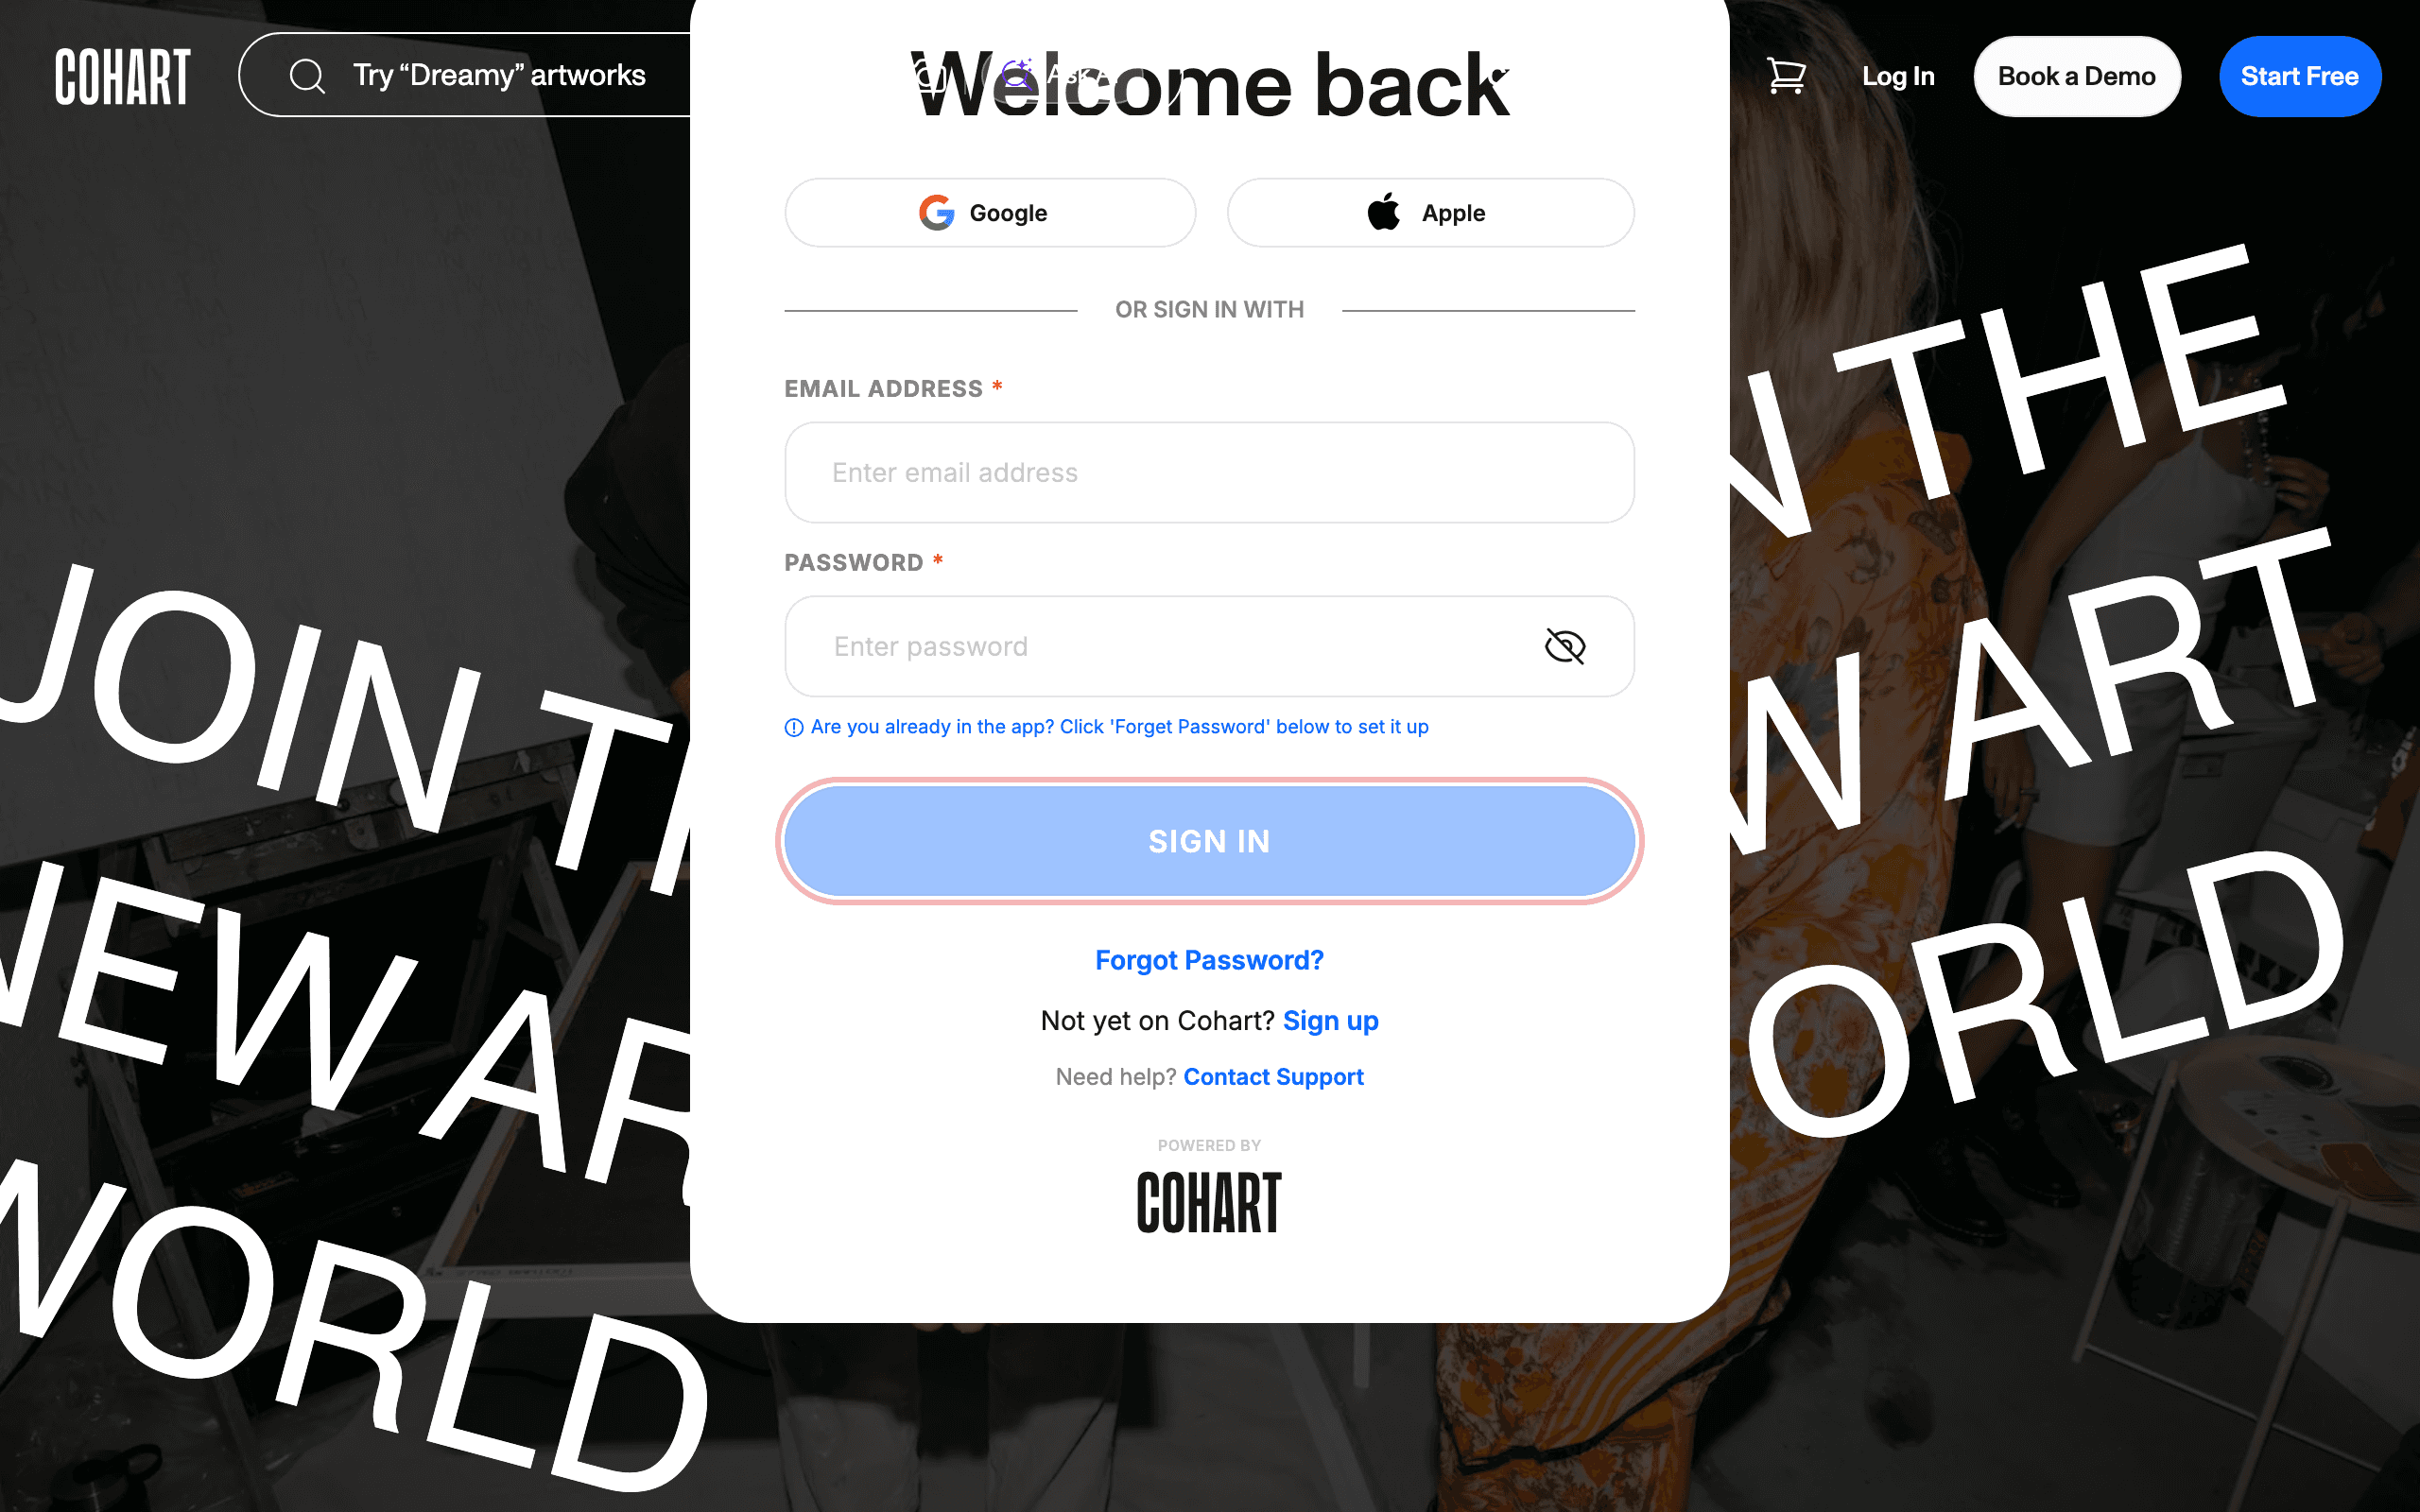
1. Sign in
Sign in with your operator account.
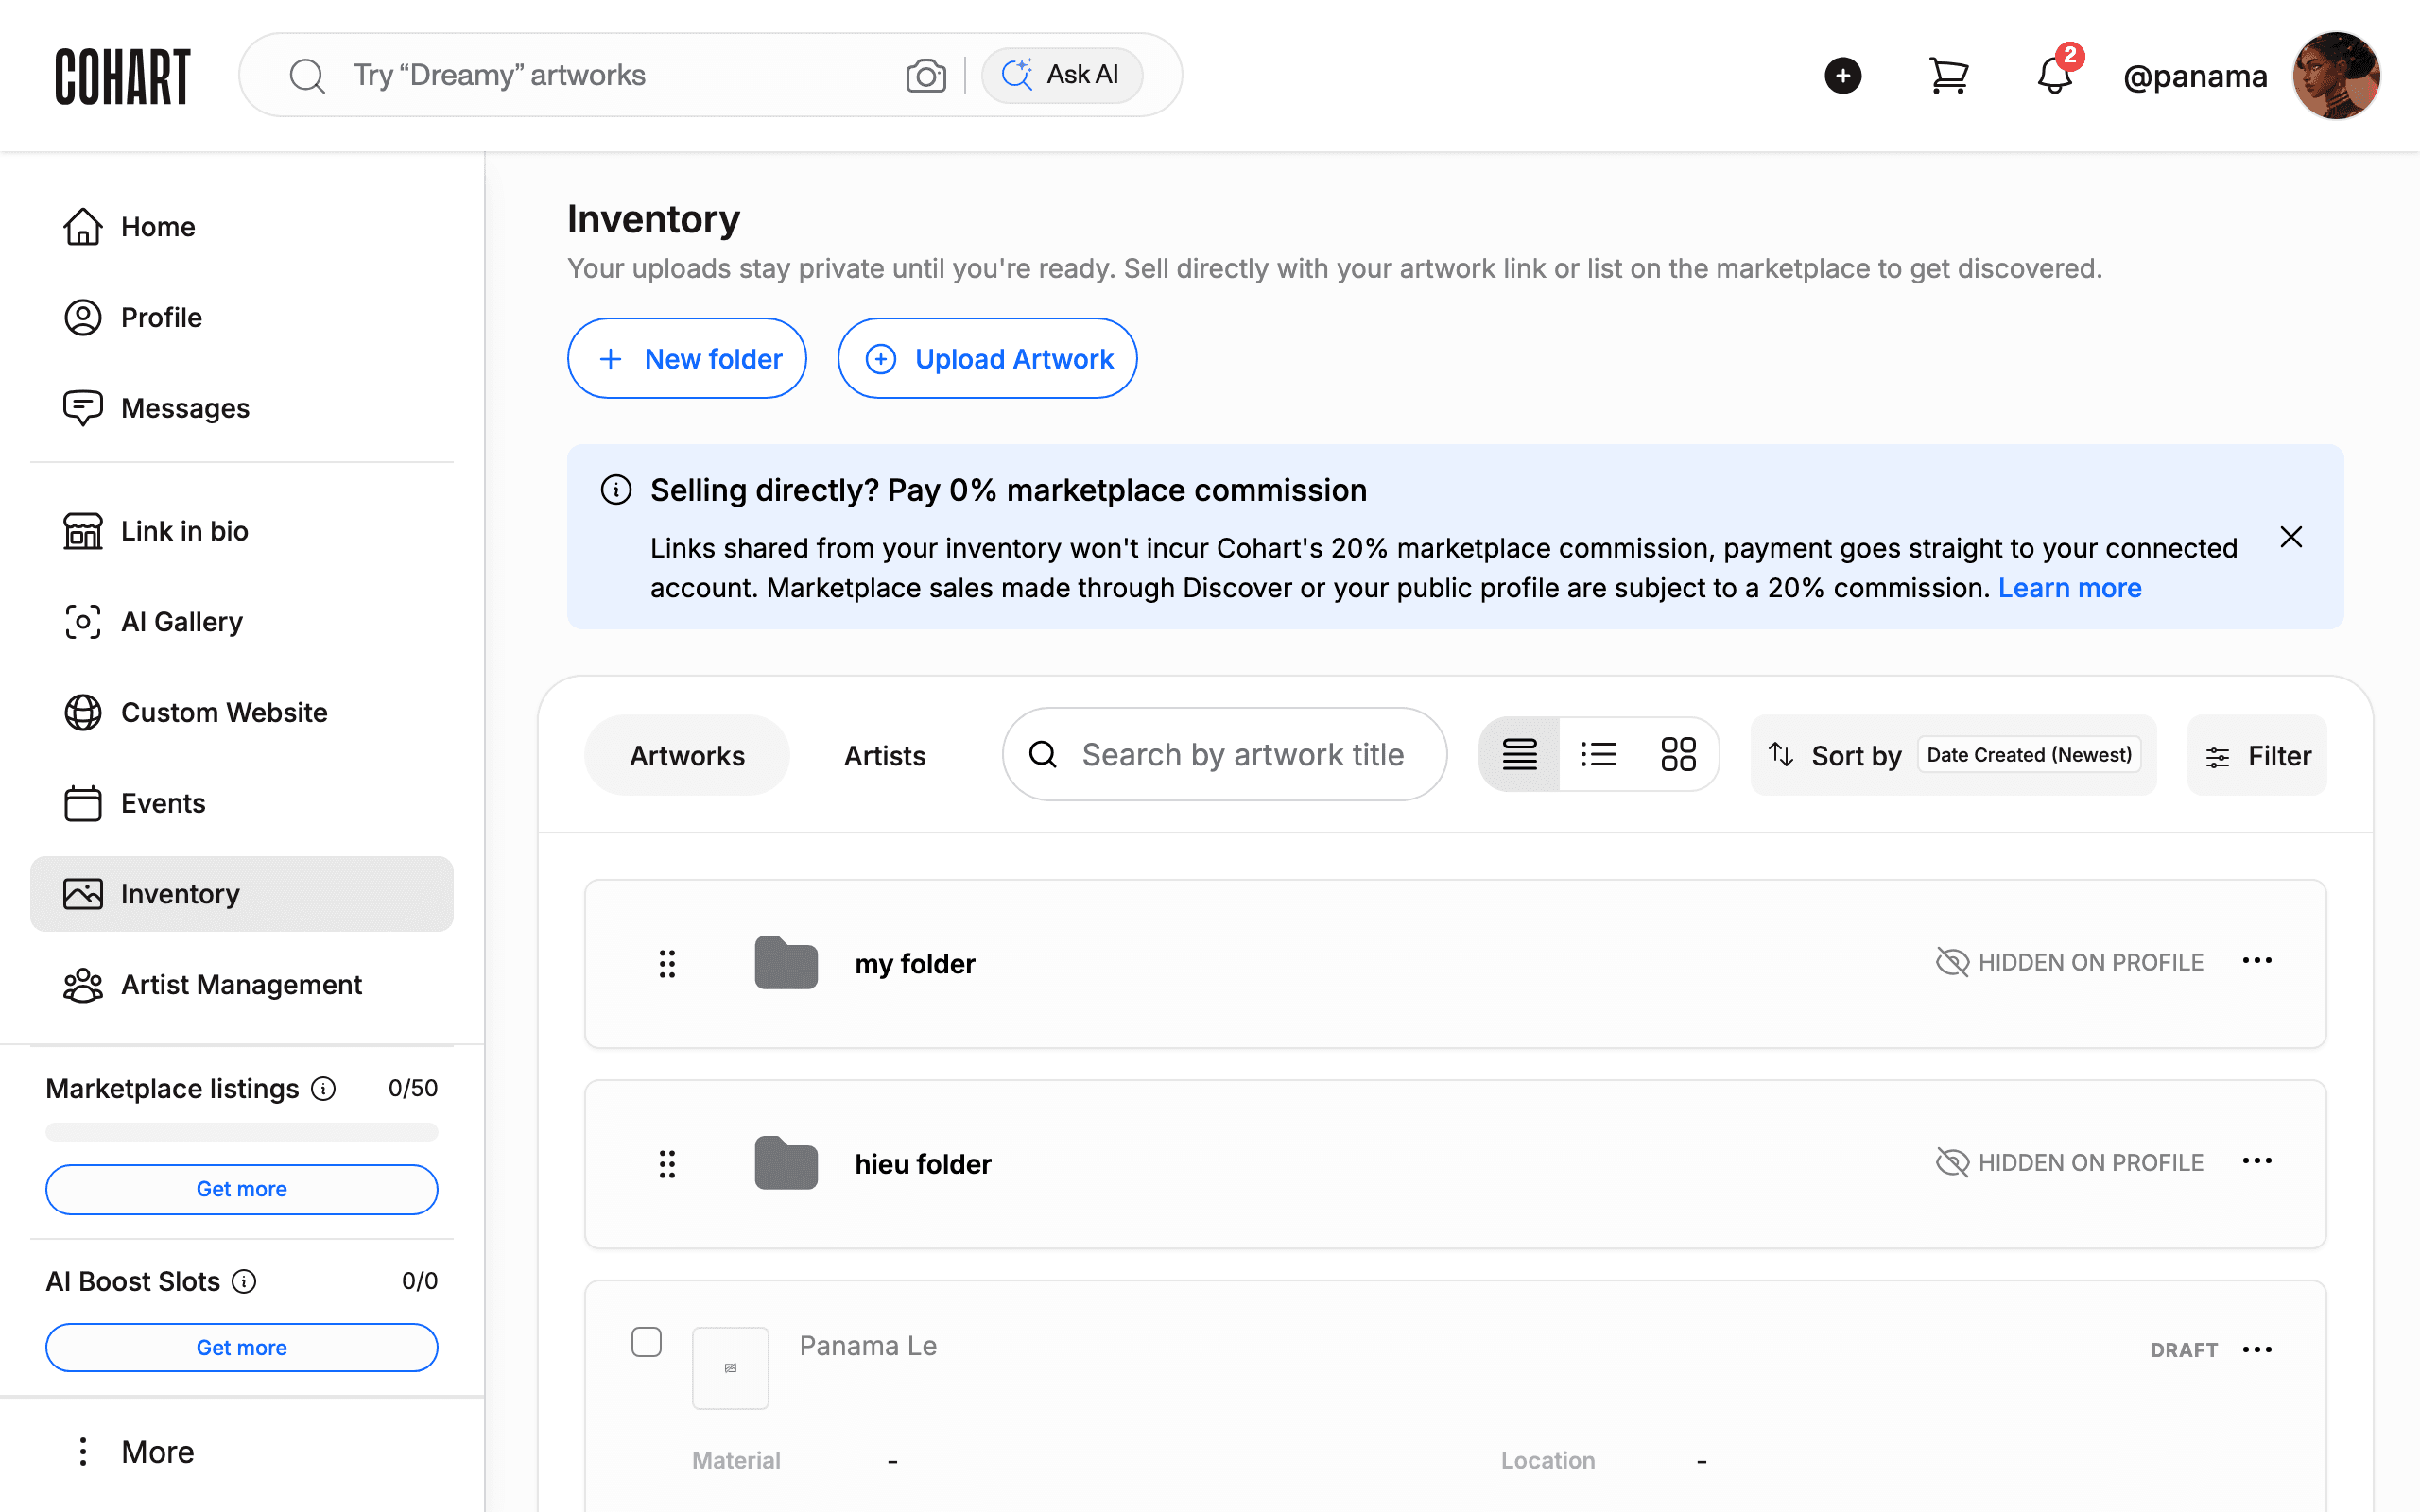
2. Confirm you are signed in
Confirm you are signed in. You land on Inventory and the header shows your profile handle (your own handle).
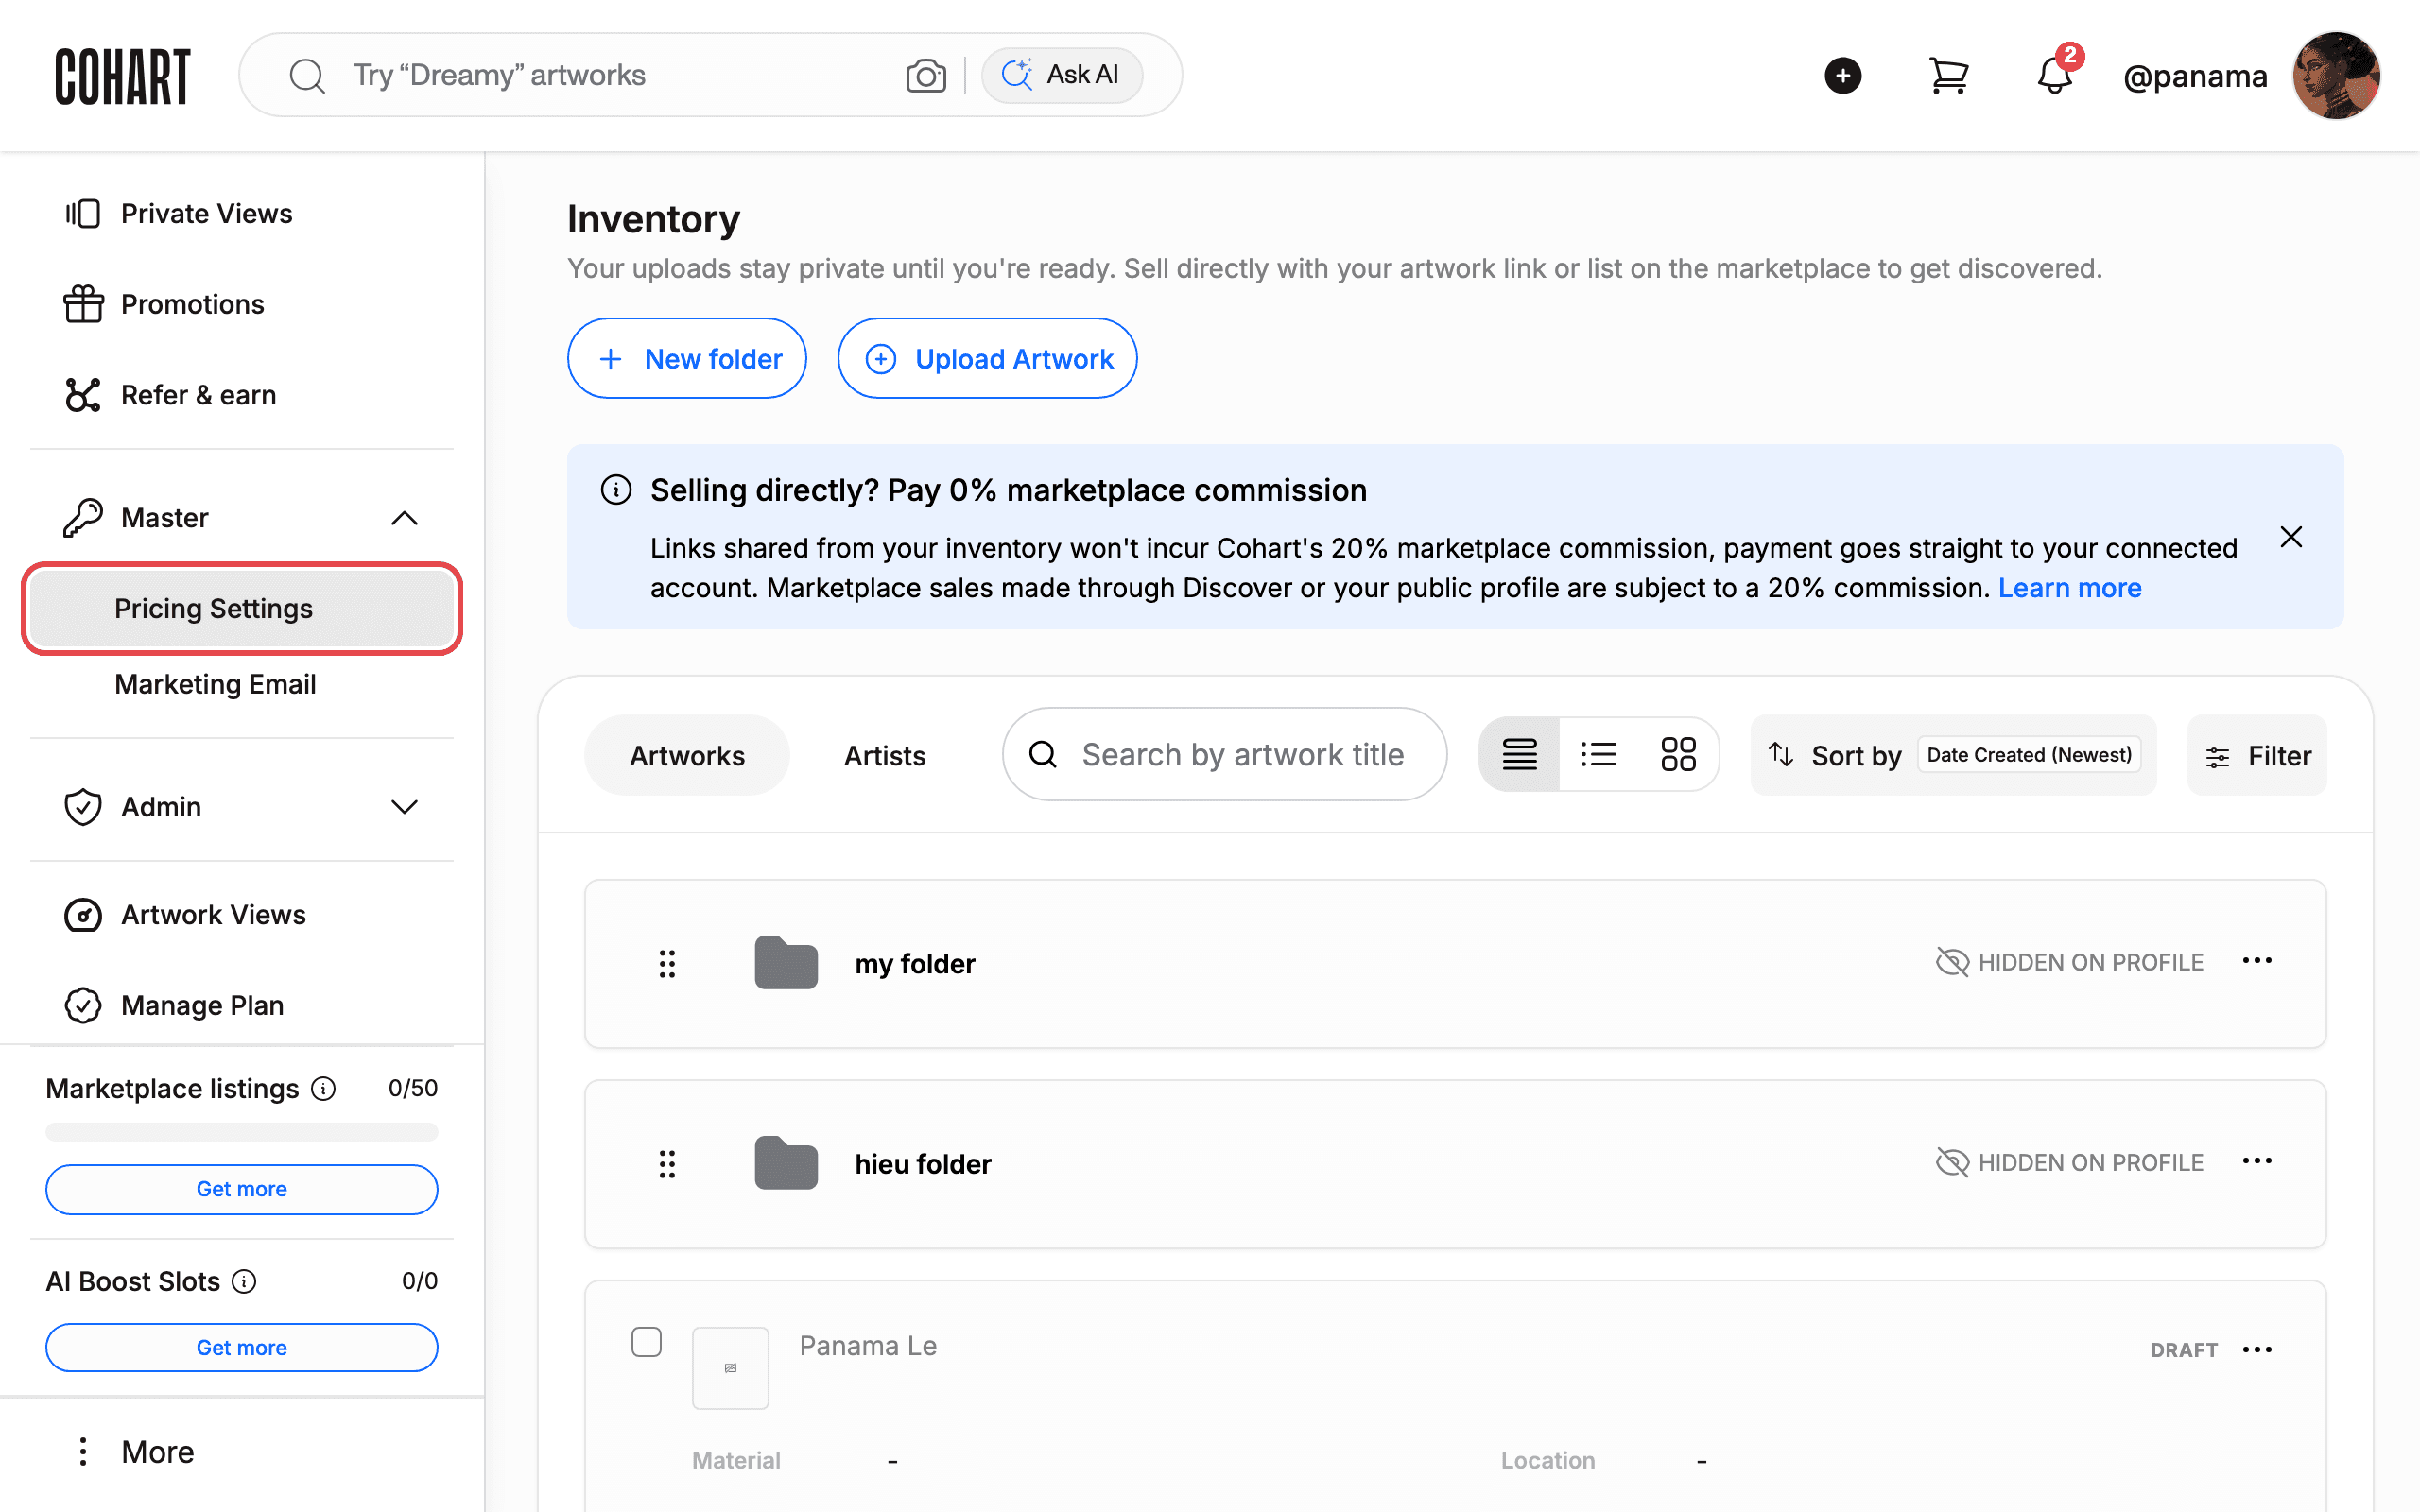
3. Expand Master in the sidebar
In the sidebar, click Master to expand it. It reveals Pricing Settings and Marketing Email.
4. Open Pricing Settings
Under Master, click Pricing Settings. Confirm the page heading reads Platform Pricing.
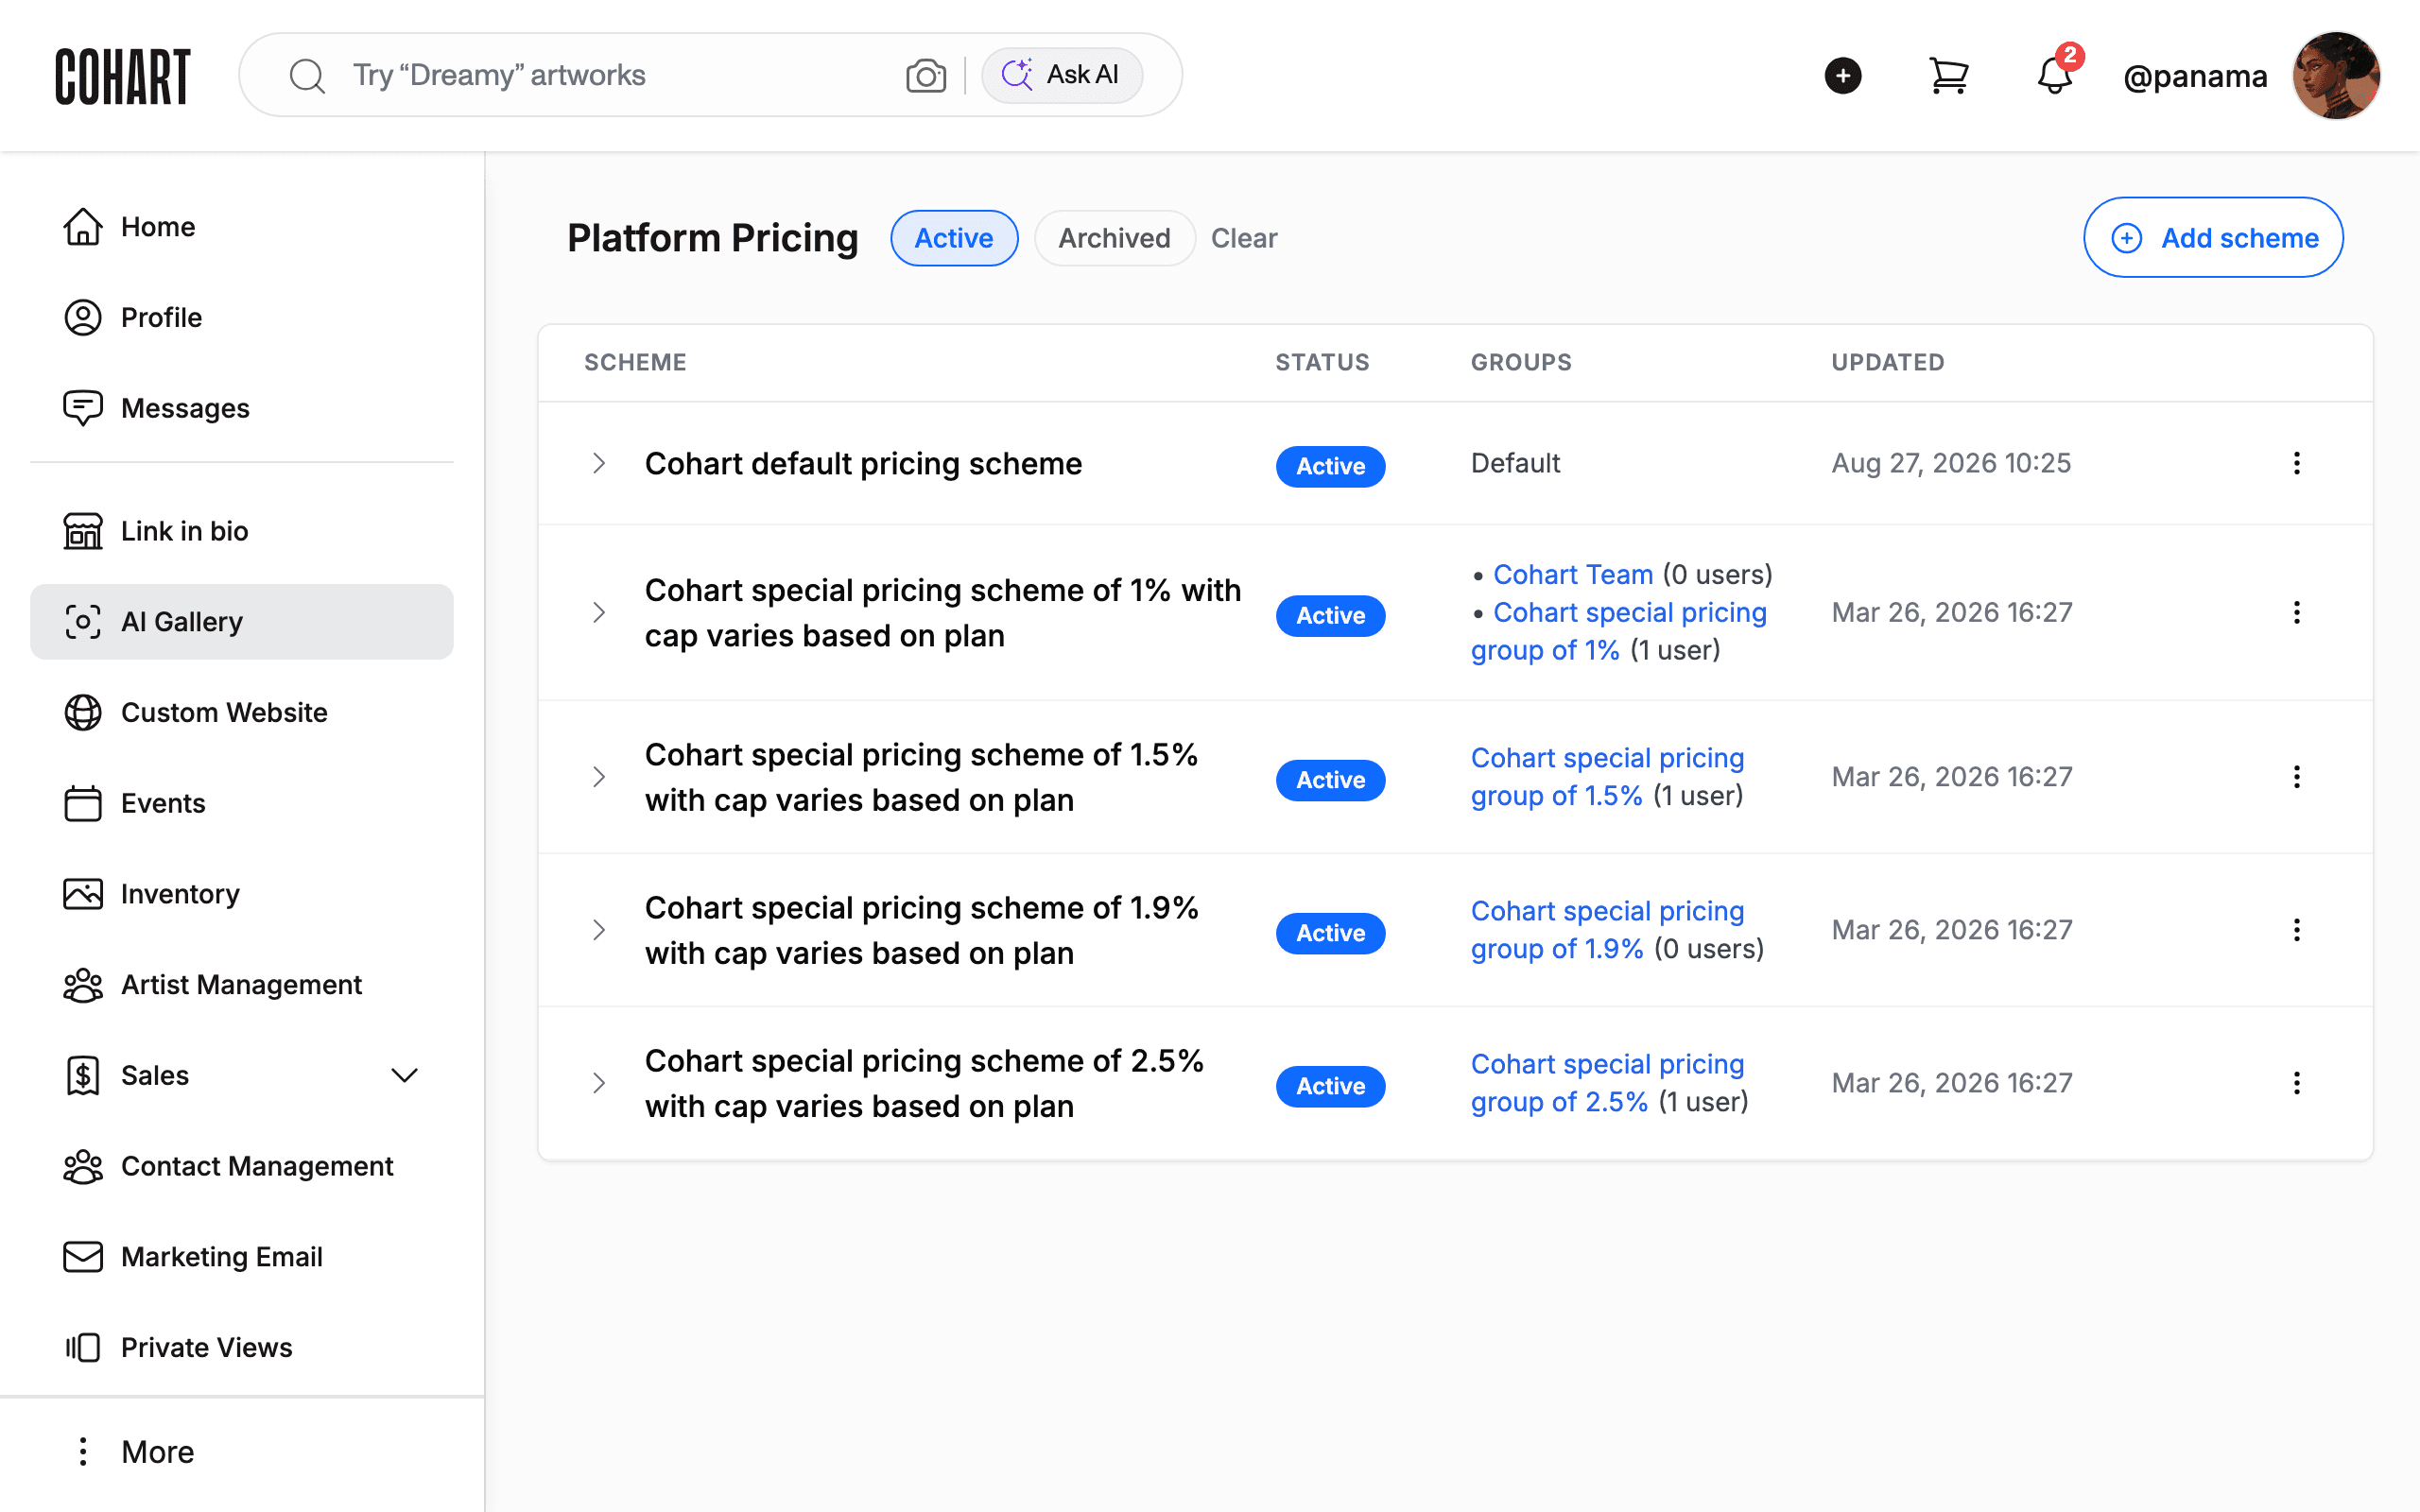
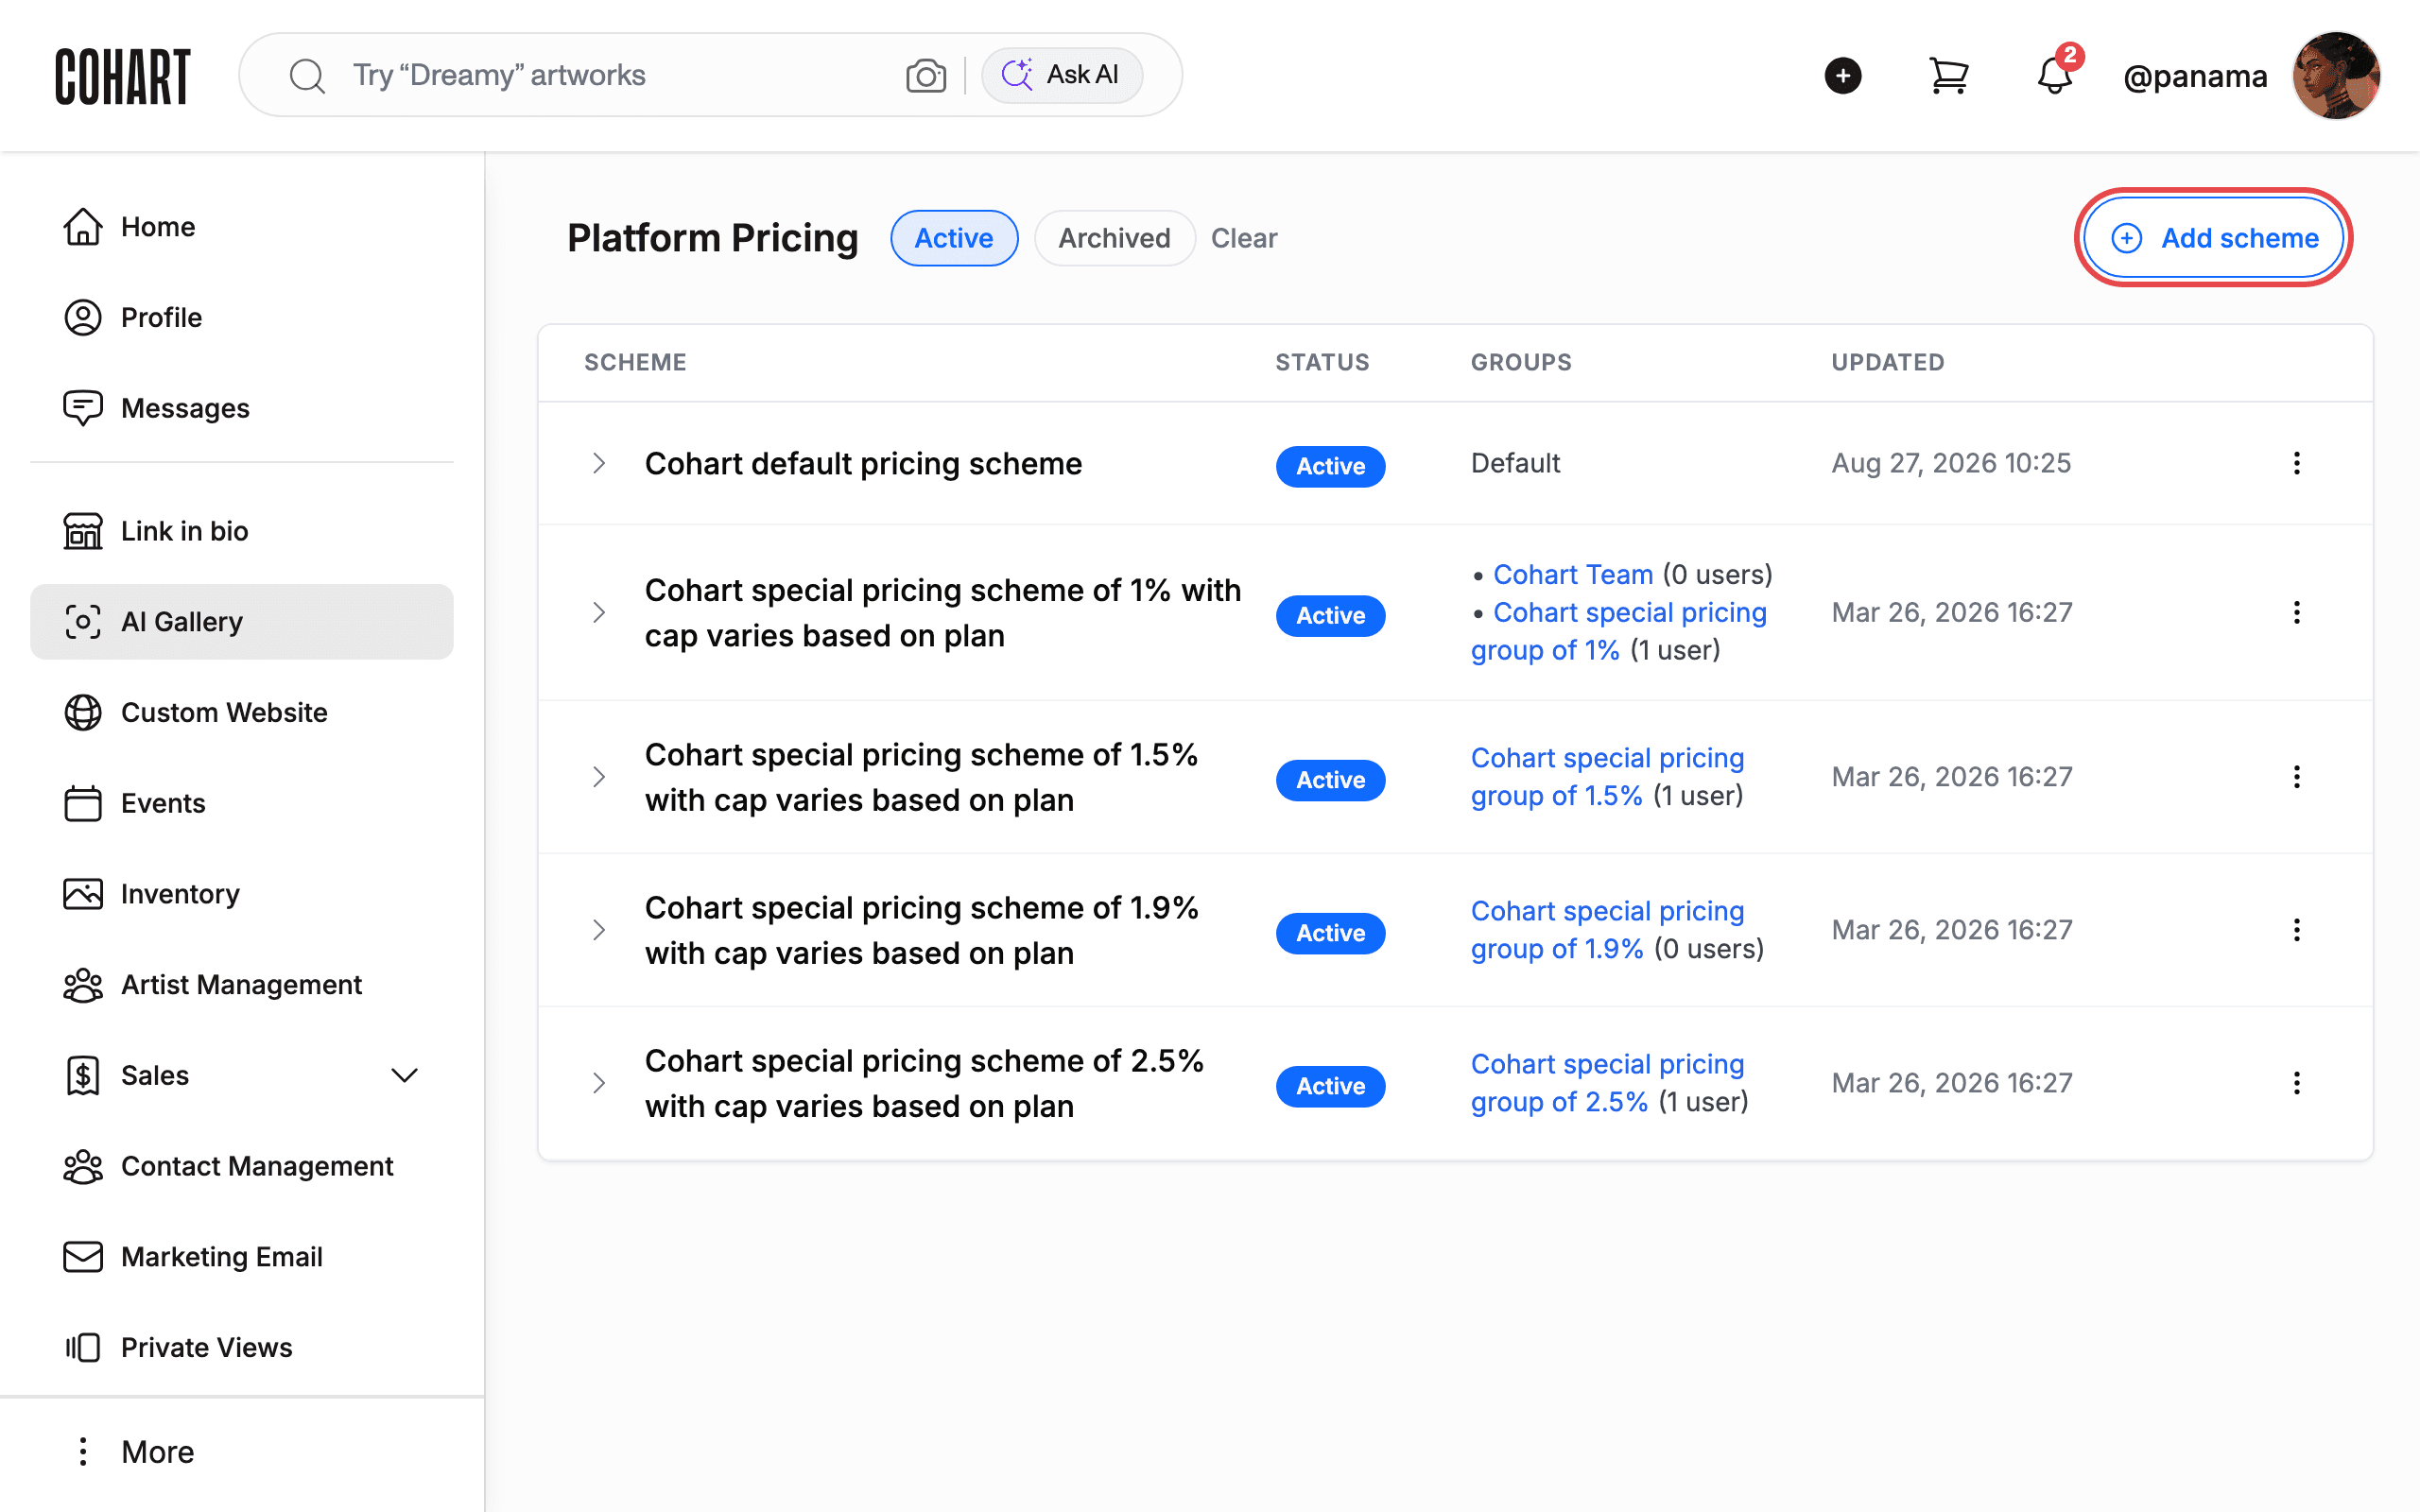
5. Read the Active schemes table
Read the Active schemes table. Each row shows the scheme name, a status pill (Active), the assigned GROUPS with user counts, and the UPDATED timestamp. Group names are links that open the group. To create a scheme, click Add scheme in the top-right corner.
6. Check the Archived tab
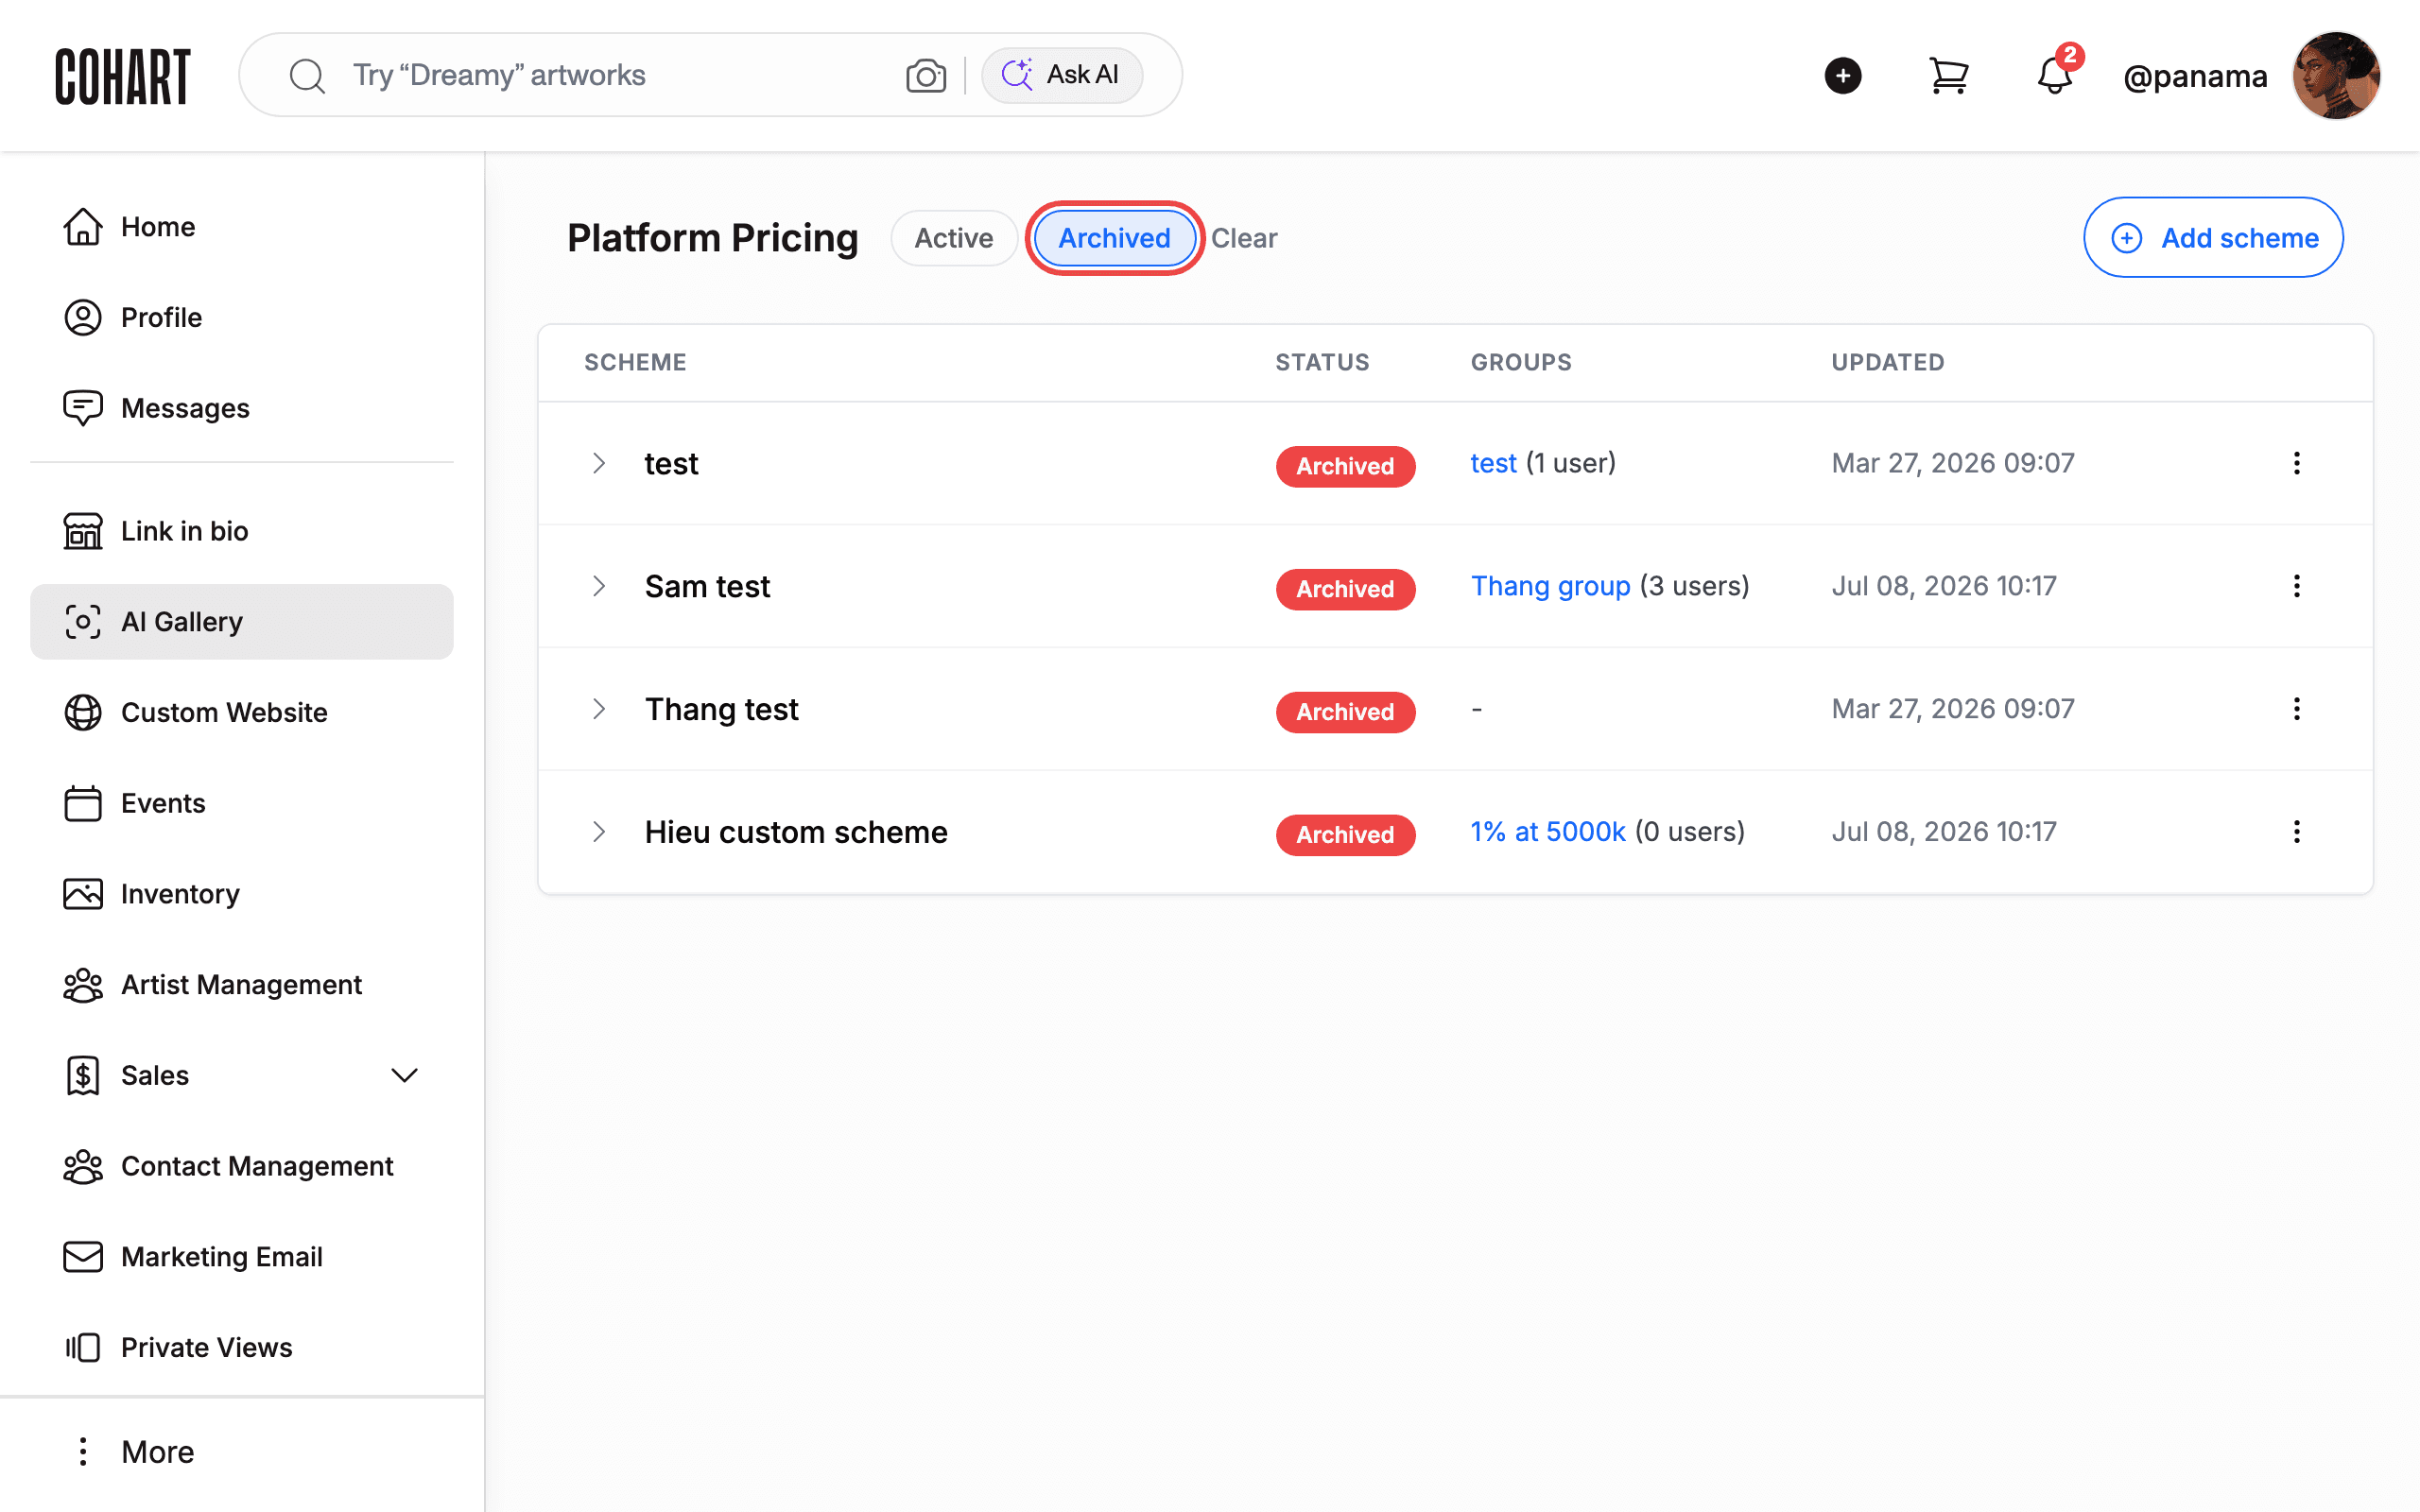
Click the Archived tab to see archived schemes. Archived rows carry a red Archived pill. Click Active to return.
7. Open a scheme’s row menu
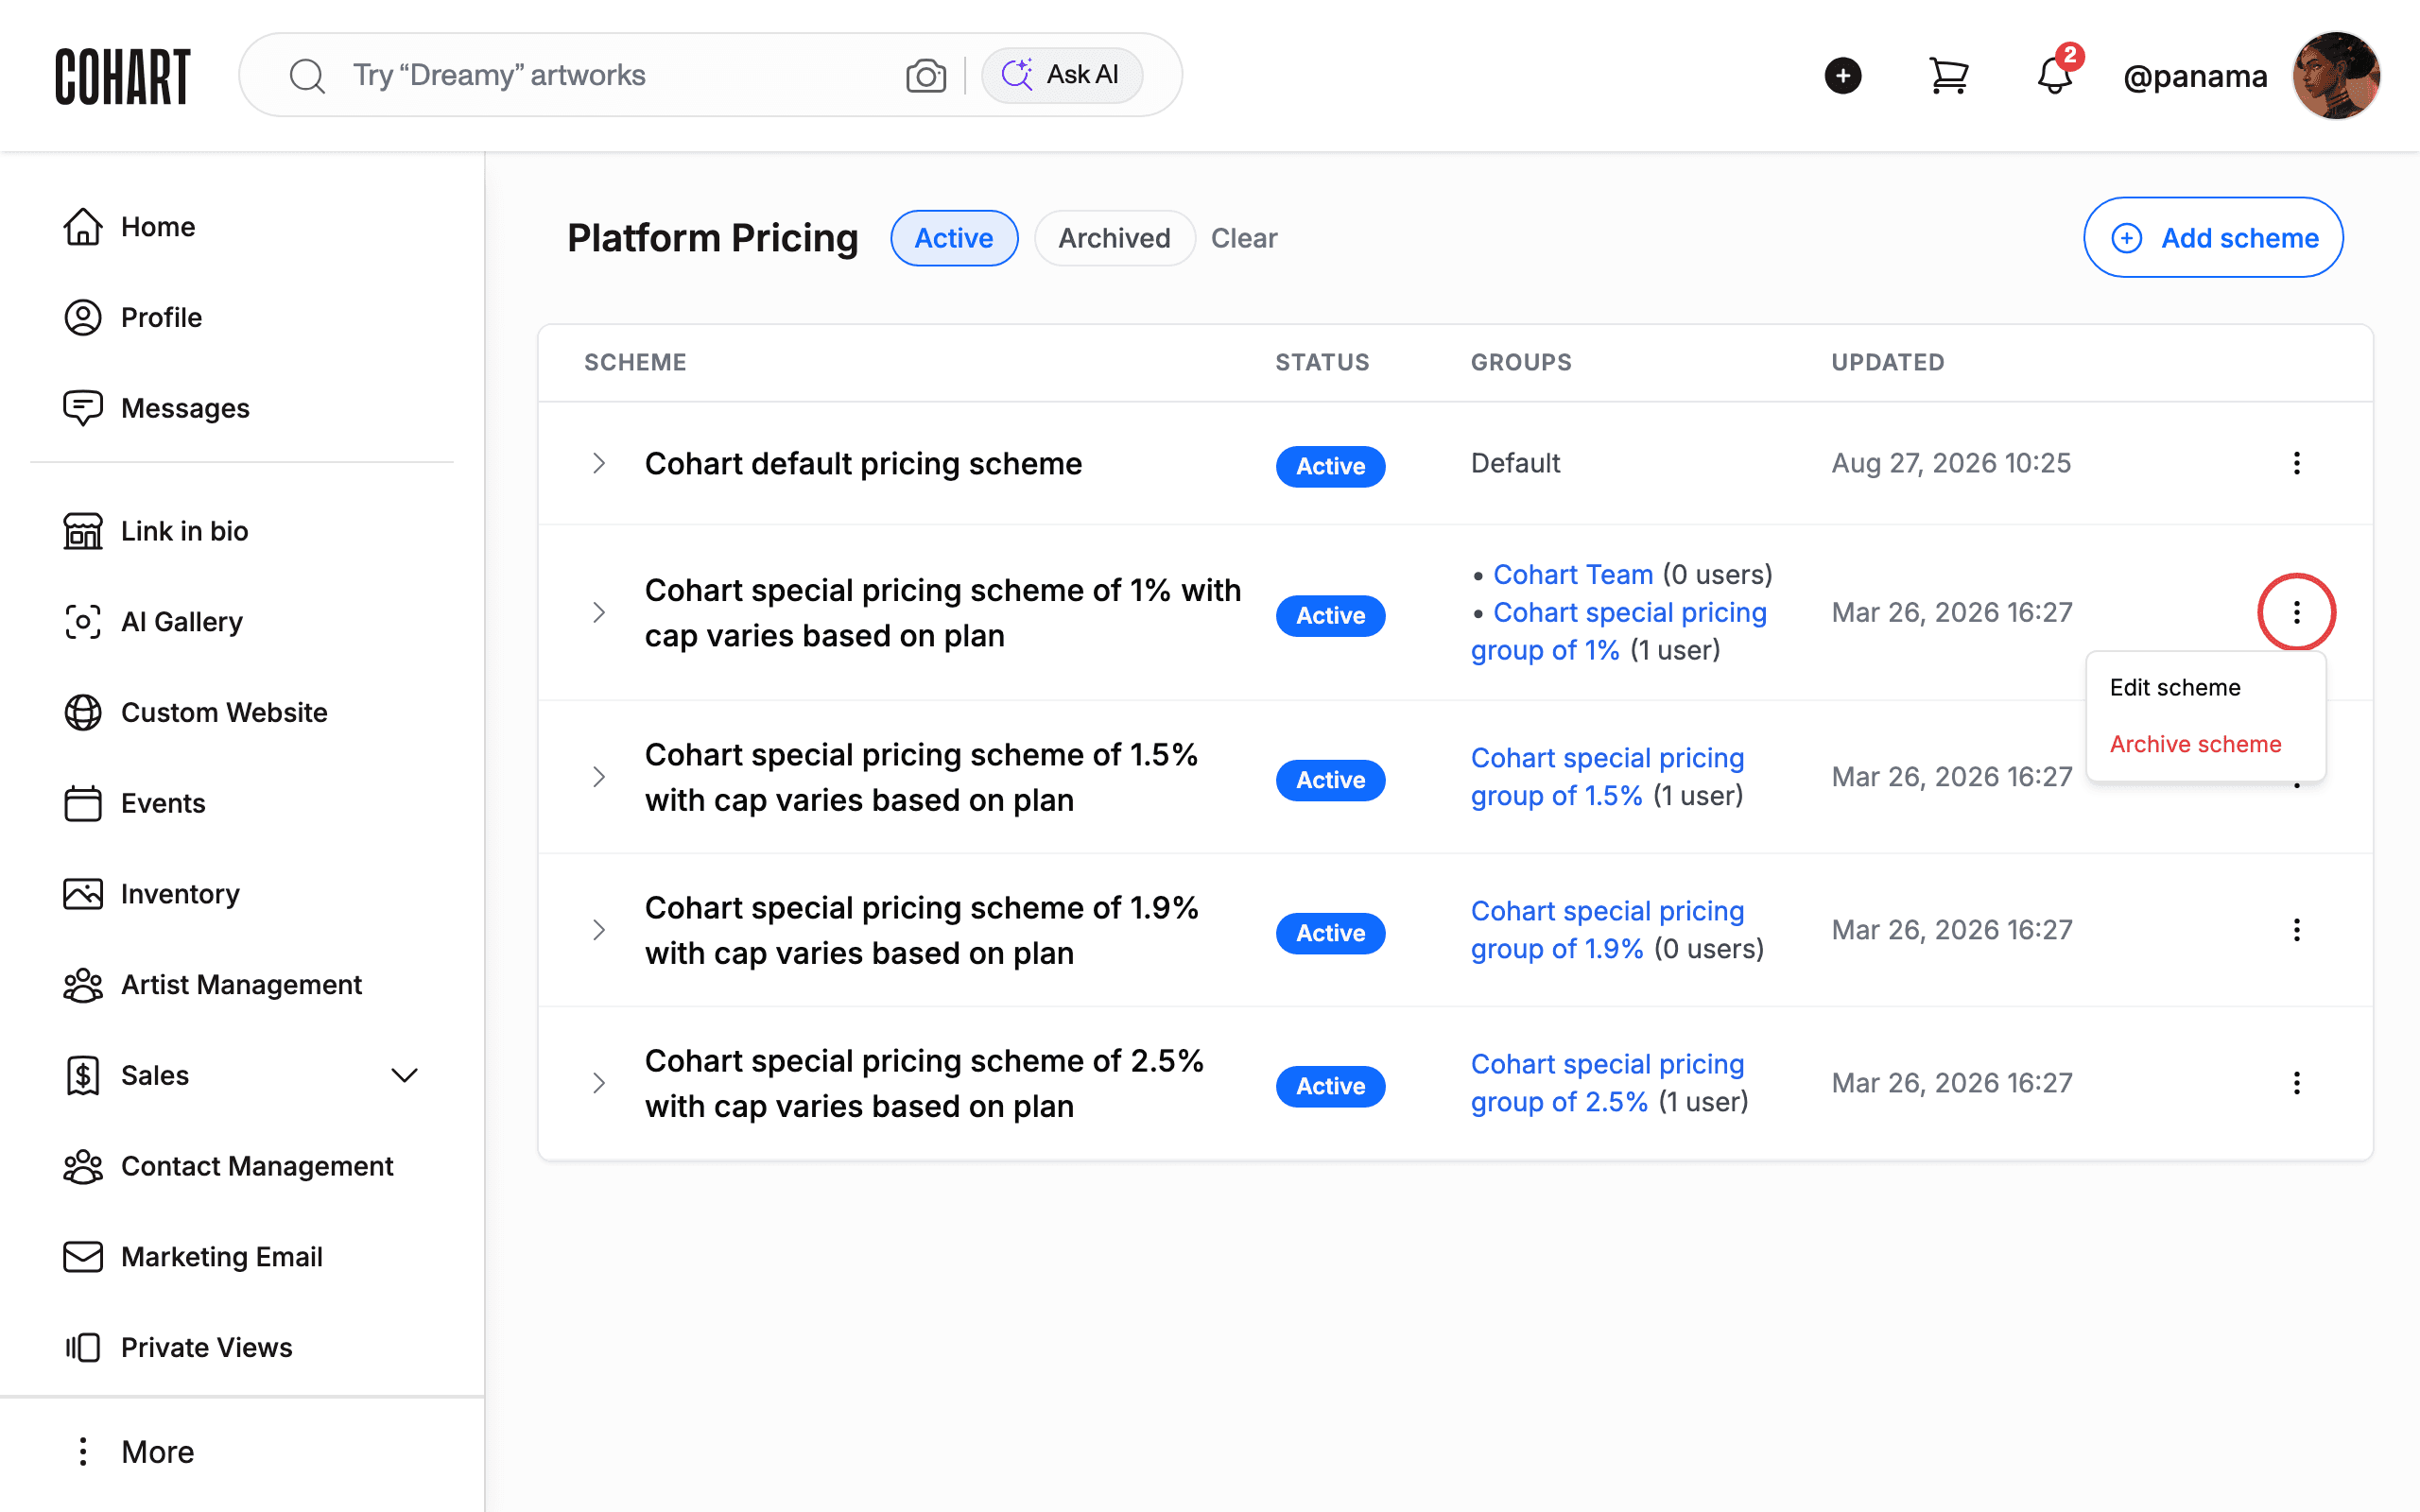
Click the three-dot menu button at the end of a scheme row. A non-default scheme offers Edit scheme and Archive scheme (shown in red). Opening the default scheme’s menu instead shows Edit scheme with Cannot archive default scheme disabled.
8. Name the new scheme
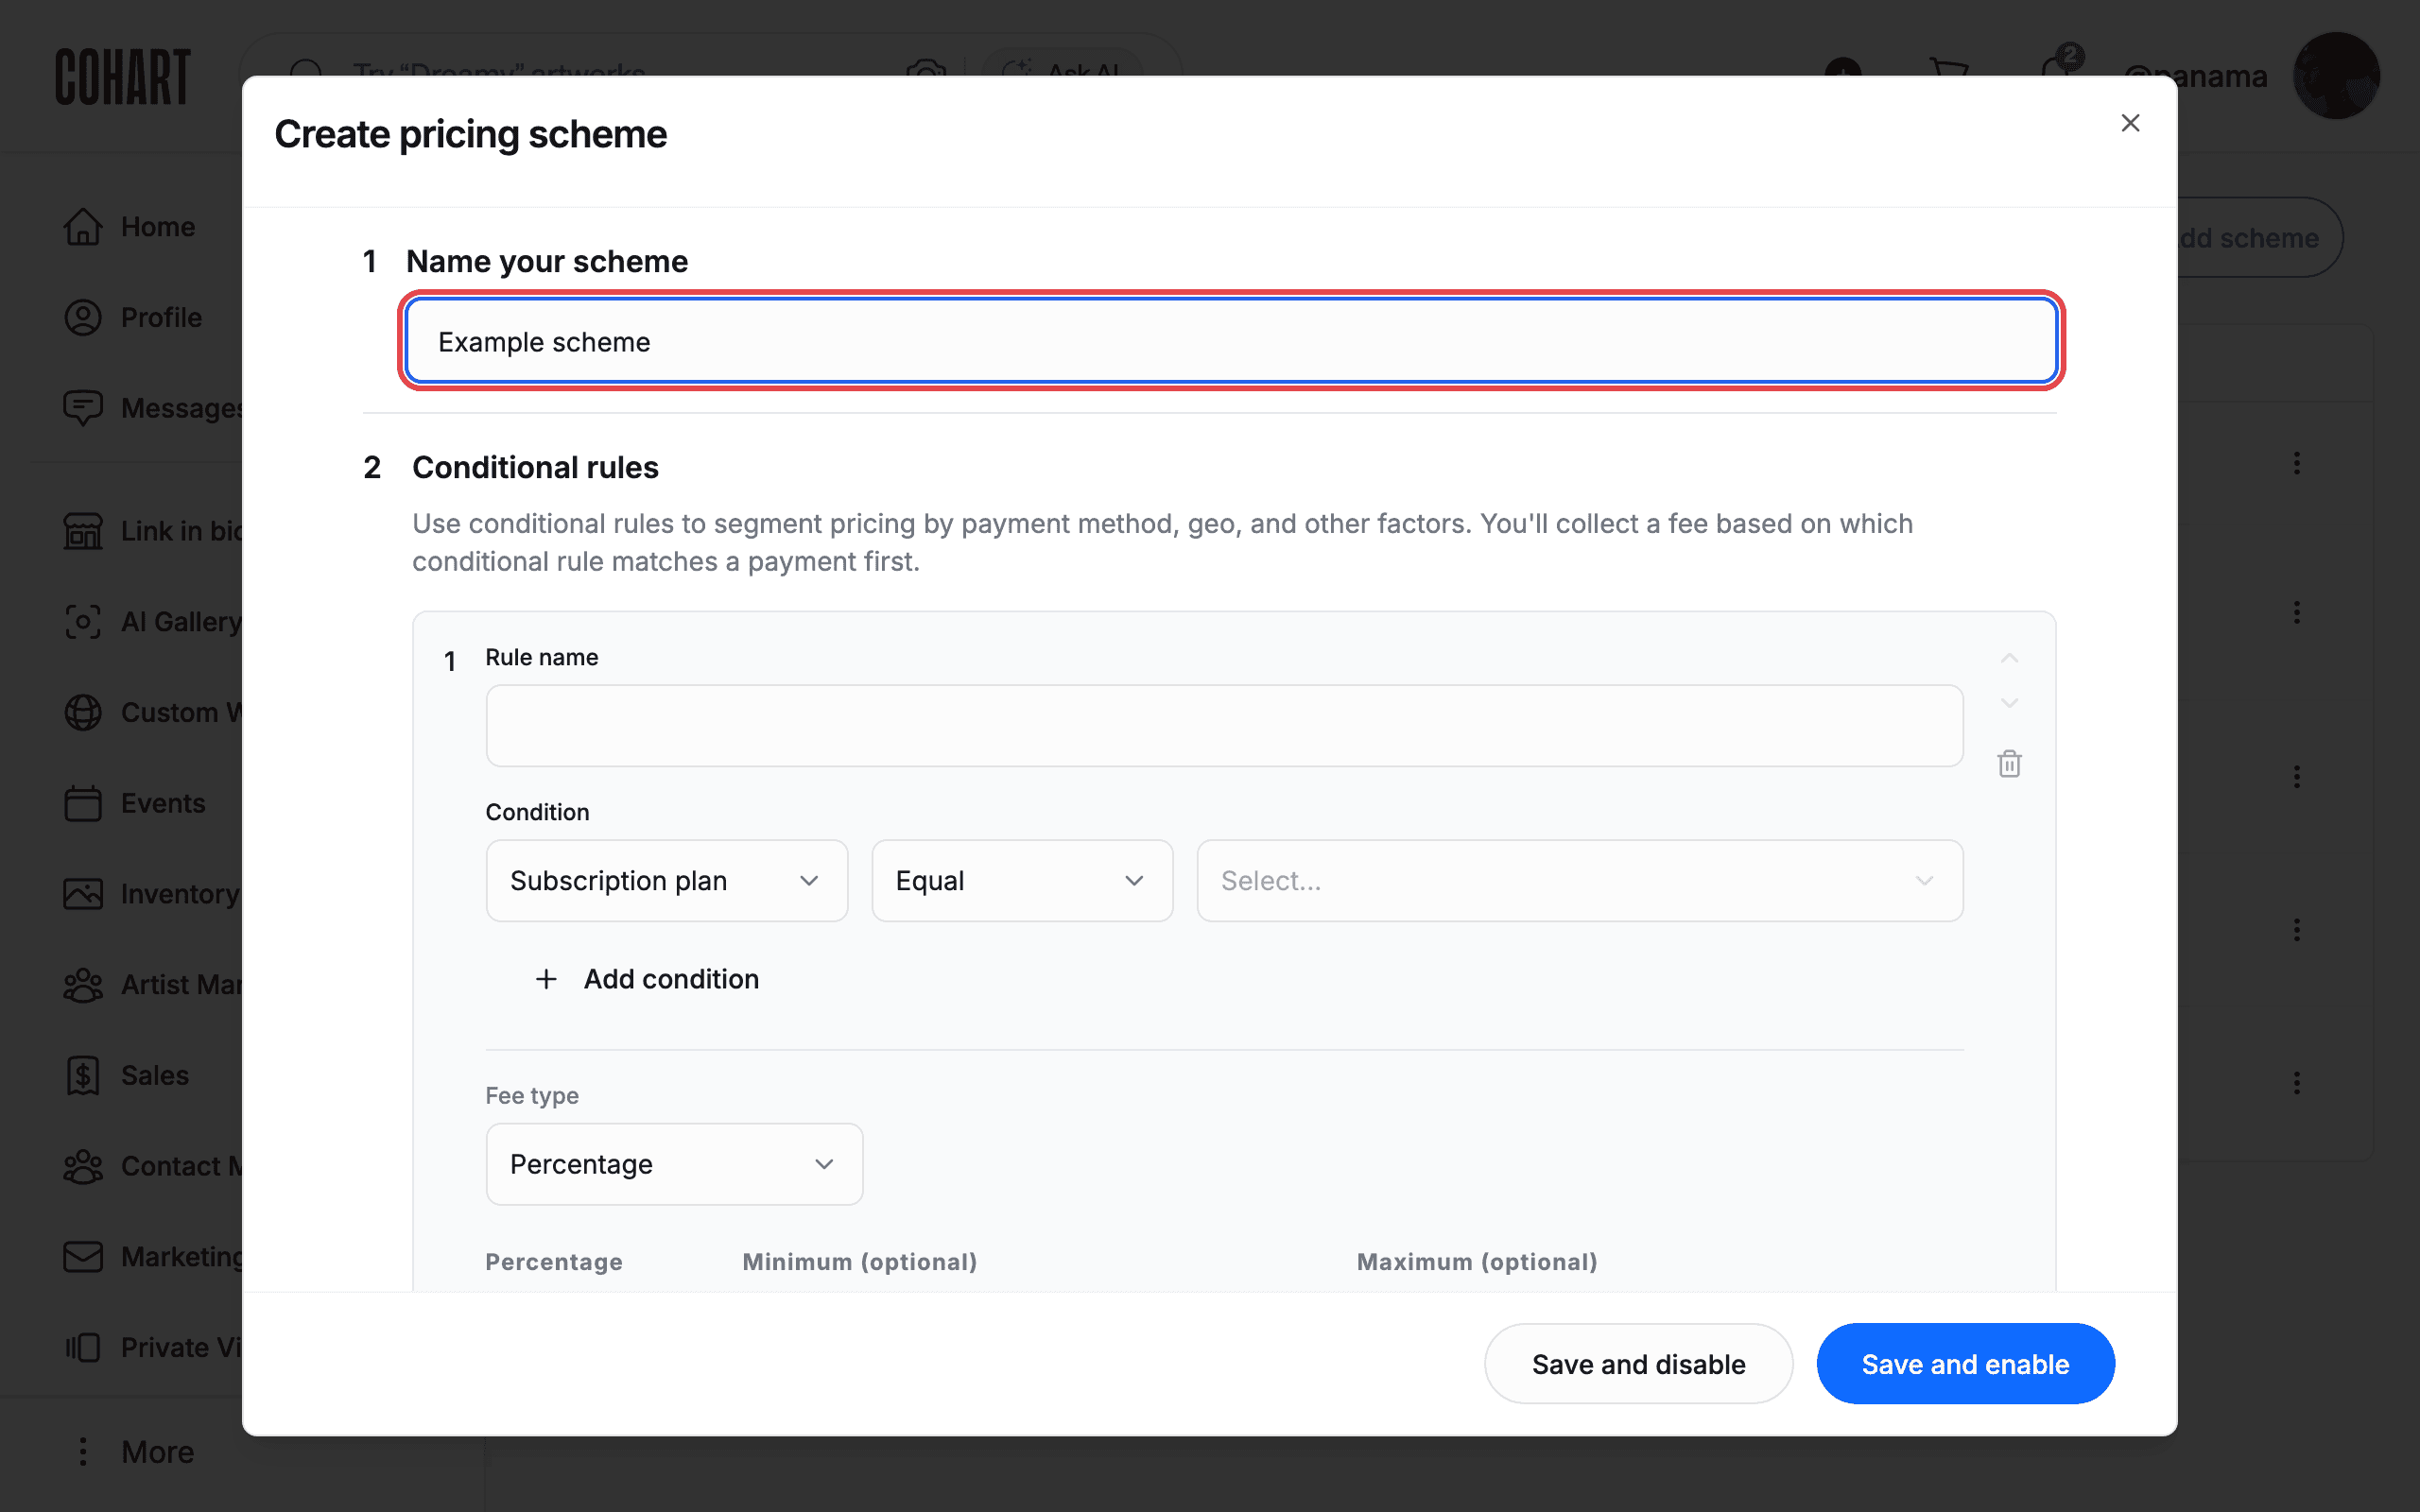
Click Add scheme to open the Create pricing scheme dialog. Under 1 Name your scheme, type the scheme’s display name into the text box.
9. Add a rule name and condition row
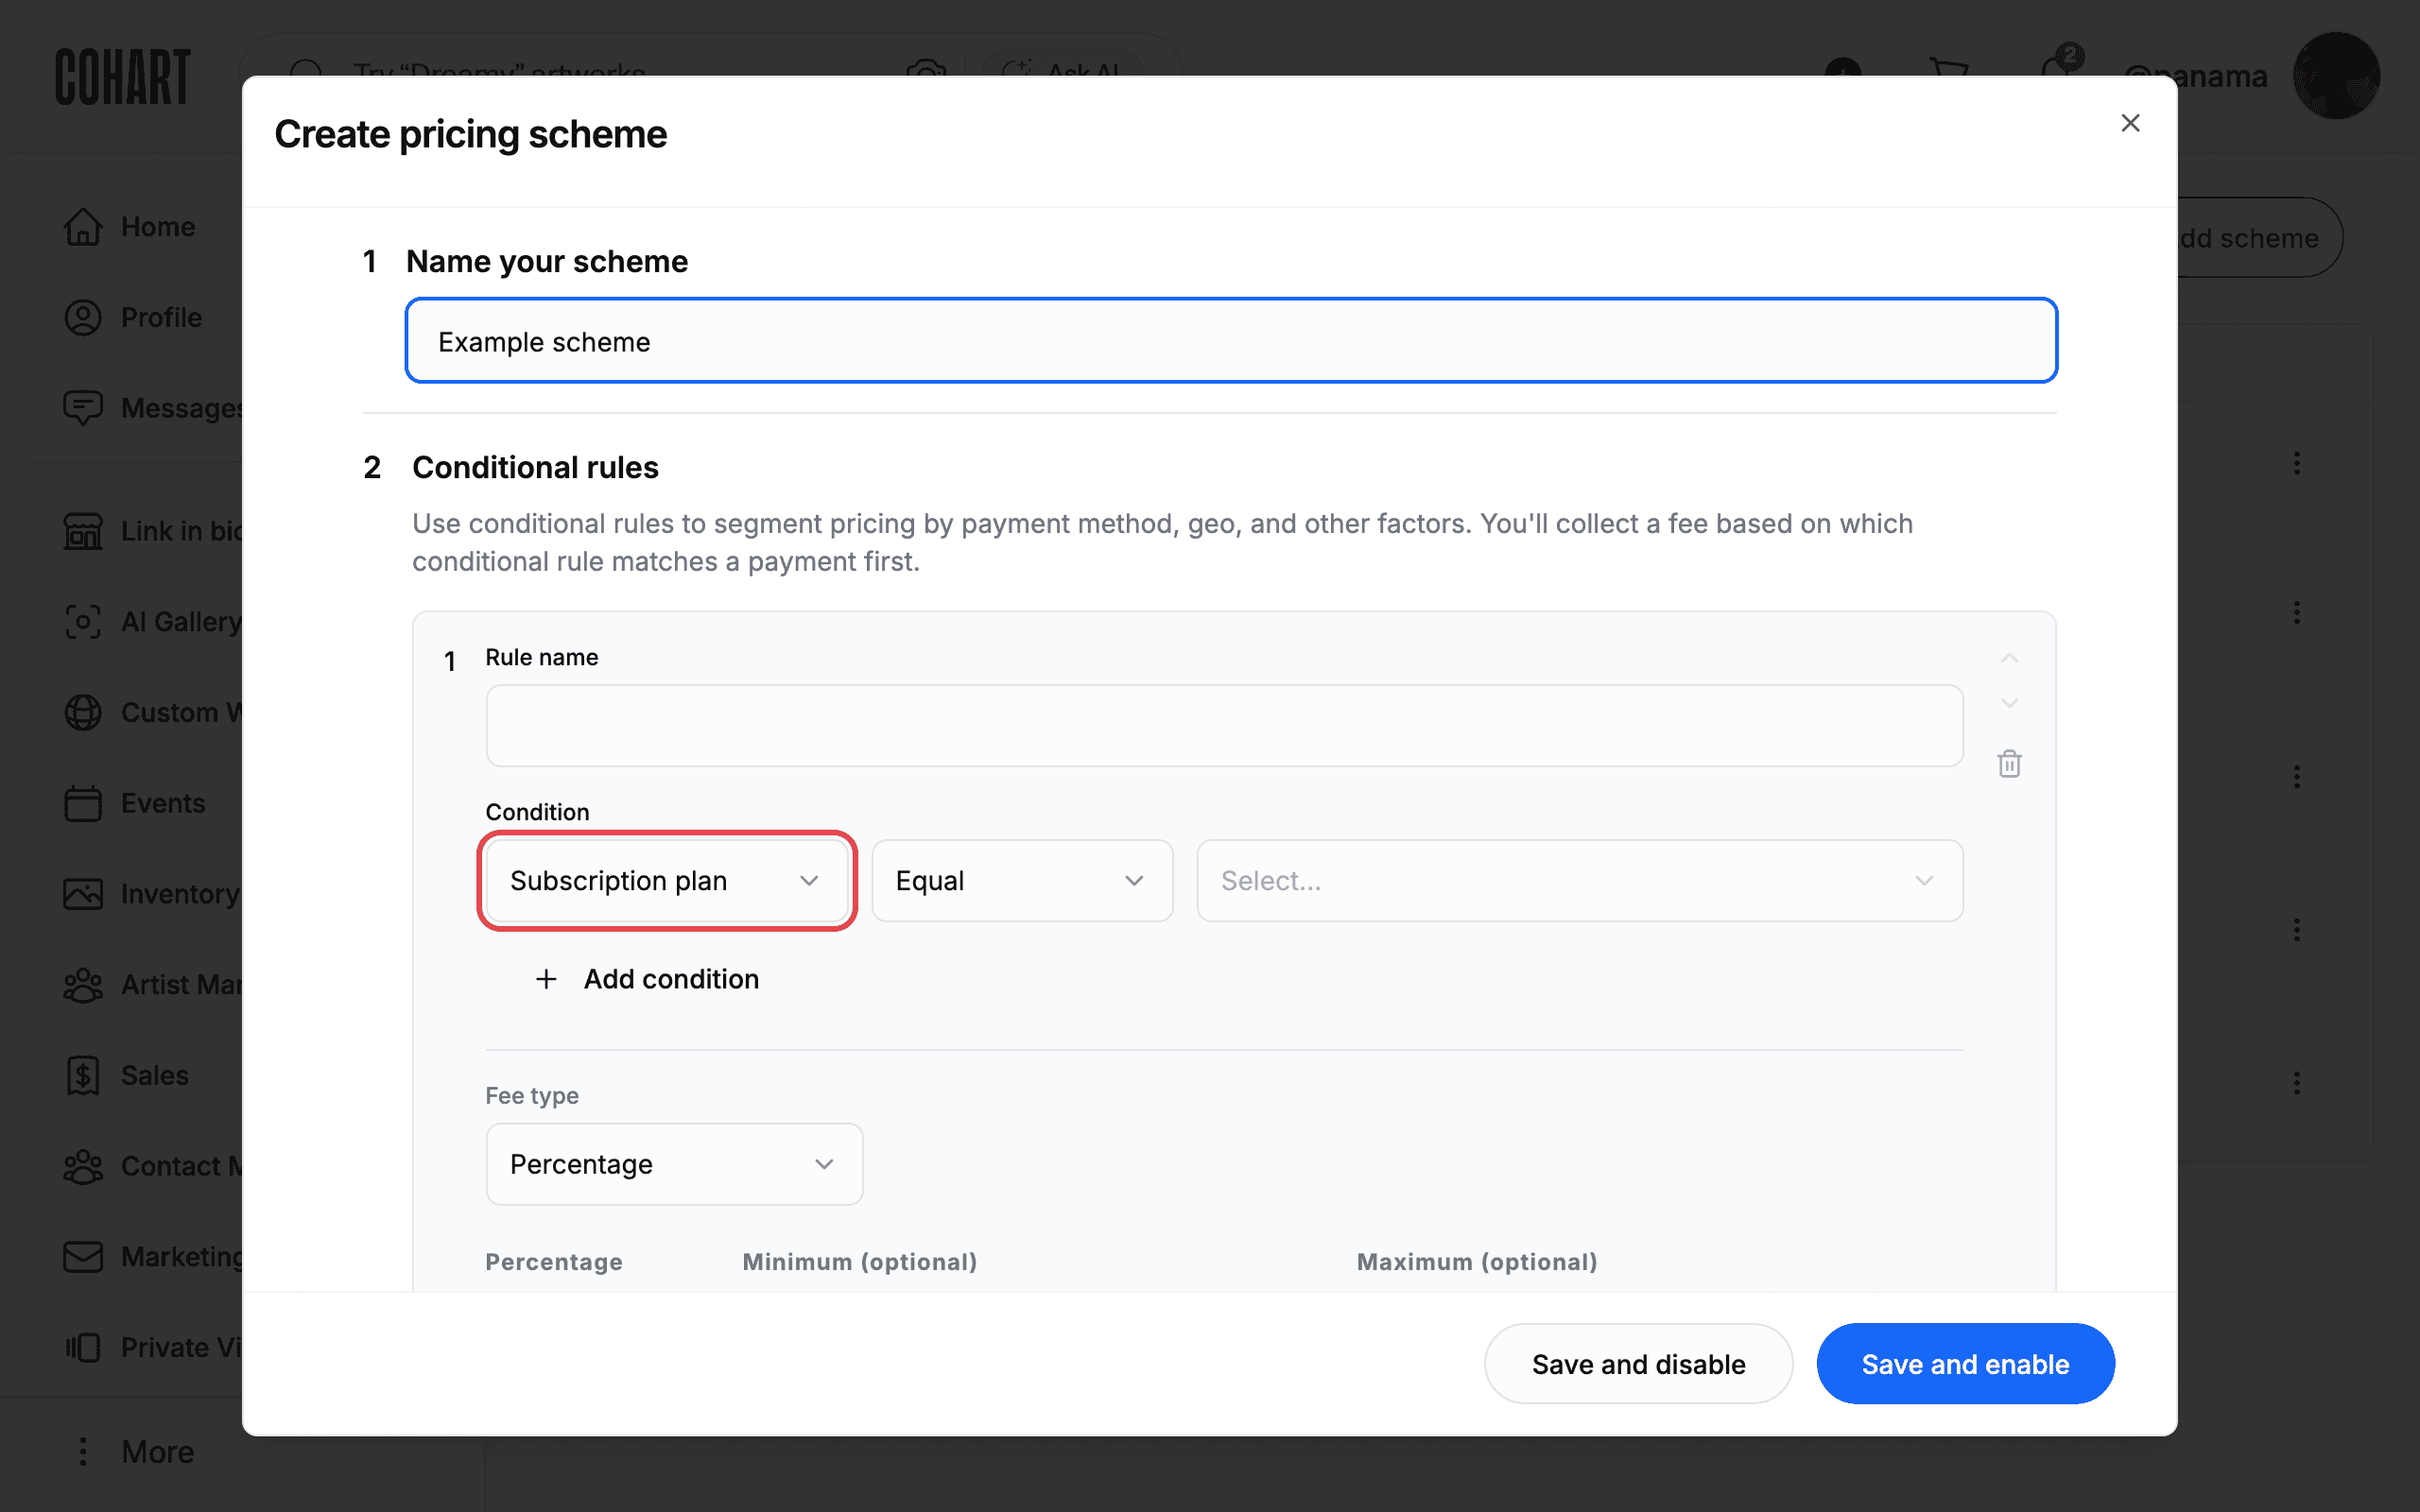
Under 2 Conditional rules, read the explanation: rules segment pricing by payment method, geo, and other factors, and the fee comes from whichever conditional rule matches a payment first. Give the first rule a name in Rule name. Under Condition, build the trigger from three dropdowns: what to check, how to compare, and which value to compare against. Each condition row has an × on its right to remove that row.
10. Choose what the condition checks
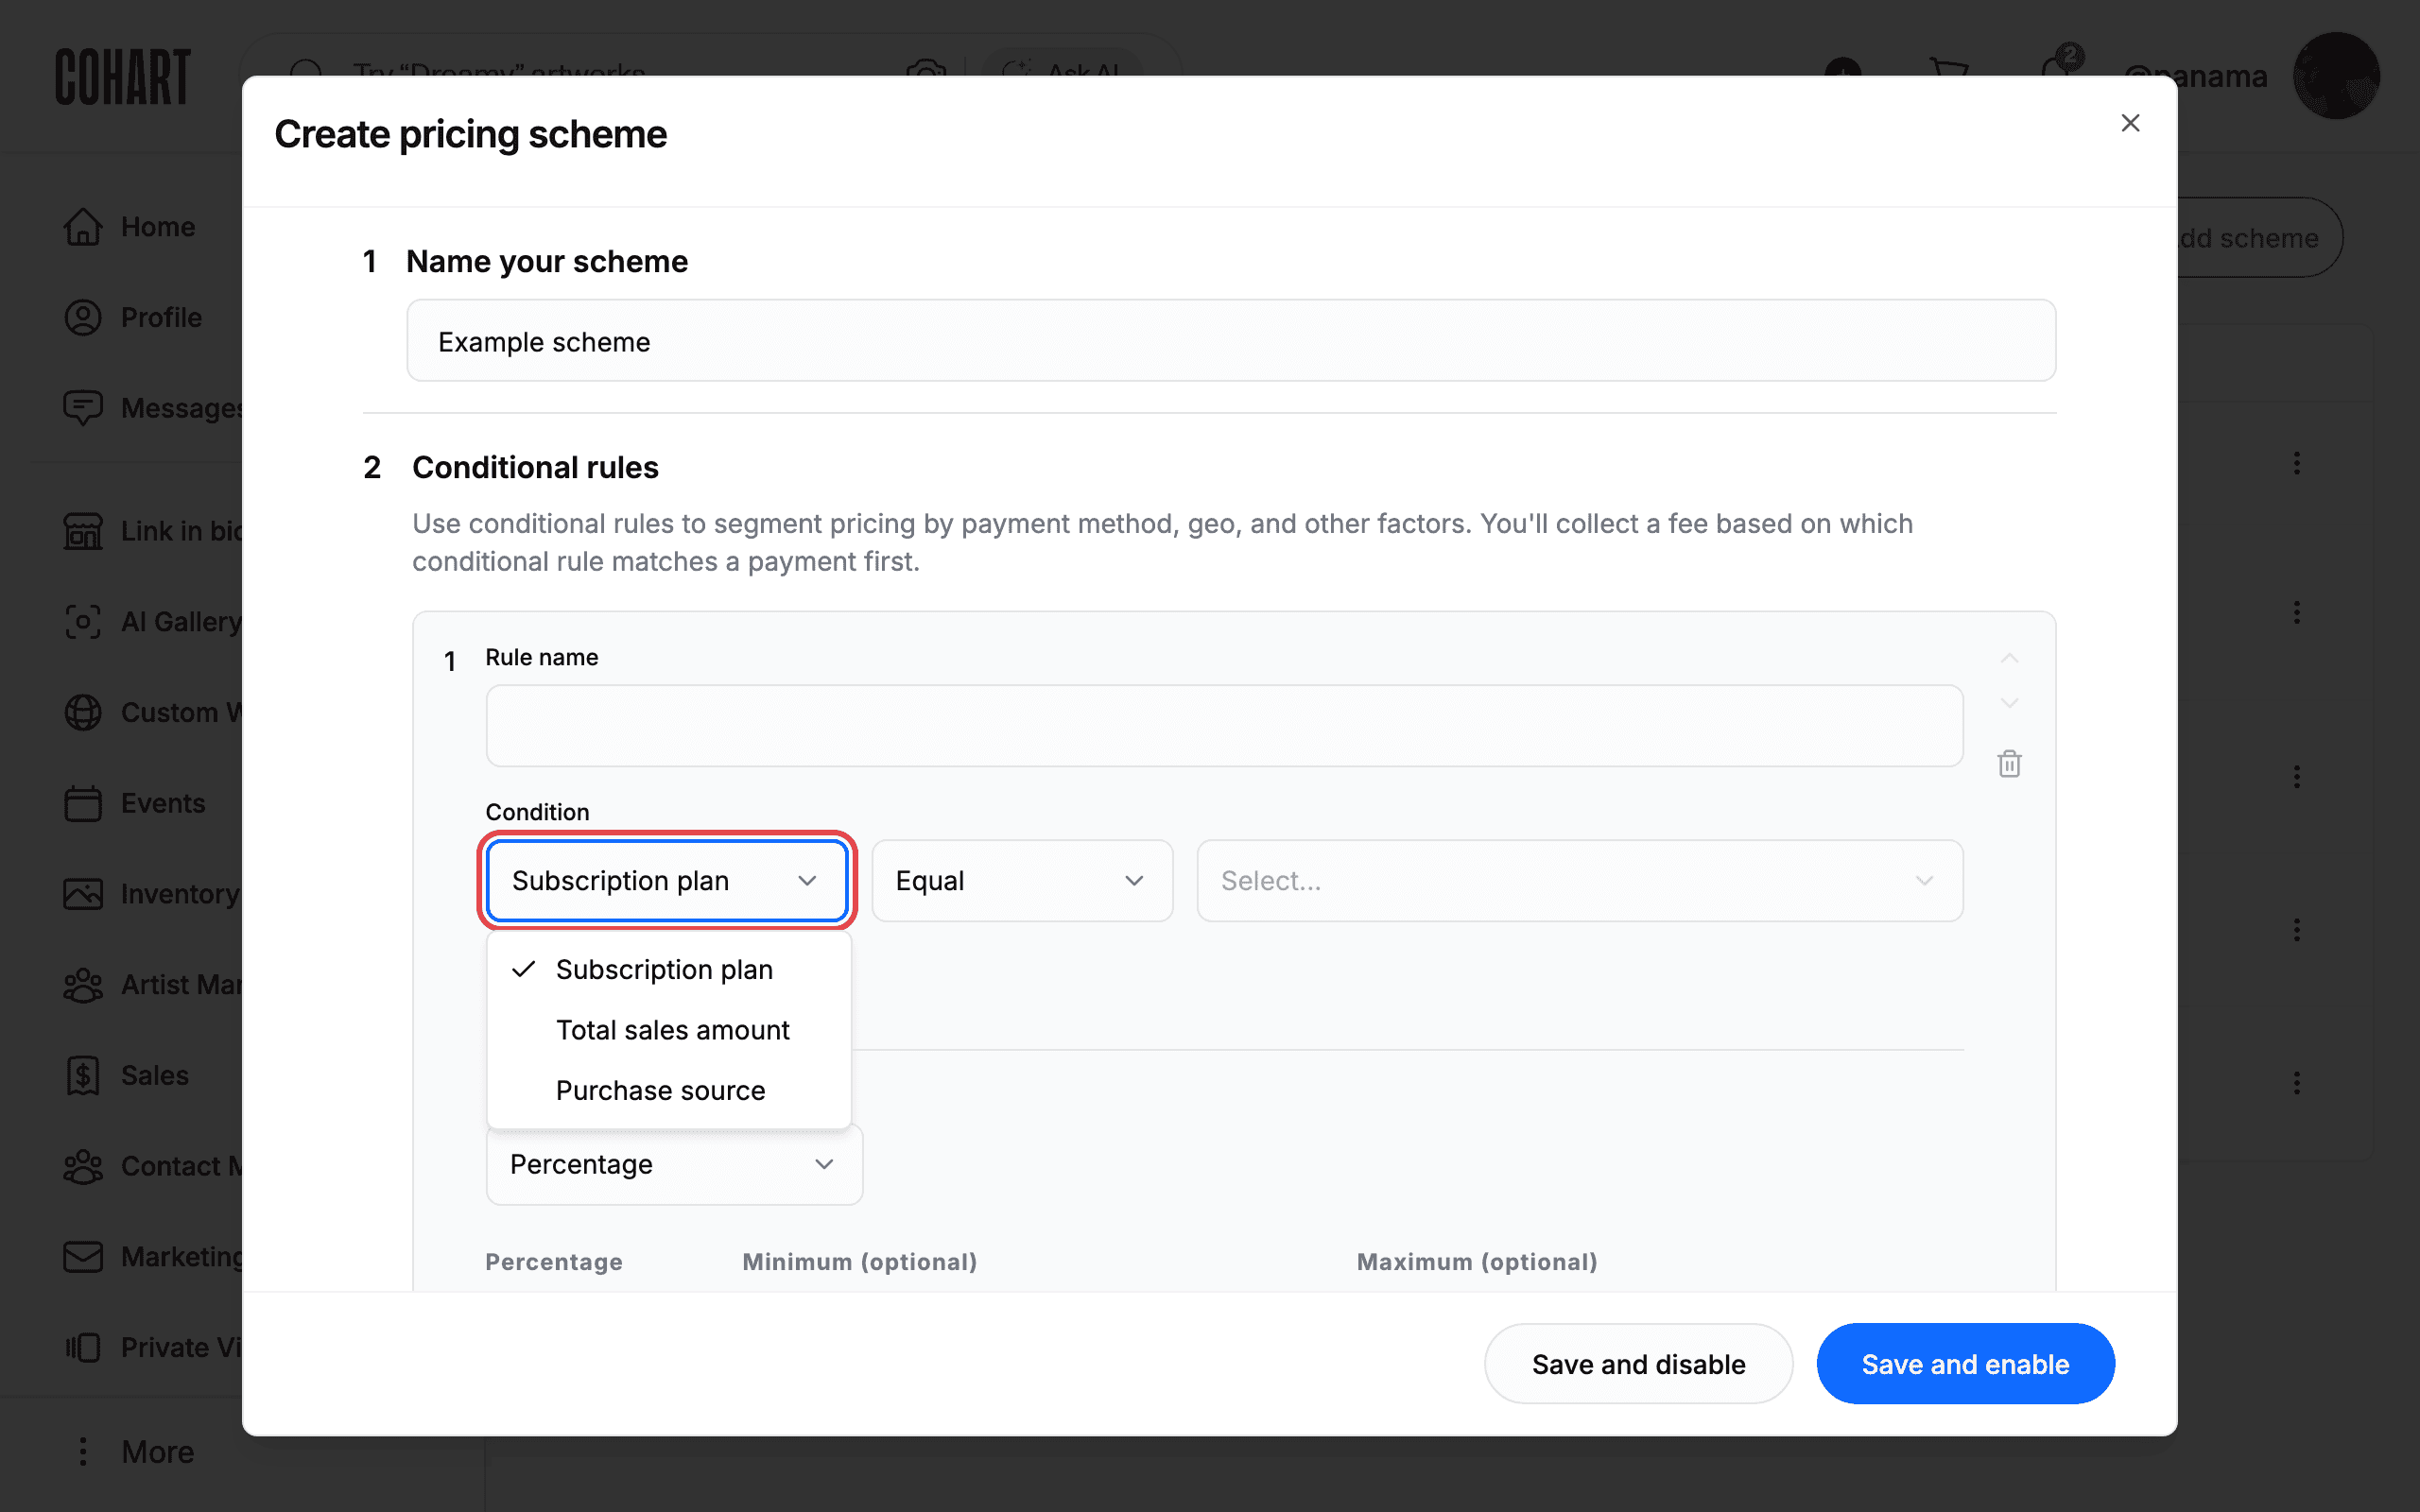
Open the first dropdown to choose what the condition checks. It offers Subscription plan, Total sales amount, and Purchase source.
- Subscription plan compares the buyer’s plan. Its operators are Equal, Not equal, In, and Not in. Its values are the plan names Free, Pro, Growth, and Premier, chosen from the Select… dropdown.
- Total sales amount compares a money amount (see the next step).
- Purchase source compares where the payment came from. Its values are grouped: Discovery (Discover, Top Picks, Discover Artists, Discover Galleries, Get Inspired, Editorial), Coco AI (AI Curator), Artwork details (Artwork Details, Private View), Direct sale (Direct Sale Link), Profiles (Profile Page, Portfolio Page), Event page (Event Page, Event Storefront), Invoice (Invoice Checkout), In-person sale channels (Tap to Pay, Business App Card), Custom website (Custom Website), Mailing (Campaign Email, Platform Marketing Email), Acquisition channels (Social Share), and Fallback (Marketplace).
11. Compare against a Total sales amount
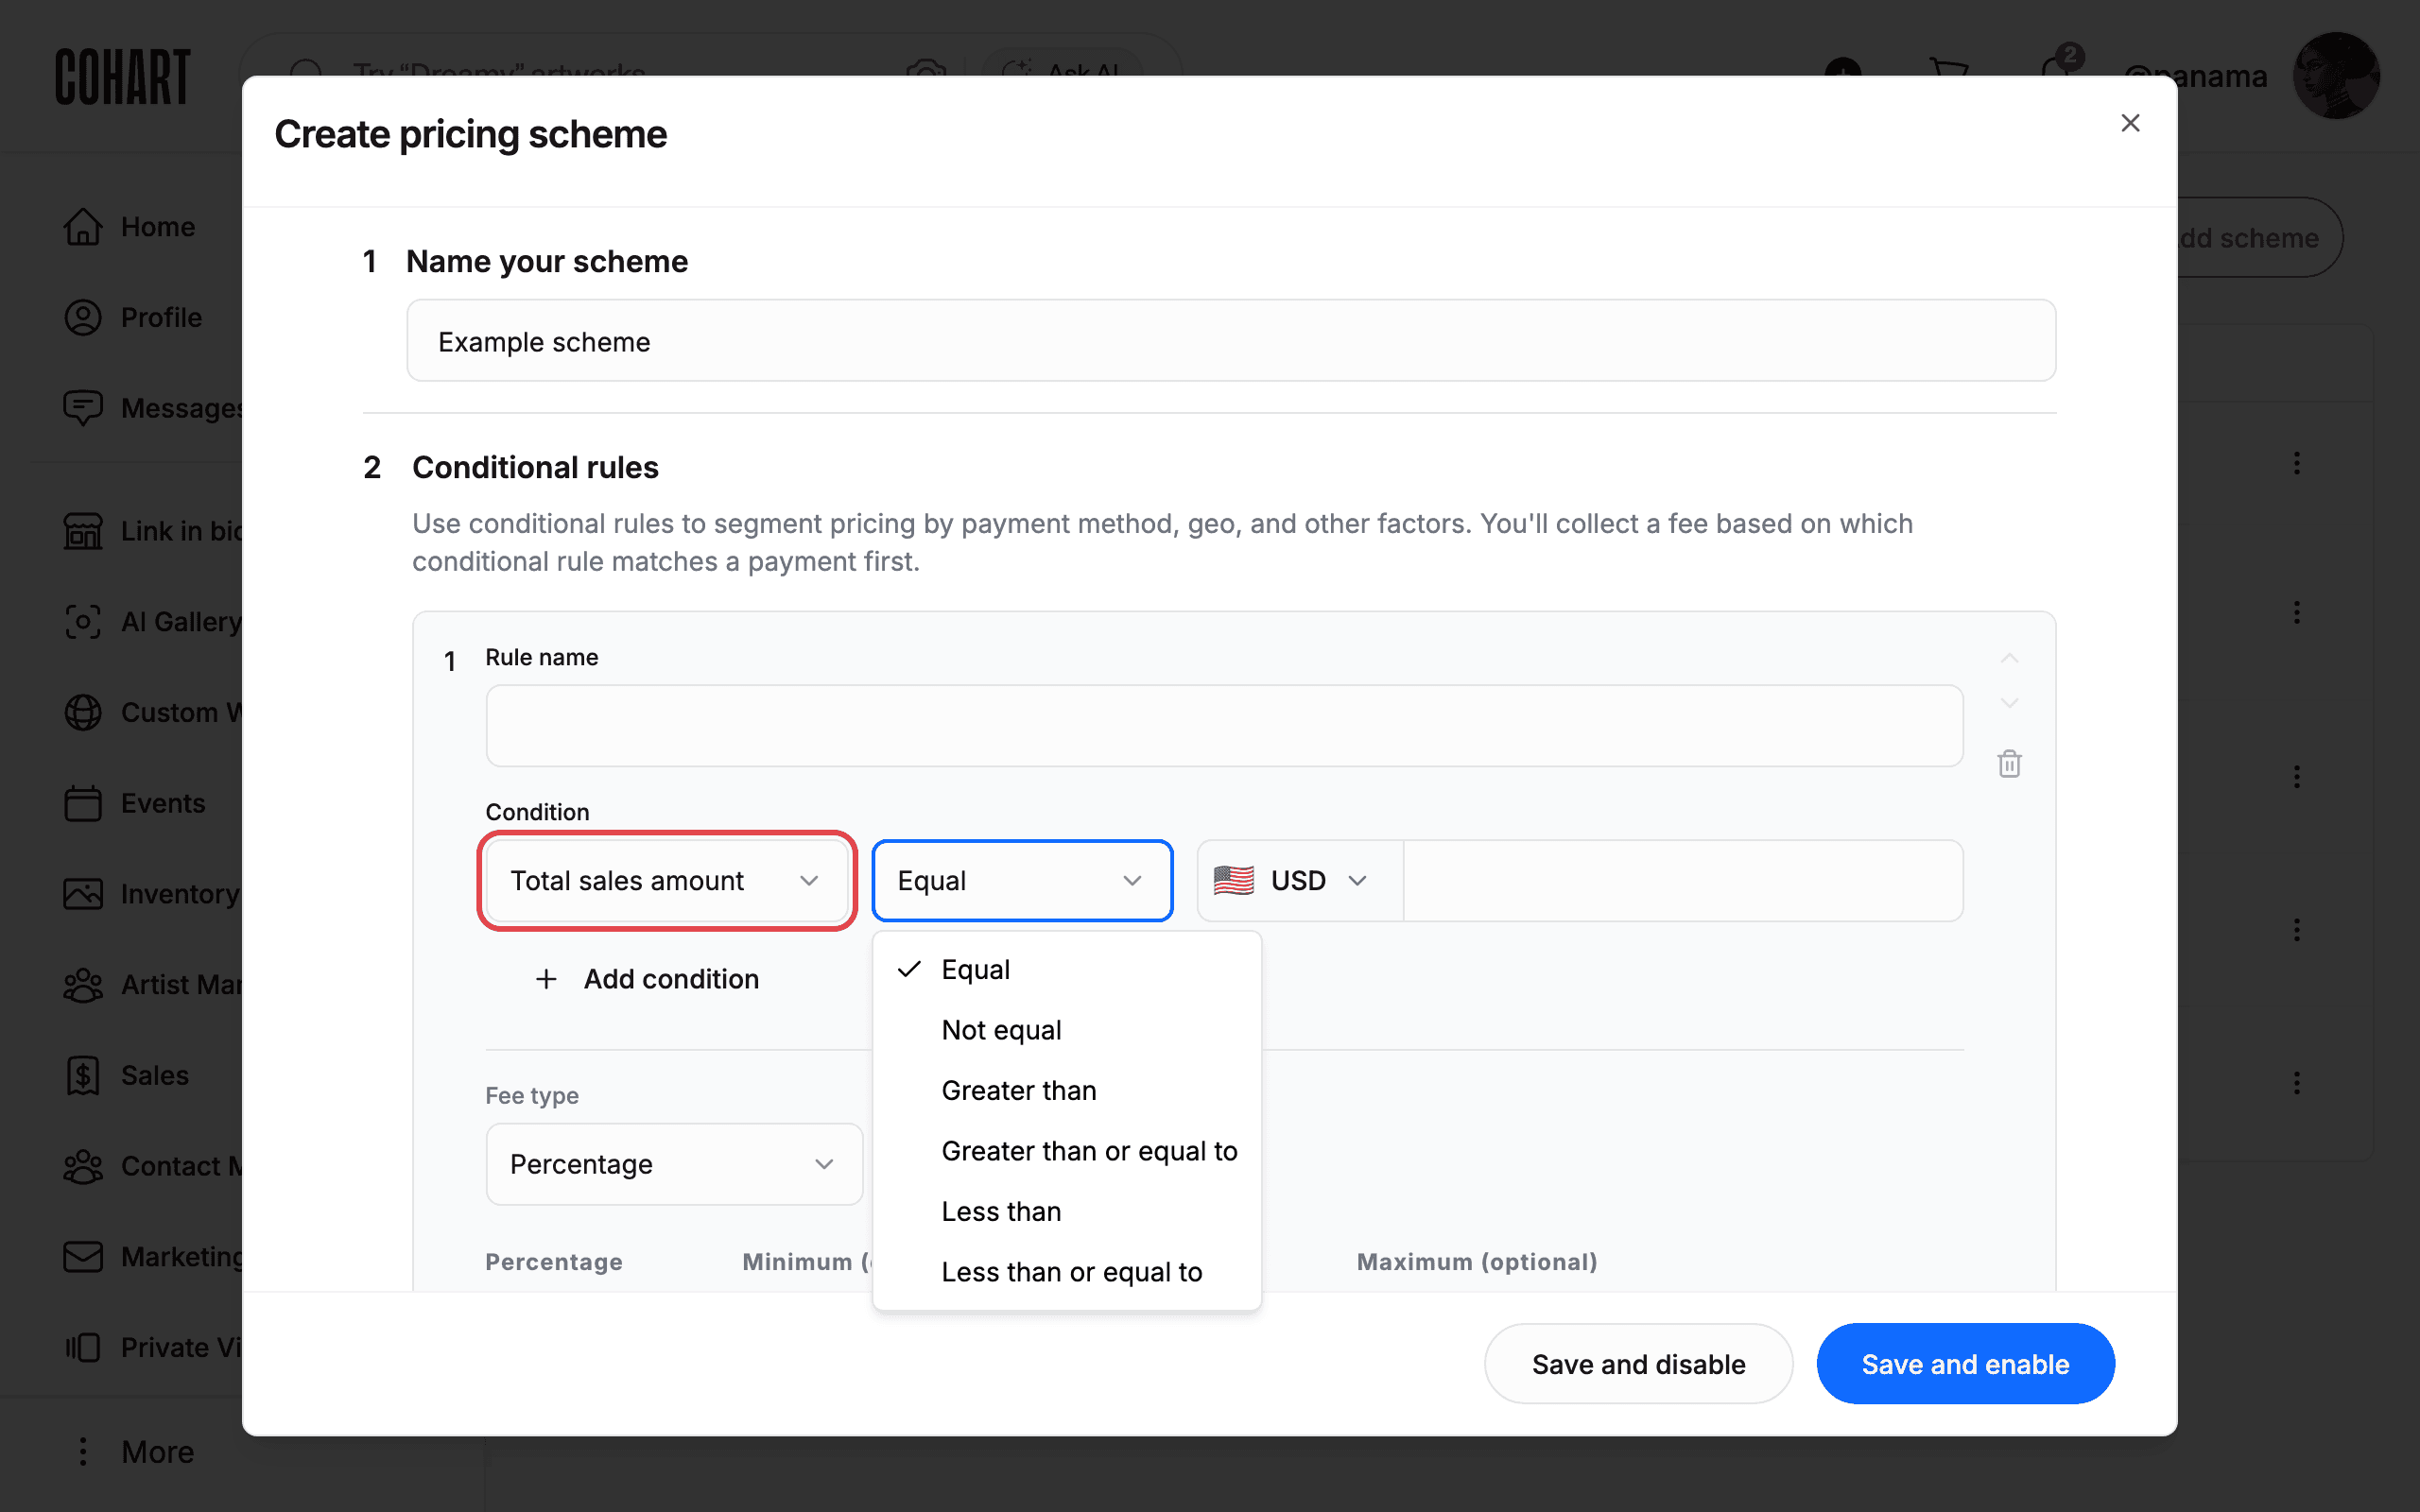
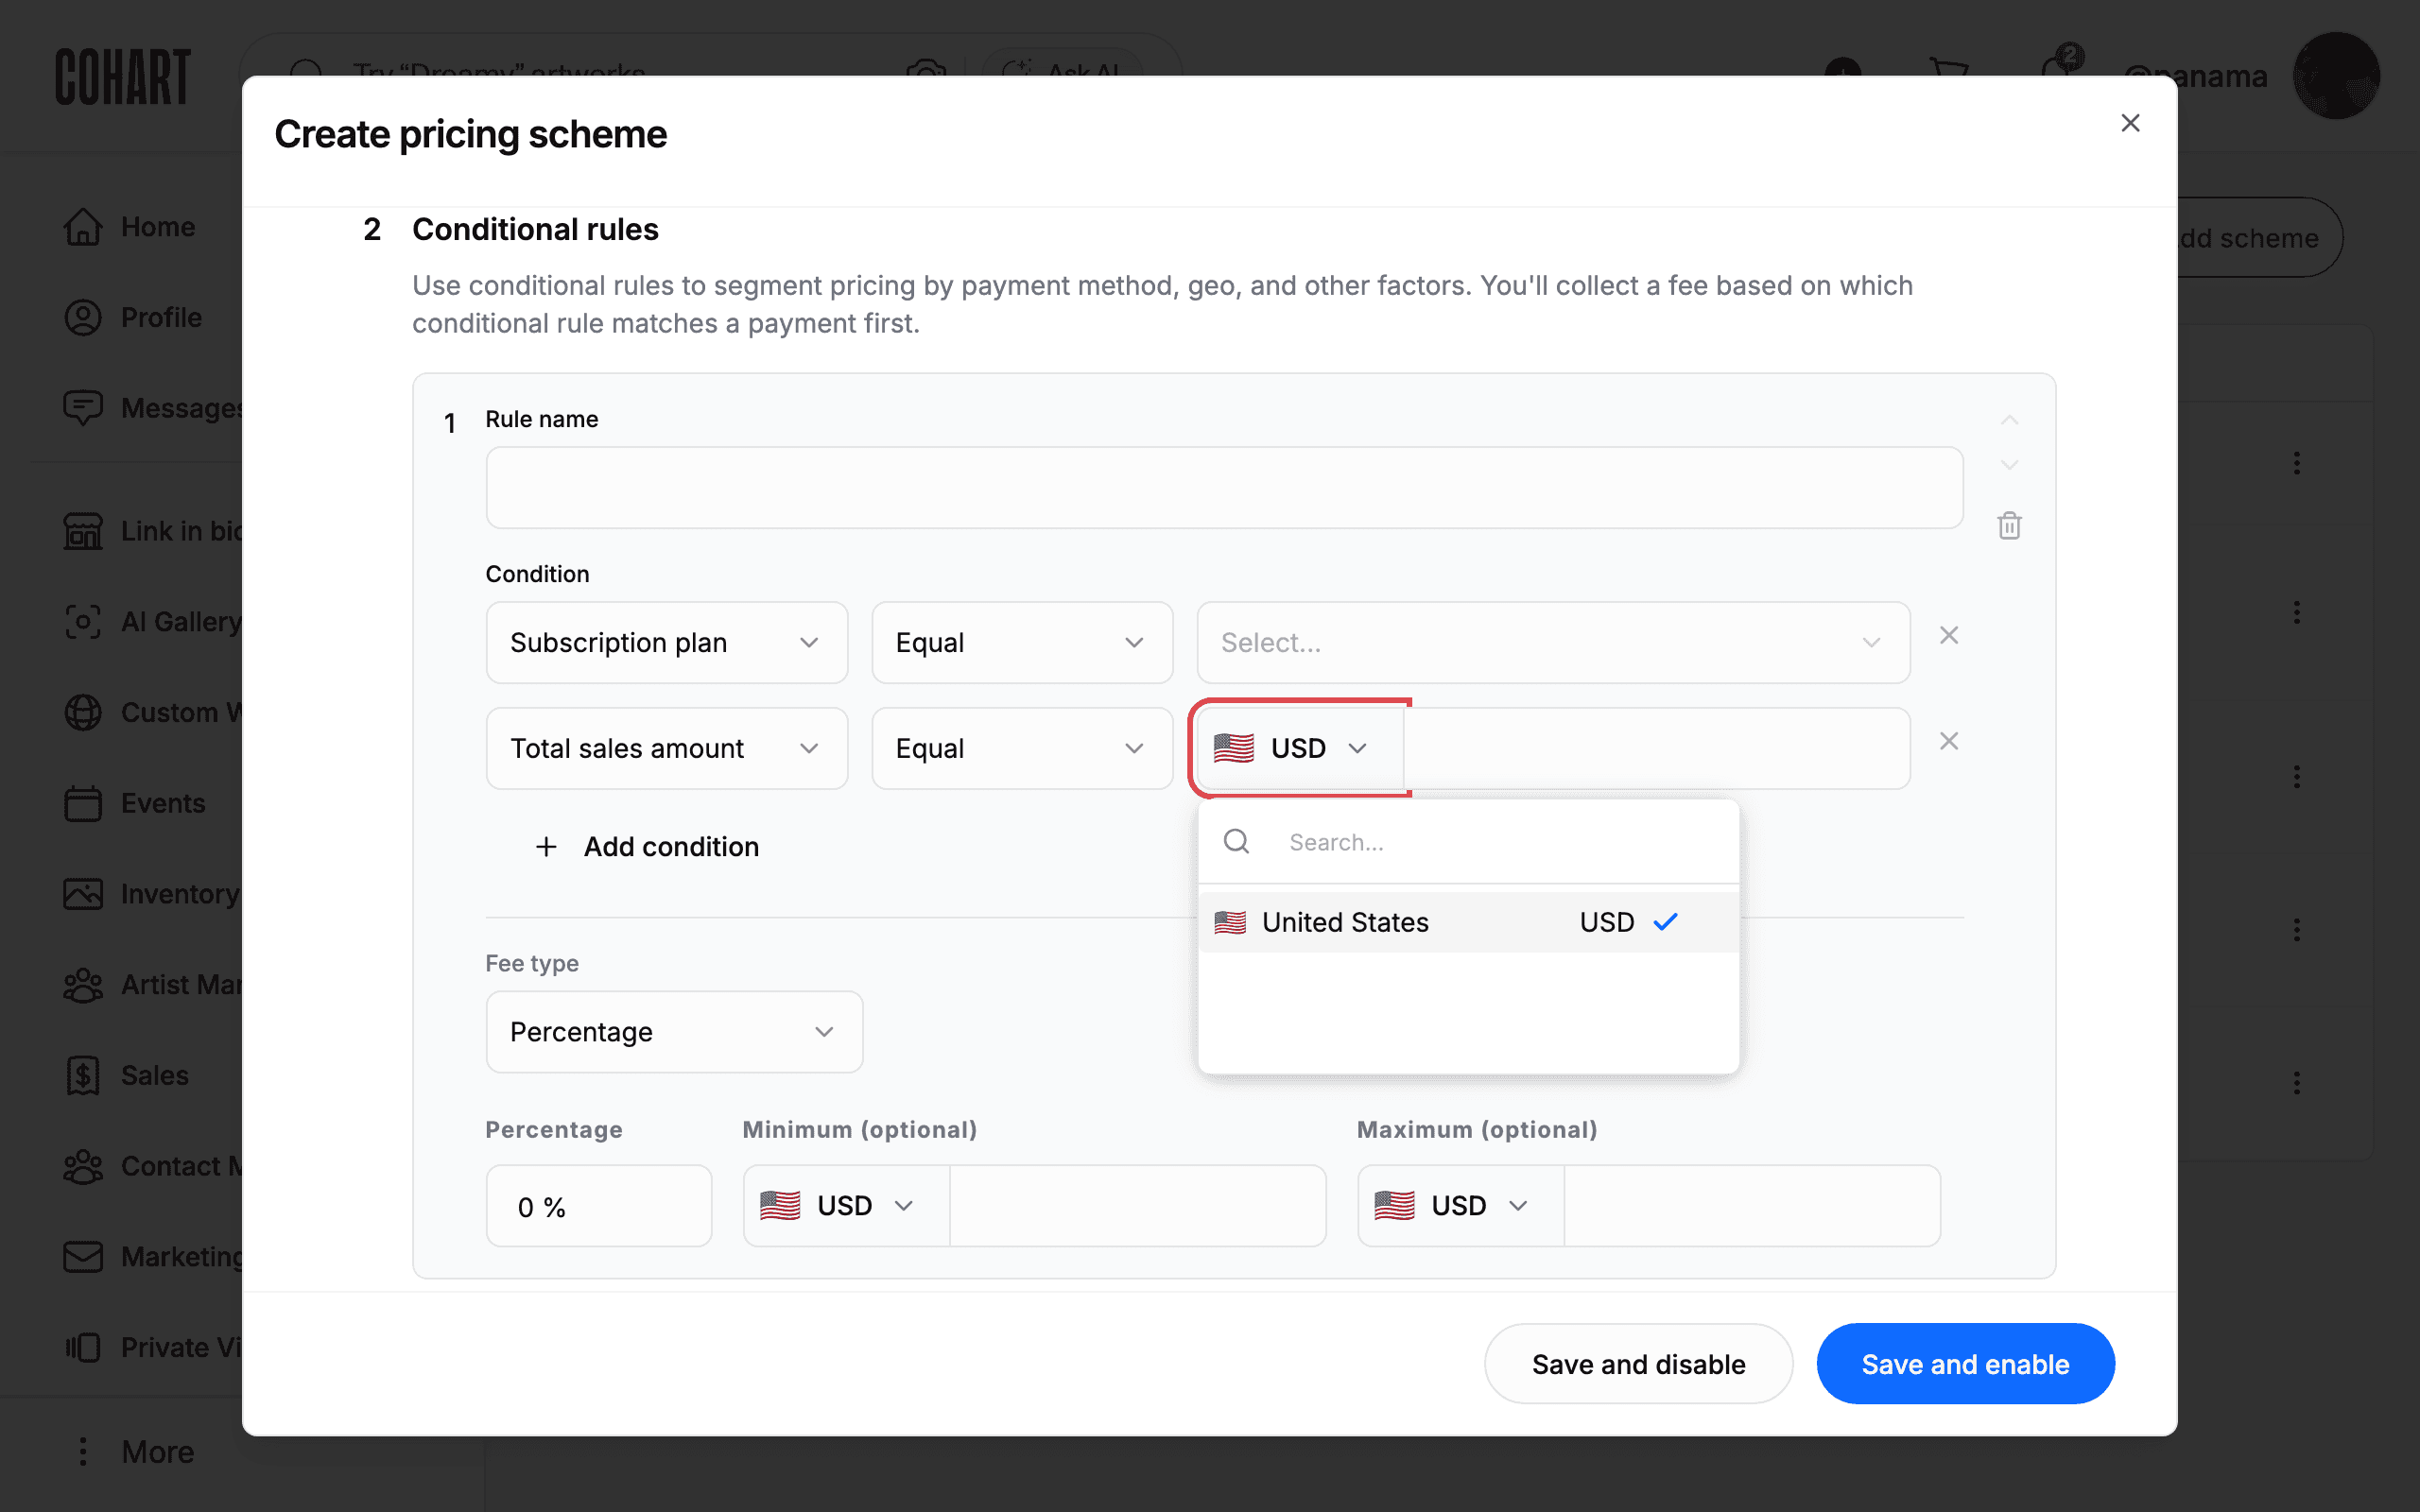
Pick Total sales amount to compare against a money threshold. The operator dropdown then offers Equal, Not equal, Greater than, Greater than or equal to, Less than, and Less than or equal to. Type the threshold into the split amount box: the 🇺🇸 USD button on its left picks the currency.
12. Add a second condition row
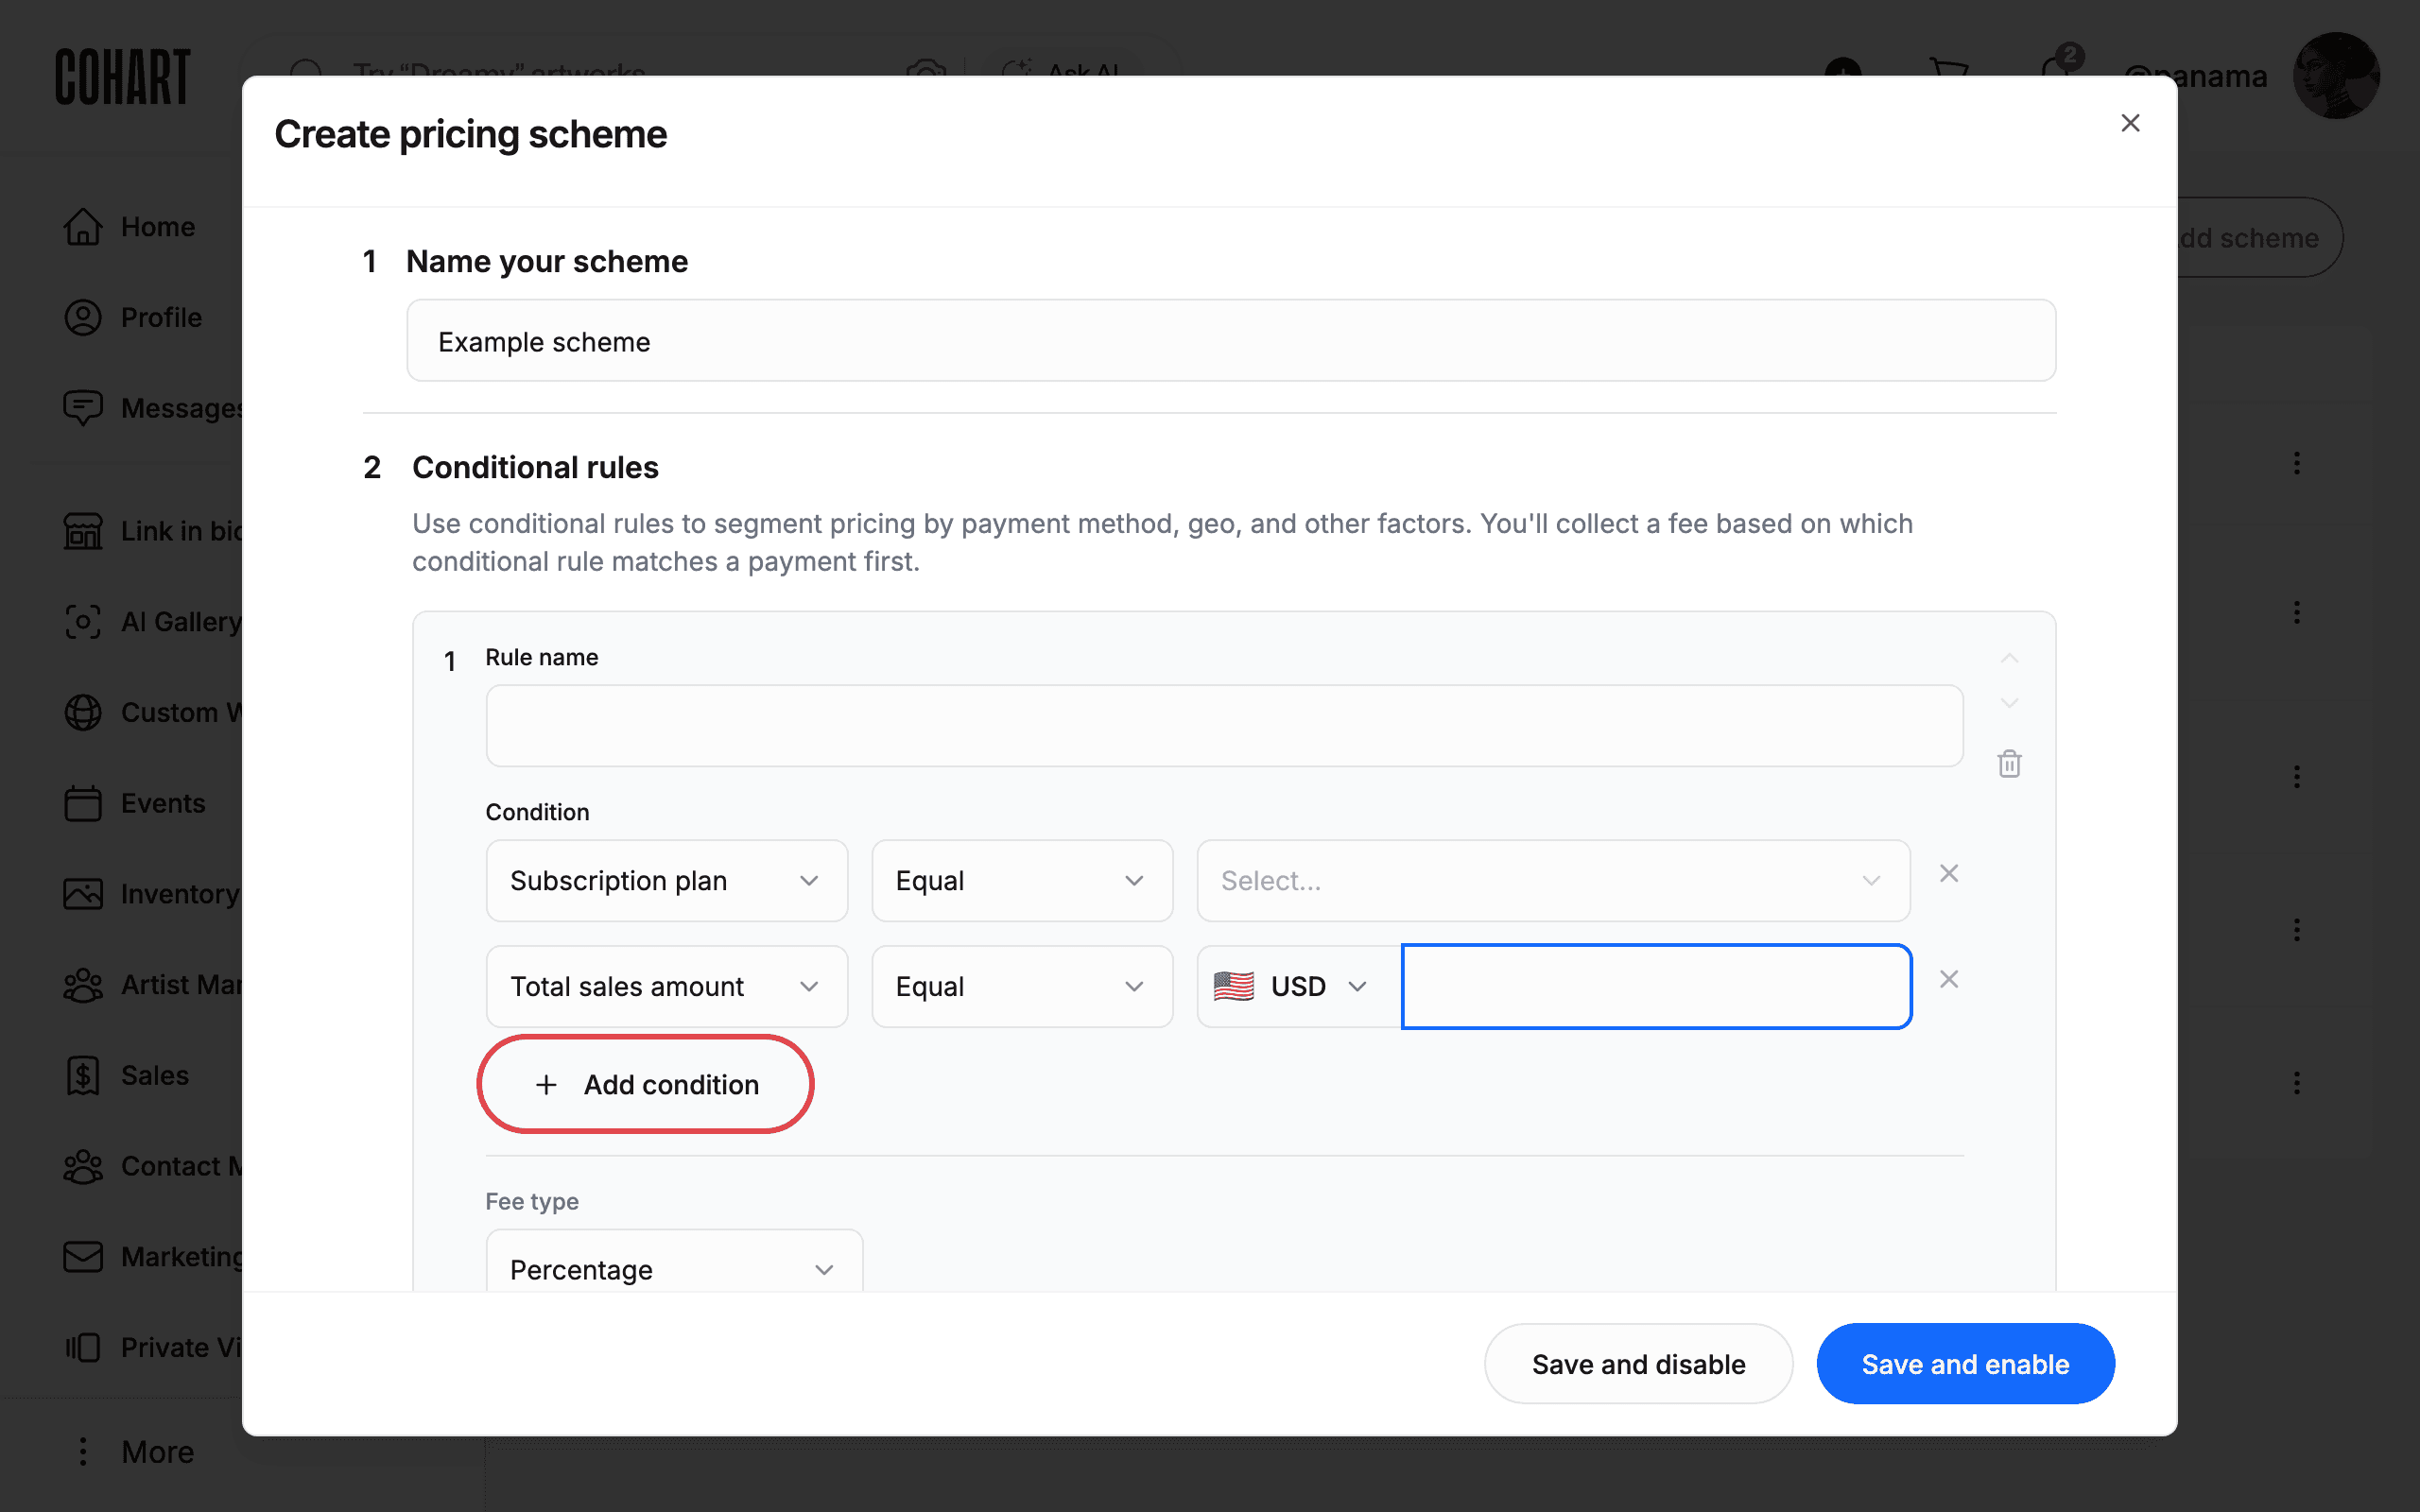
Click Add condition to add a second condition row to the same rule. Remove any row with its ×. The dialog does not label whether multiple rows must all match or just one, so confirm the combination logic before relying on multi-condition rules.
13. Choose a fee type and manage rules
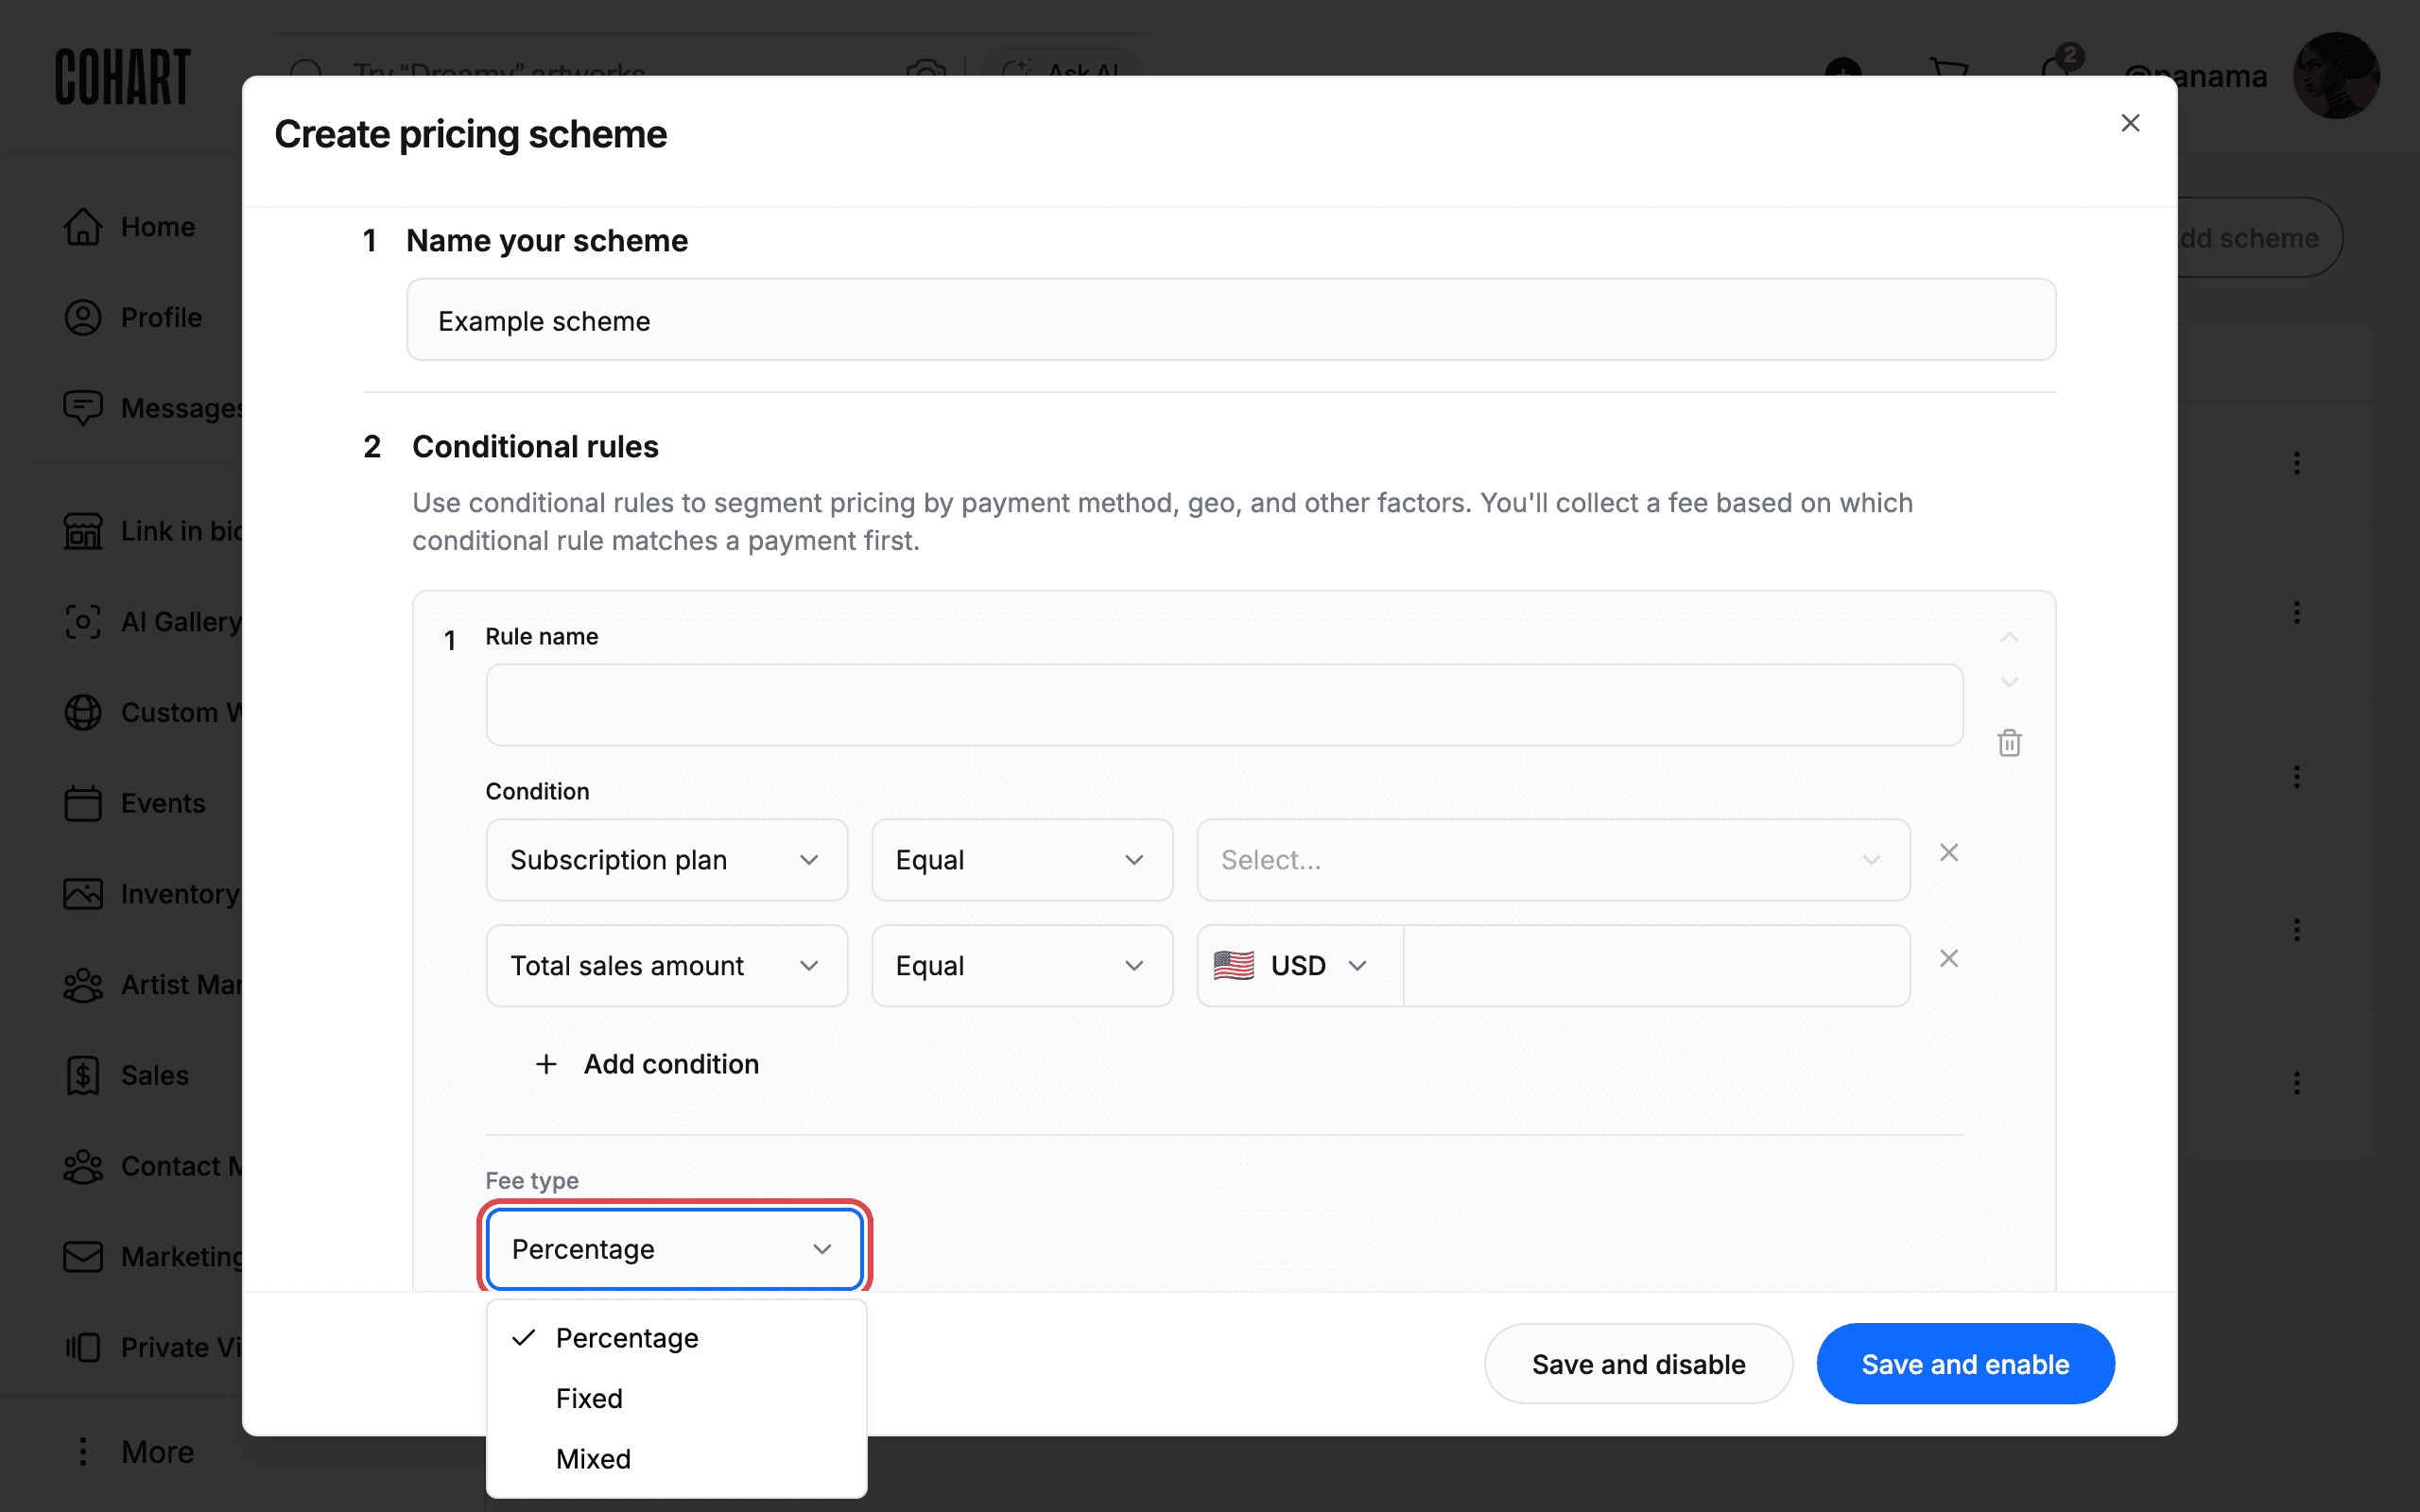
Open Fee type to choose how the fee is charged. It offers Percentage, Fixed, and Mixed. Click Add pricing rule below the rule to append rule 2 (rules are numbered and evaluated in order; the first match wins). Reorder rules with the up/down chevrons on the rule’s right edge (they are greyed out while there is only one rule) and delete a rule with the trash icon.
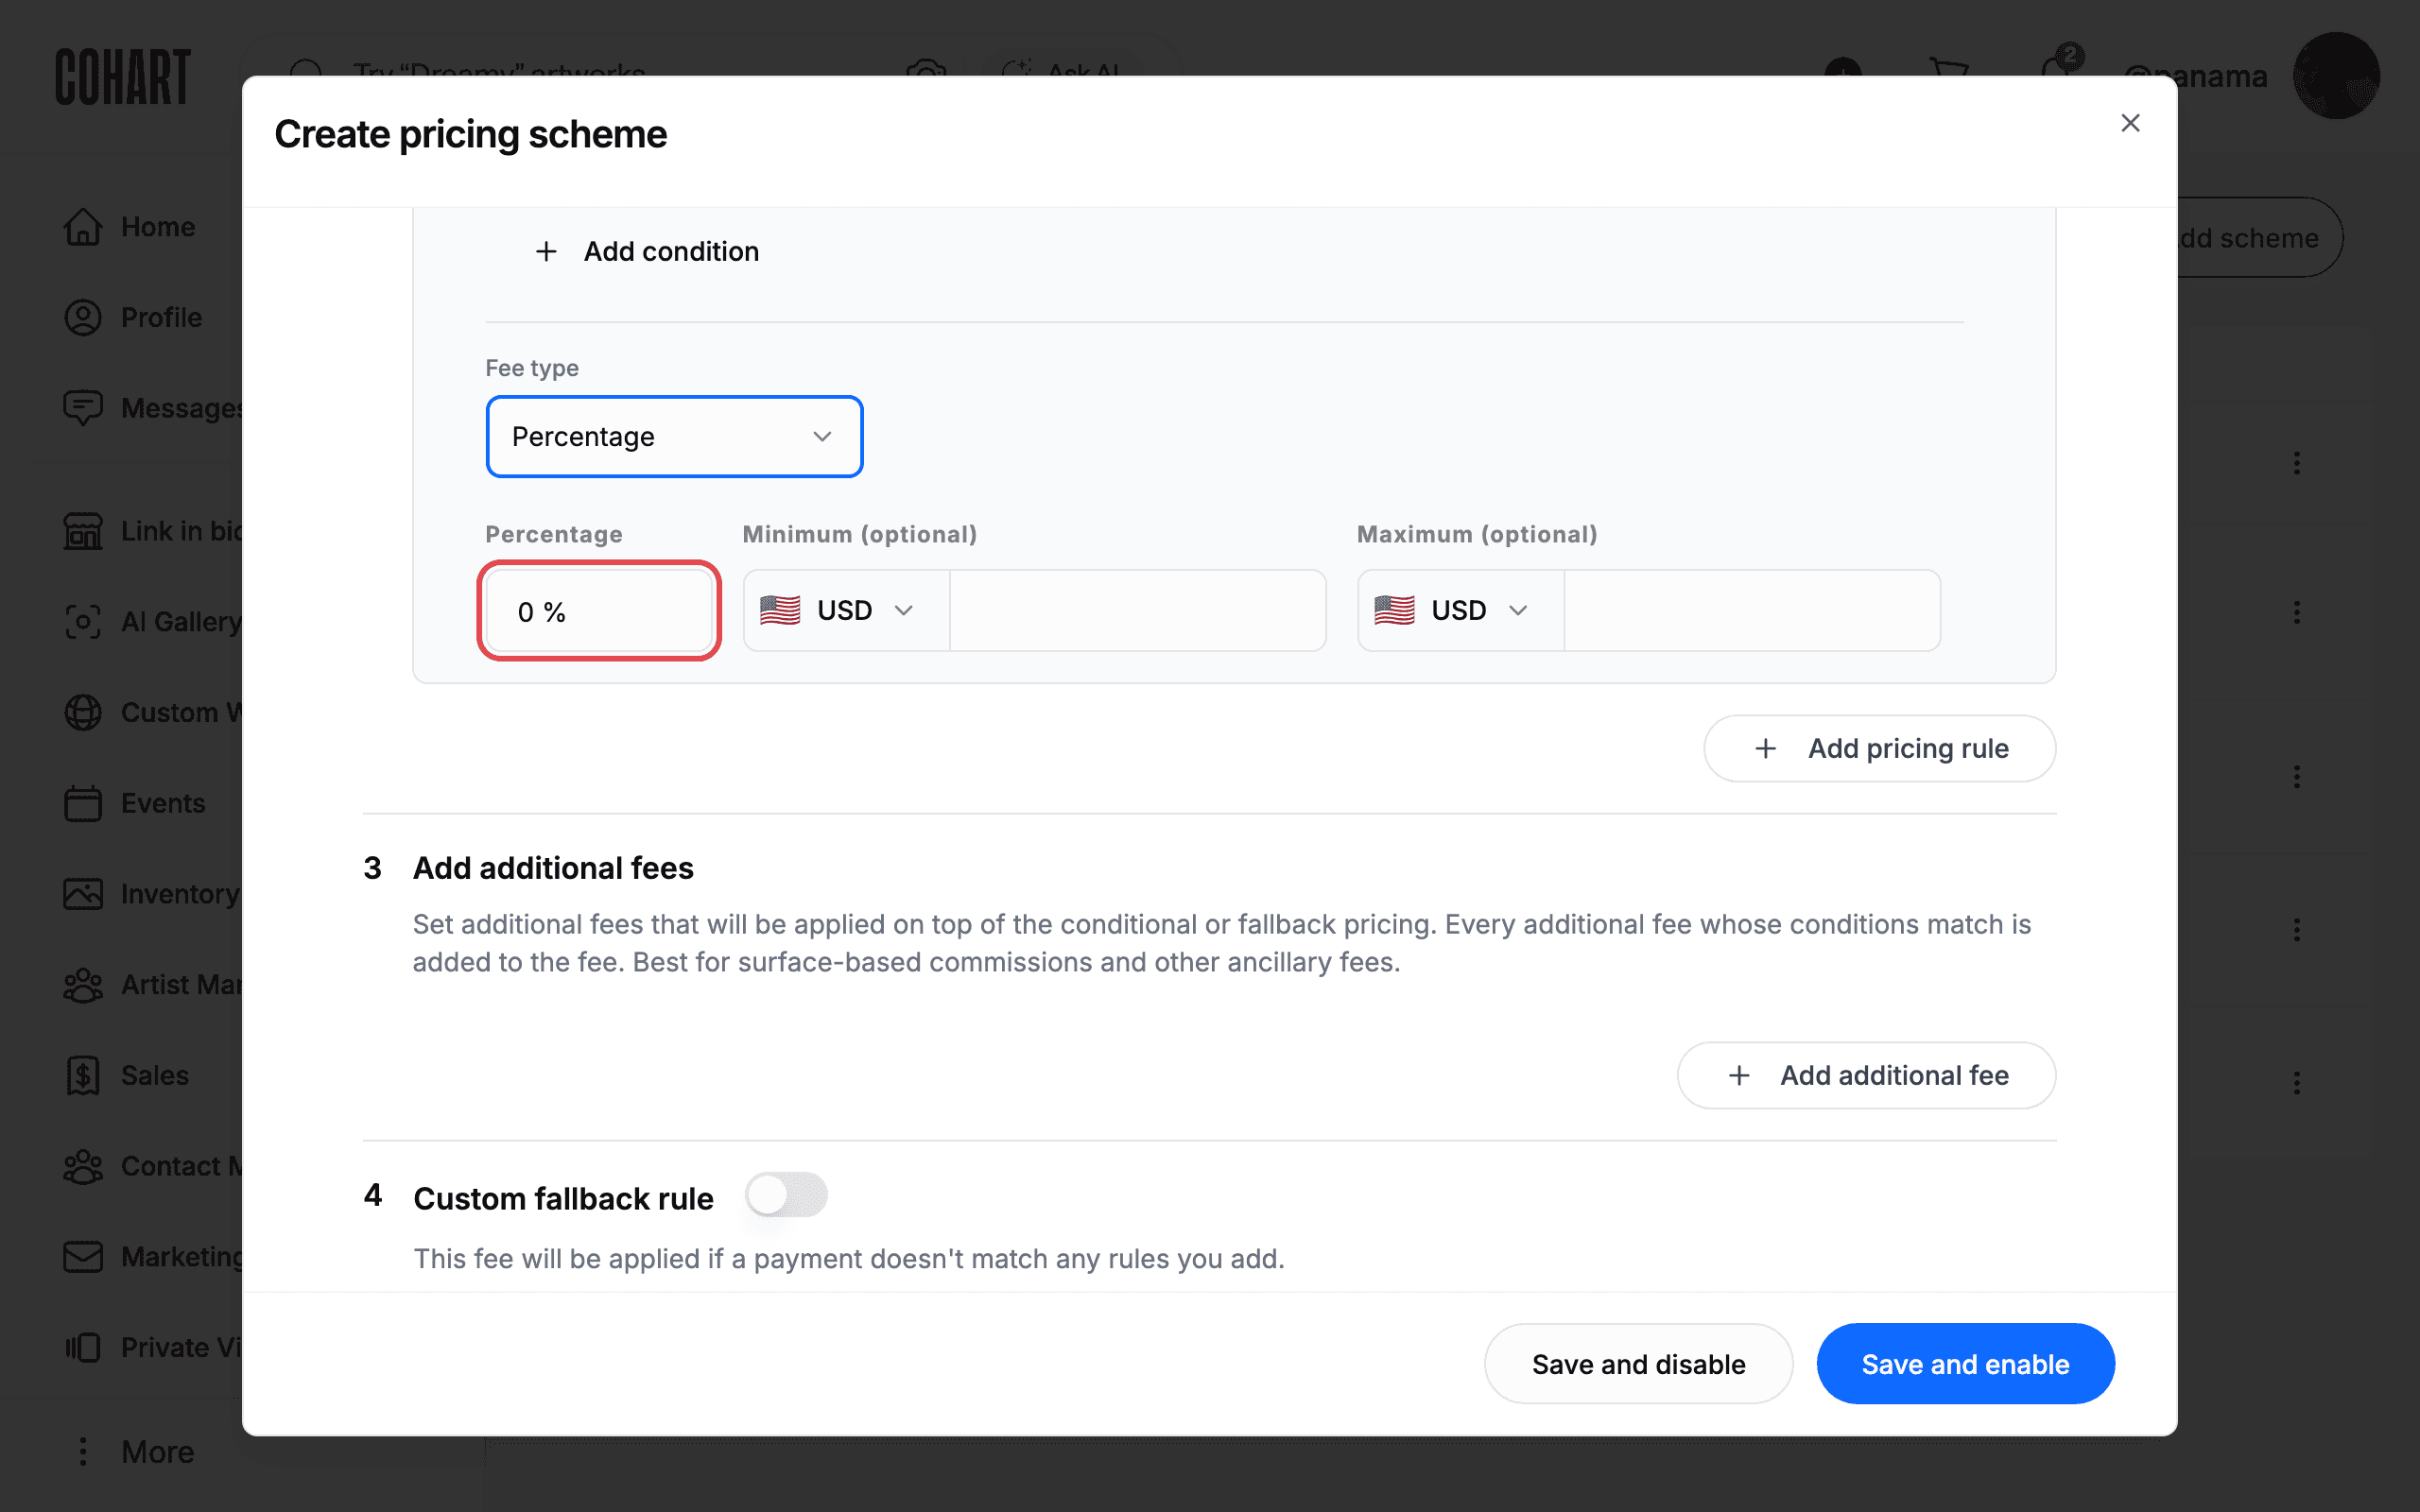
- Percentage takes a cut of each matching payment. Fill in Percentage (starts at 0 %), plus an optional floor in Minimum (optional) and an optional ceiling in Maximum (optional). Both boxes take a currency amount.
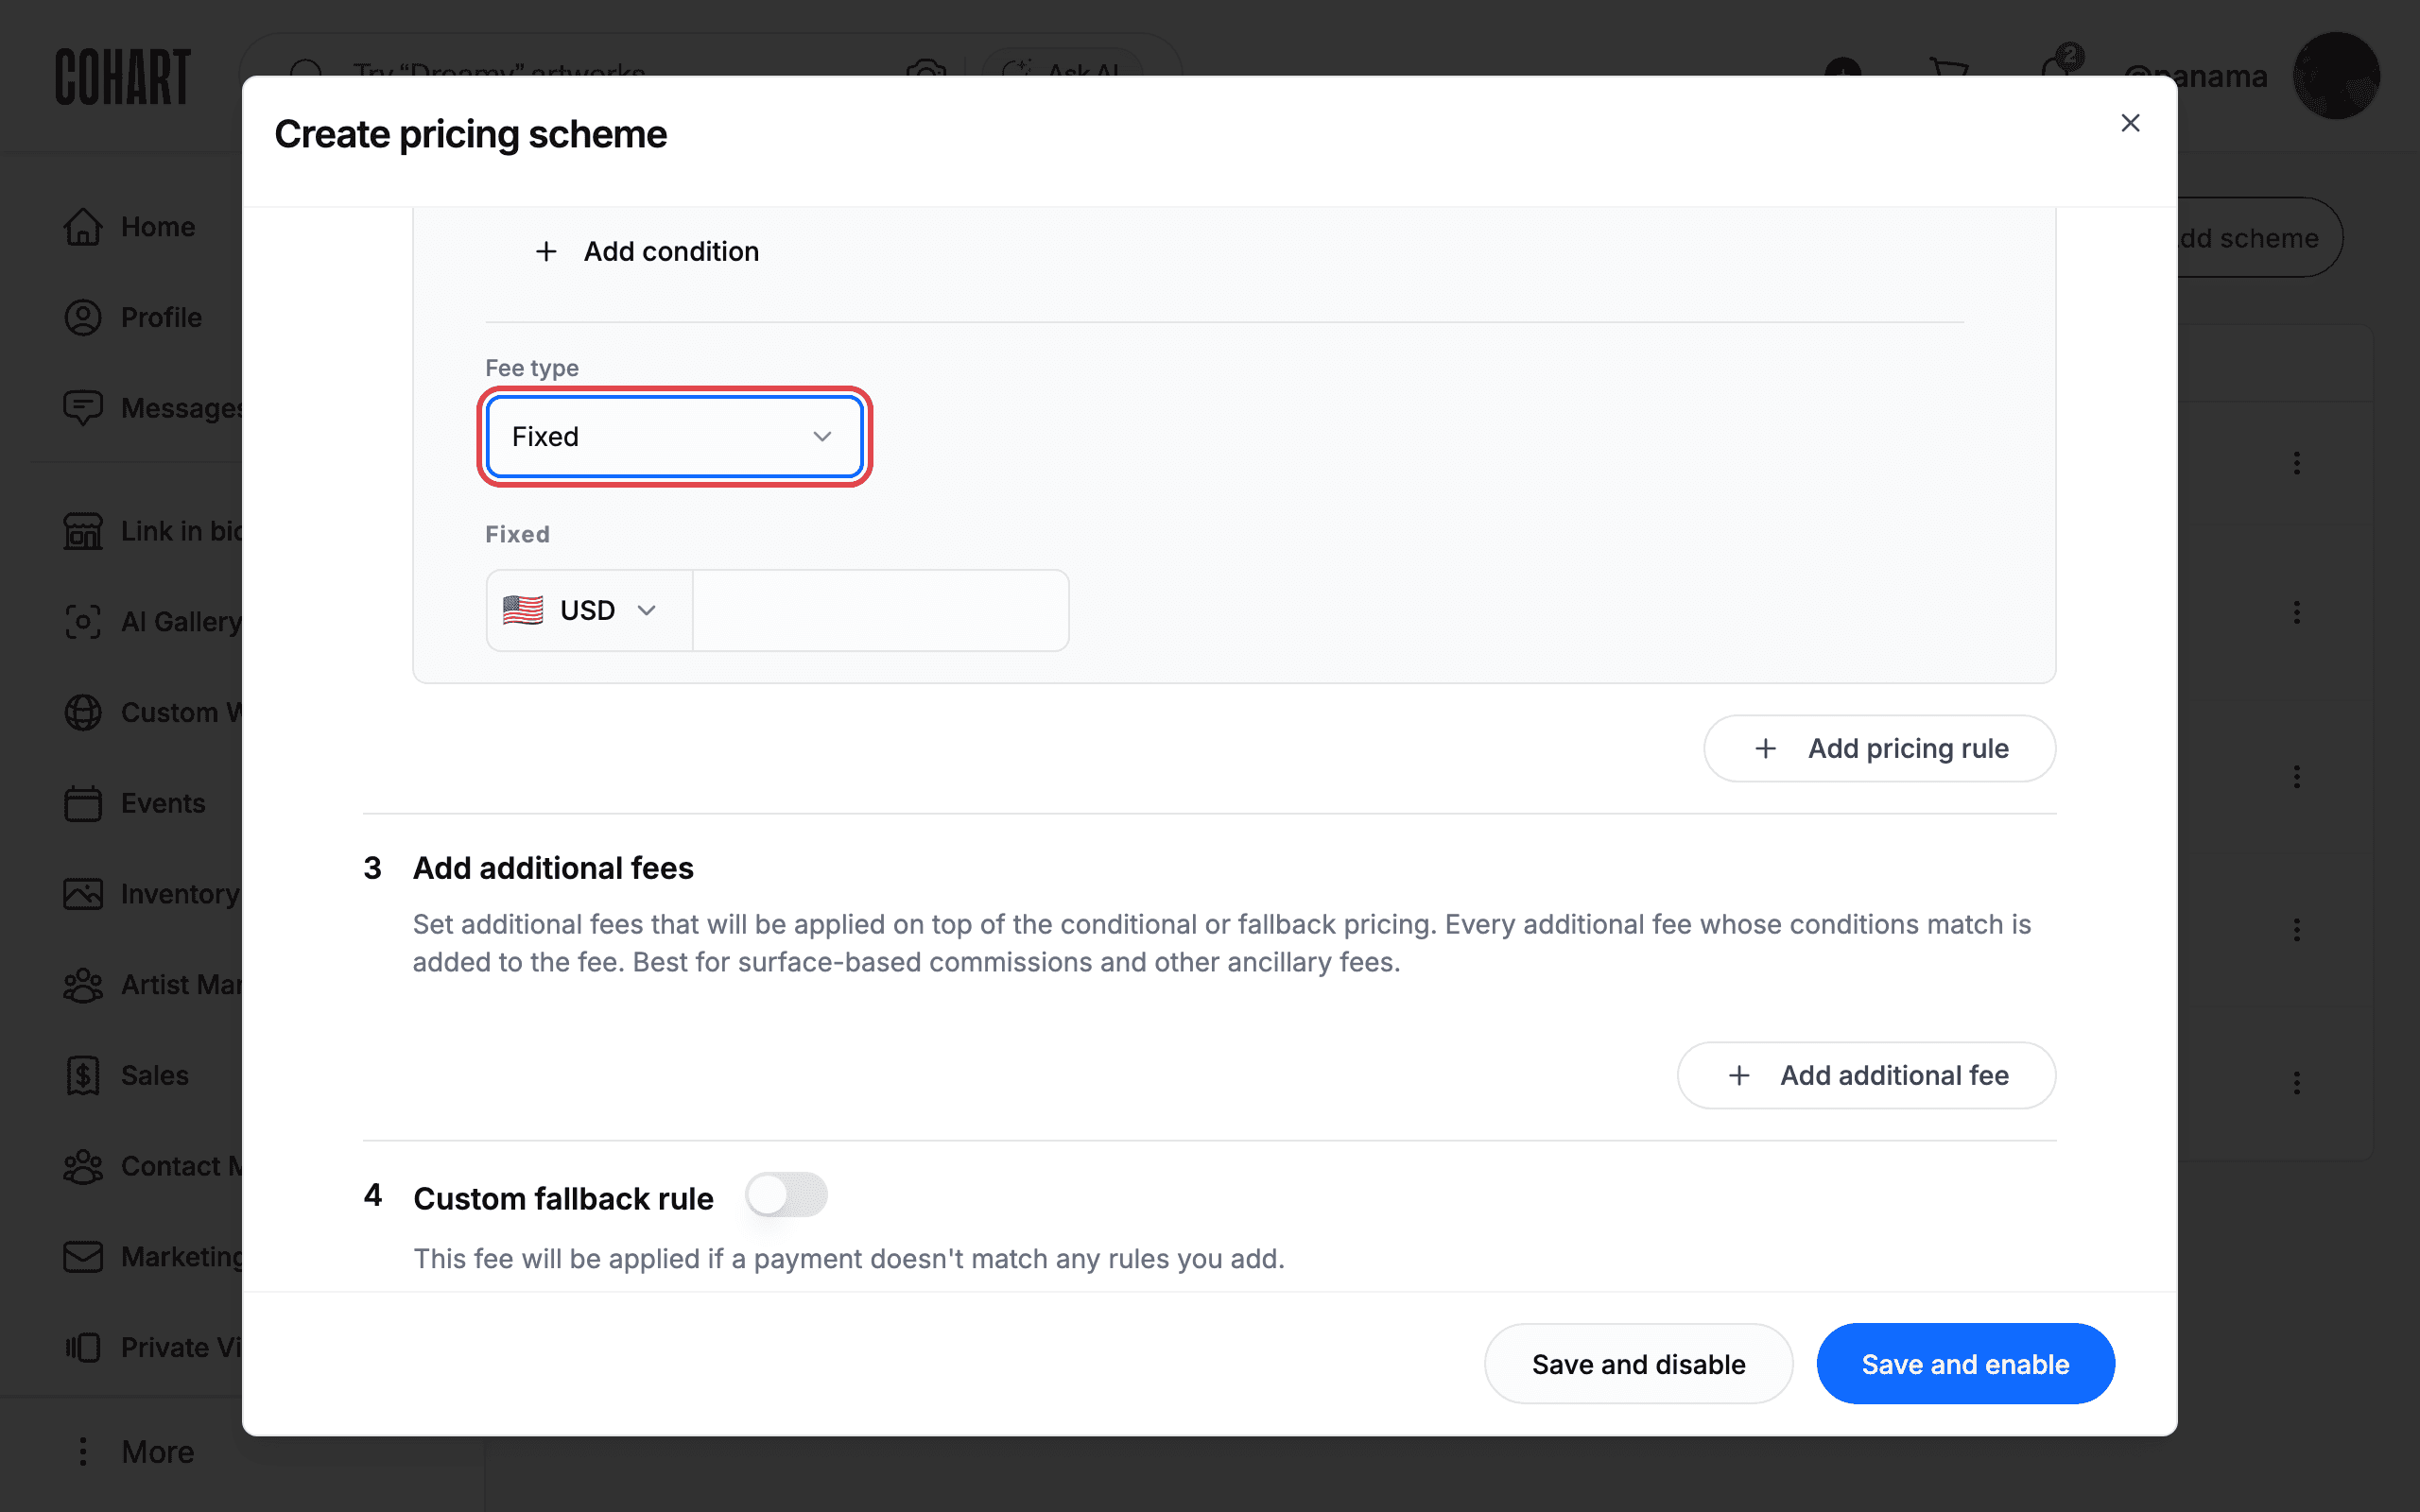
- Fixed charges one flat amount per matching payment. Fill in the single Fixed currency box. It has no minimum or maximum.
- Mixed charges both: a Percentage box plus a Fixed currency box, with only a Maximum (optional) cap and no minimum.
14. Fill in a Fixed fee
With Fixed selected, the rule shows just the Fixed label and one currency amount box.
15. Fill in a Percentage fee
With Percentage selected, the rule shows Percentage, Minimum (optional), and Maximum (optional). The percentage is what you collect; the minimum guarantees you collect at least that amount; the maximum caps what you collect.
16. Pick the currency for a money box
Click any 🇺🇸 USD button to pick the currency for a money box. The list opens a small panel with a Search… box and a single entry, 🇺🇸 United States USD (checked). Only USD is available.
17. Add additional fees
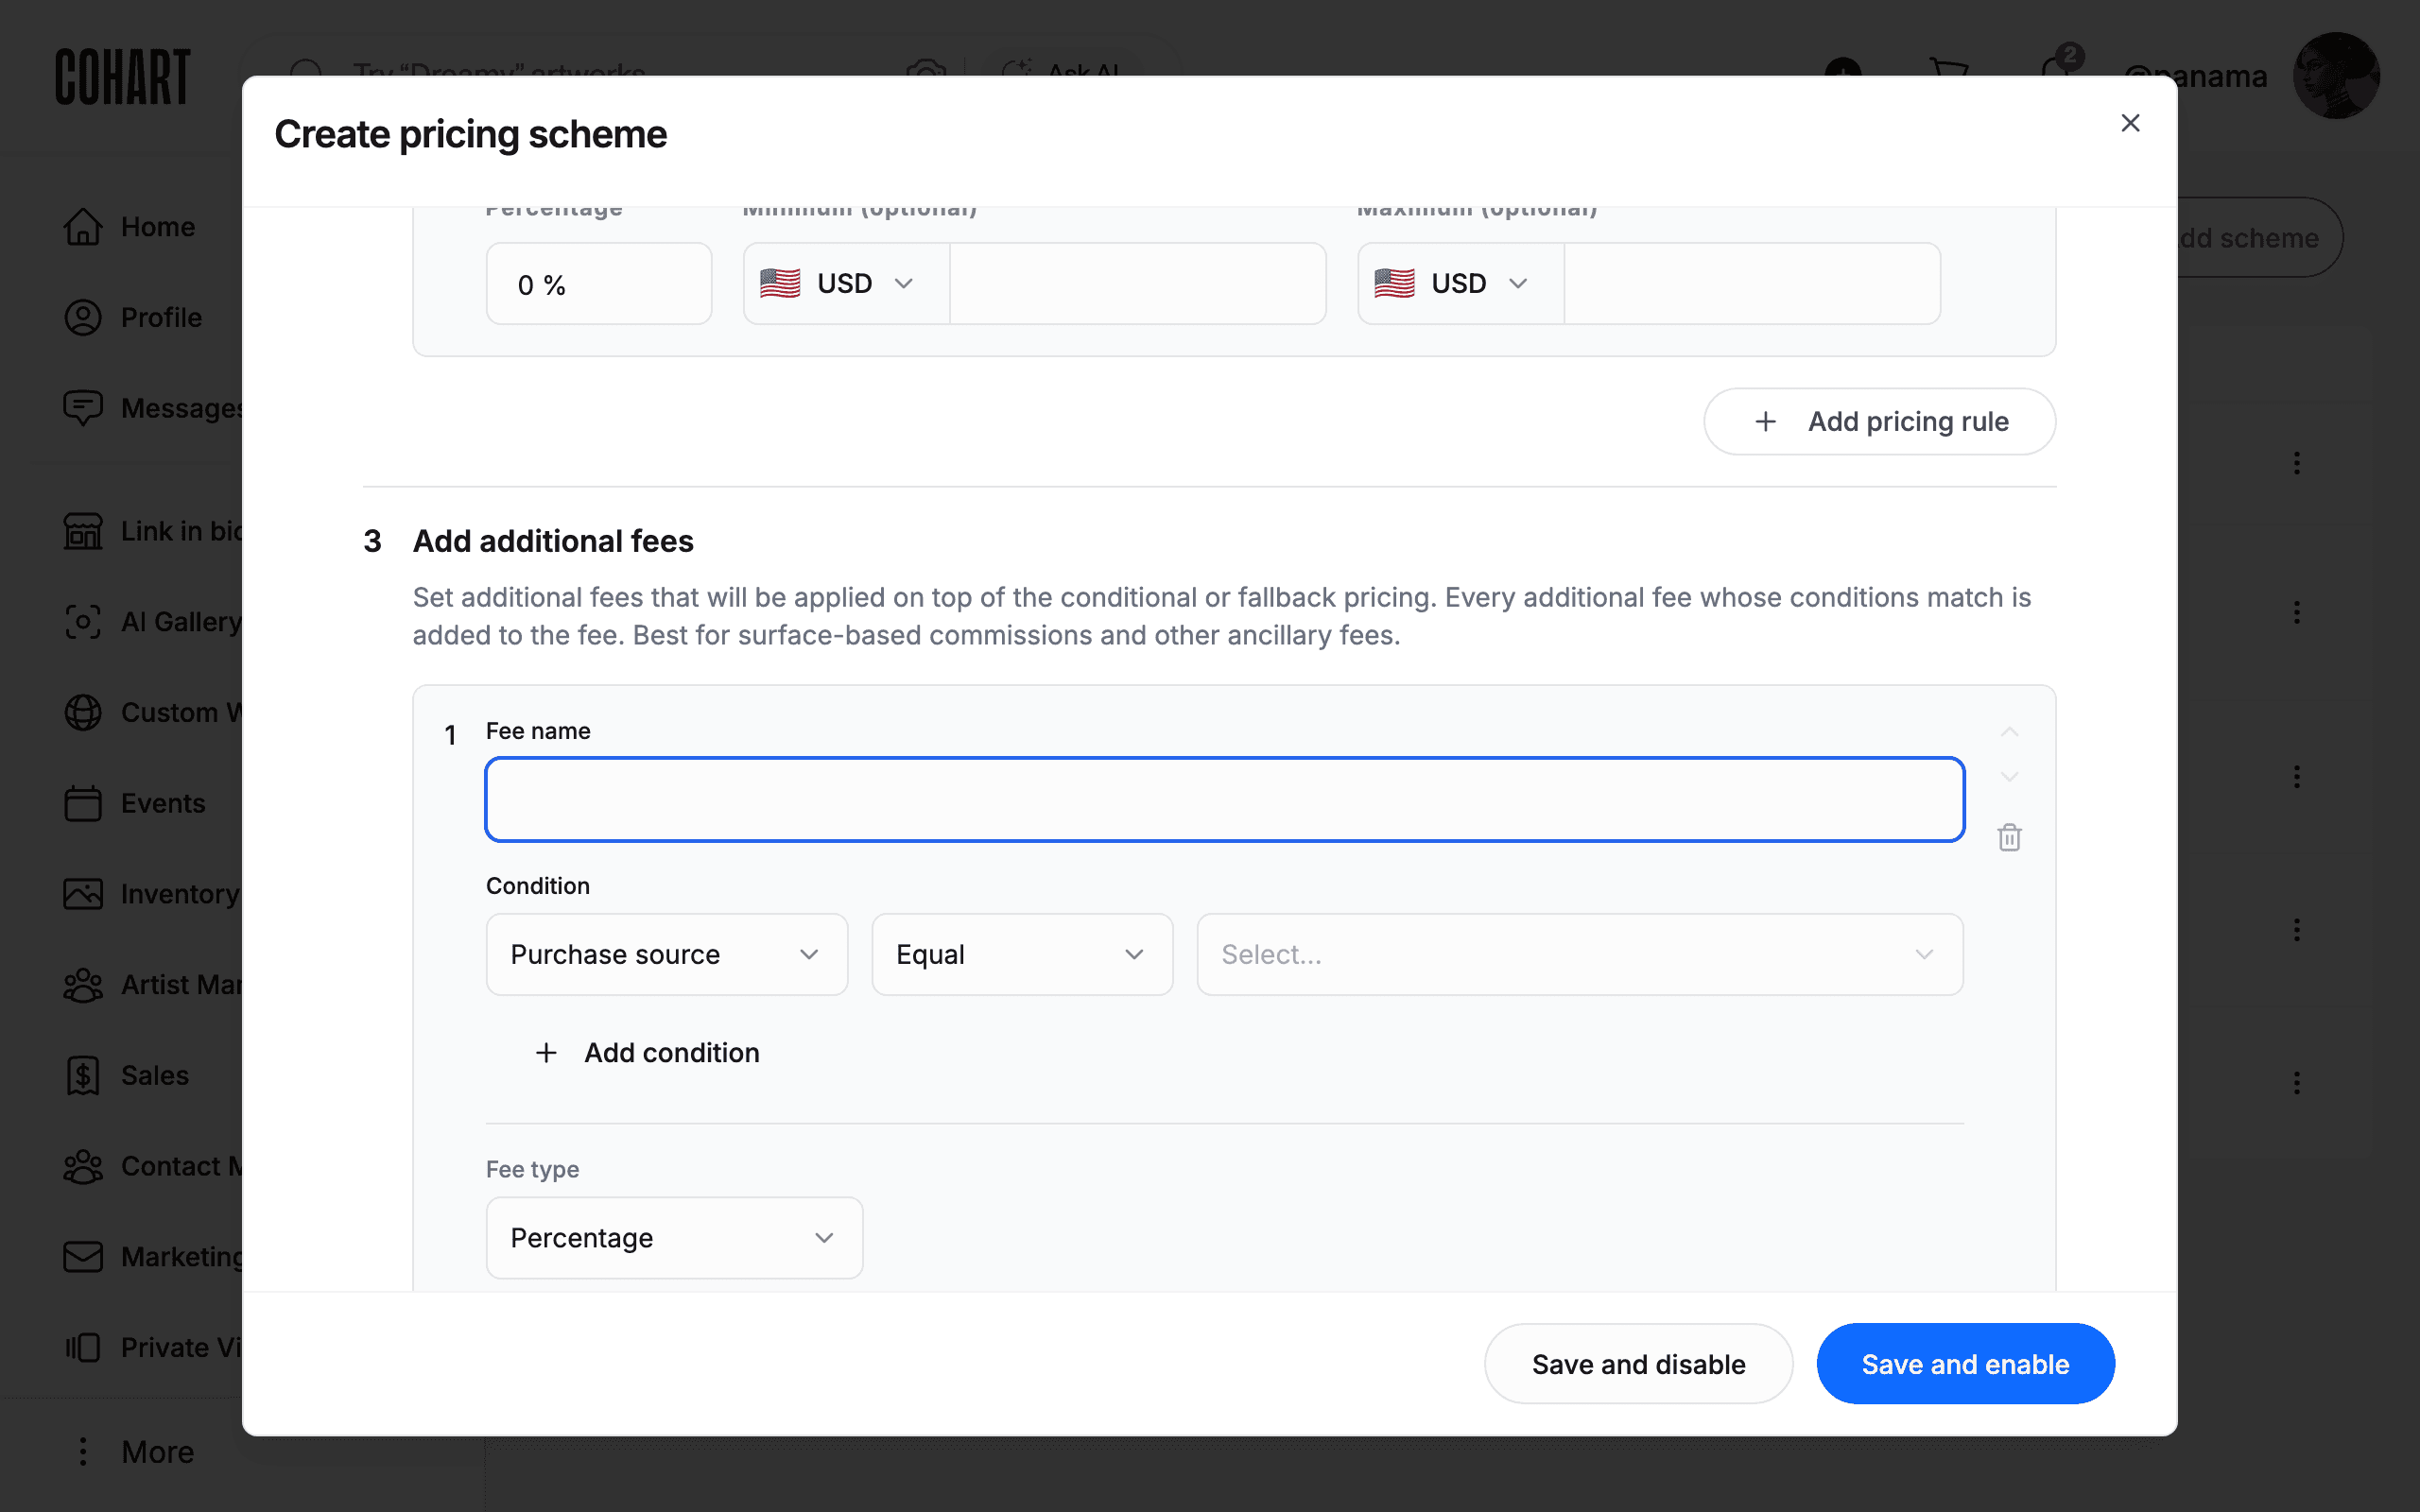
Under 3 Add additional fees, read the explanation: additional fees apply on top of the conditional or fallback pricing, every matching one is added, and they suit surface-based commissions and ancillary fees. Click Add additional fee to append a fee block with its own Fee name, Condition, and Fee type. A new fee block starts its condition on Purchase source.
18. Configure the custom fallback rule
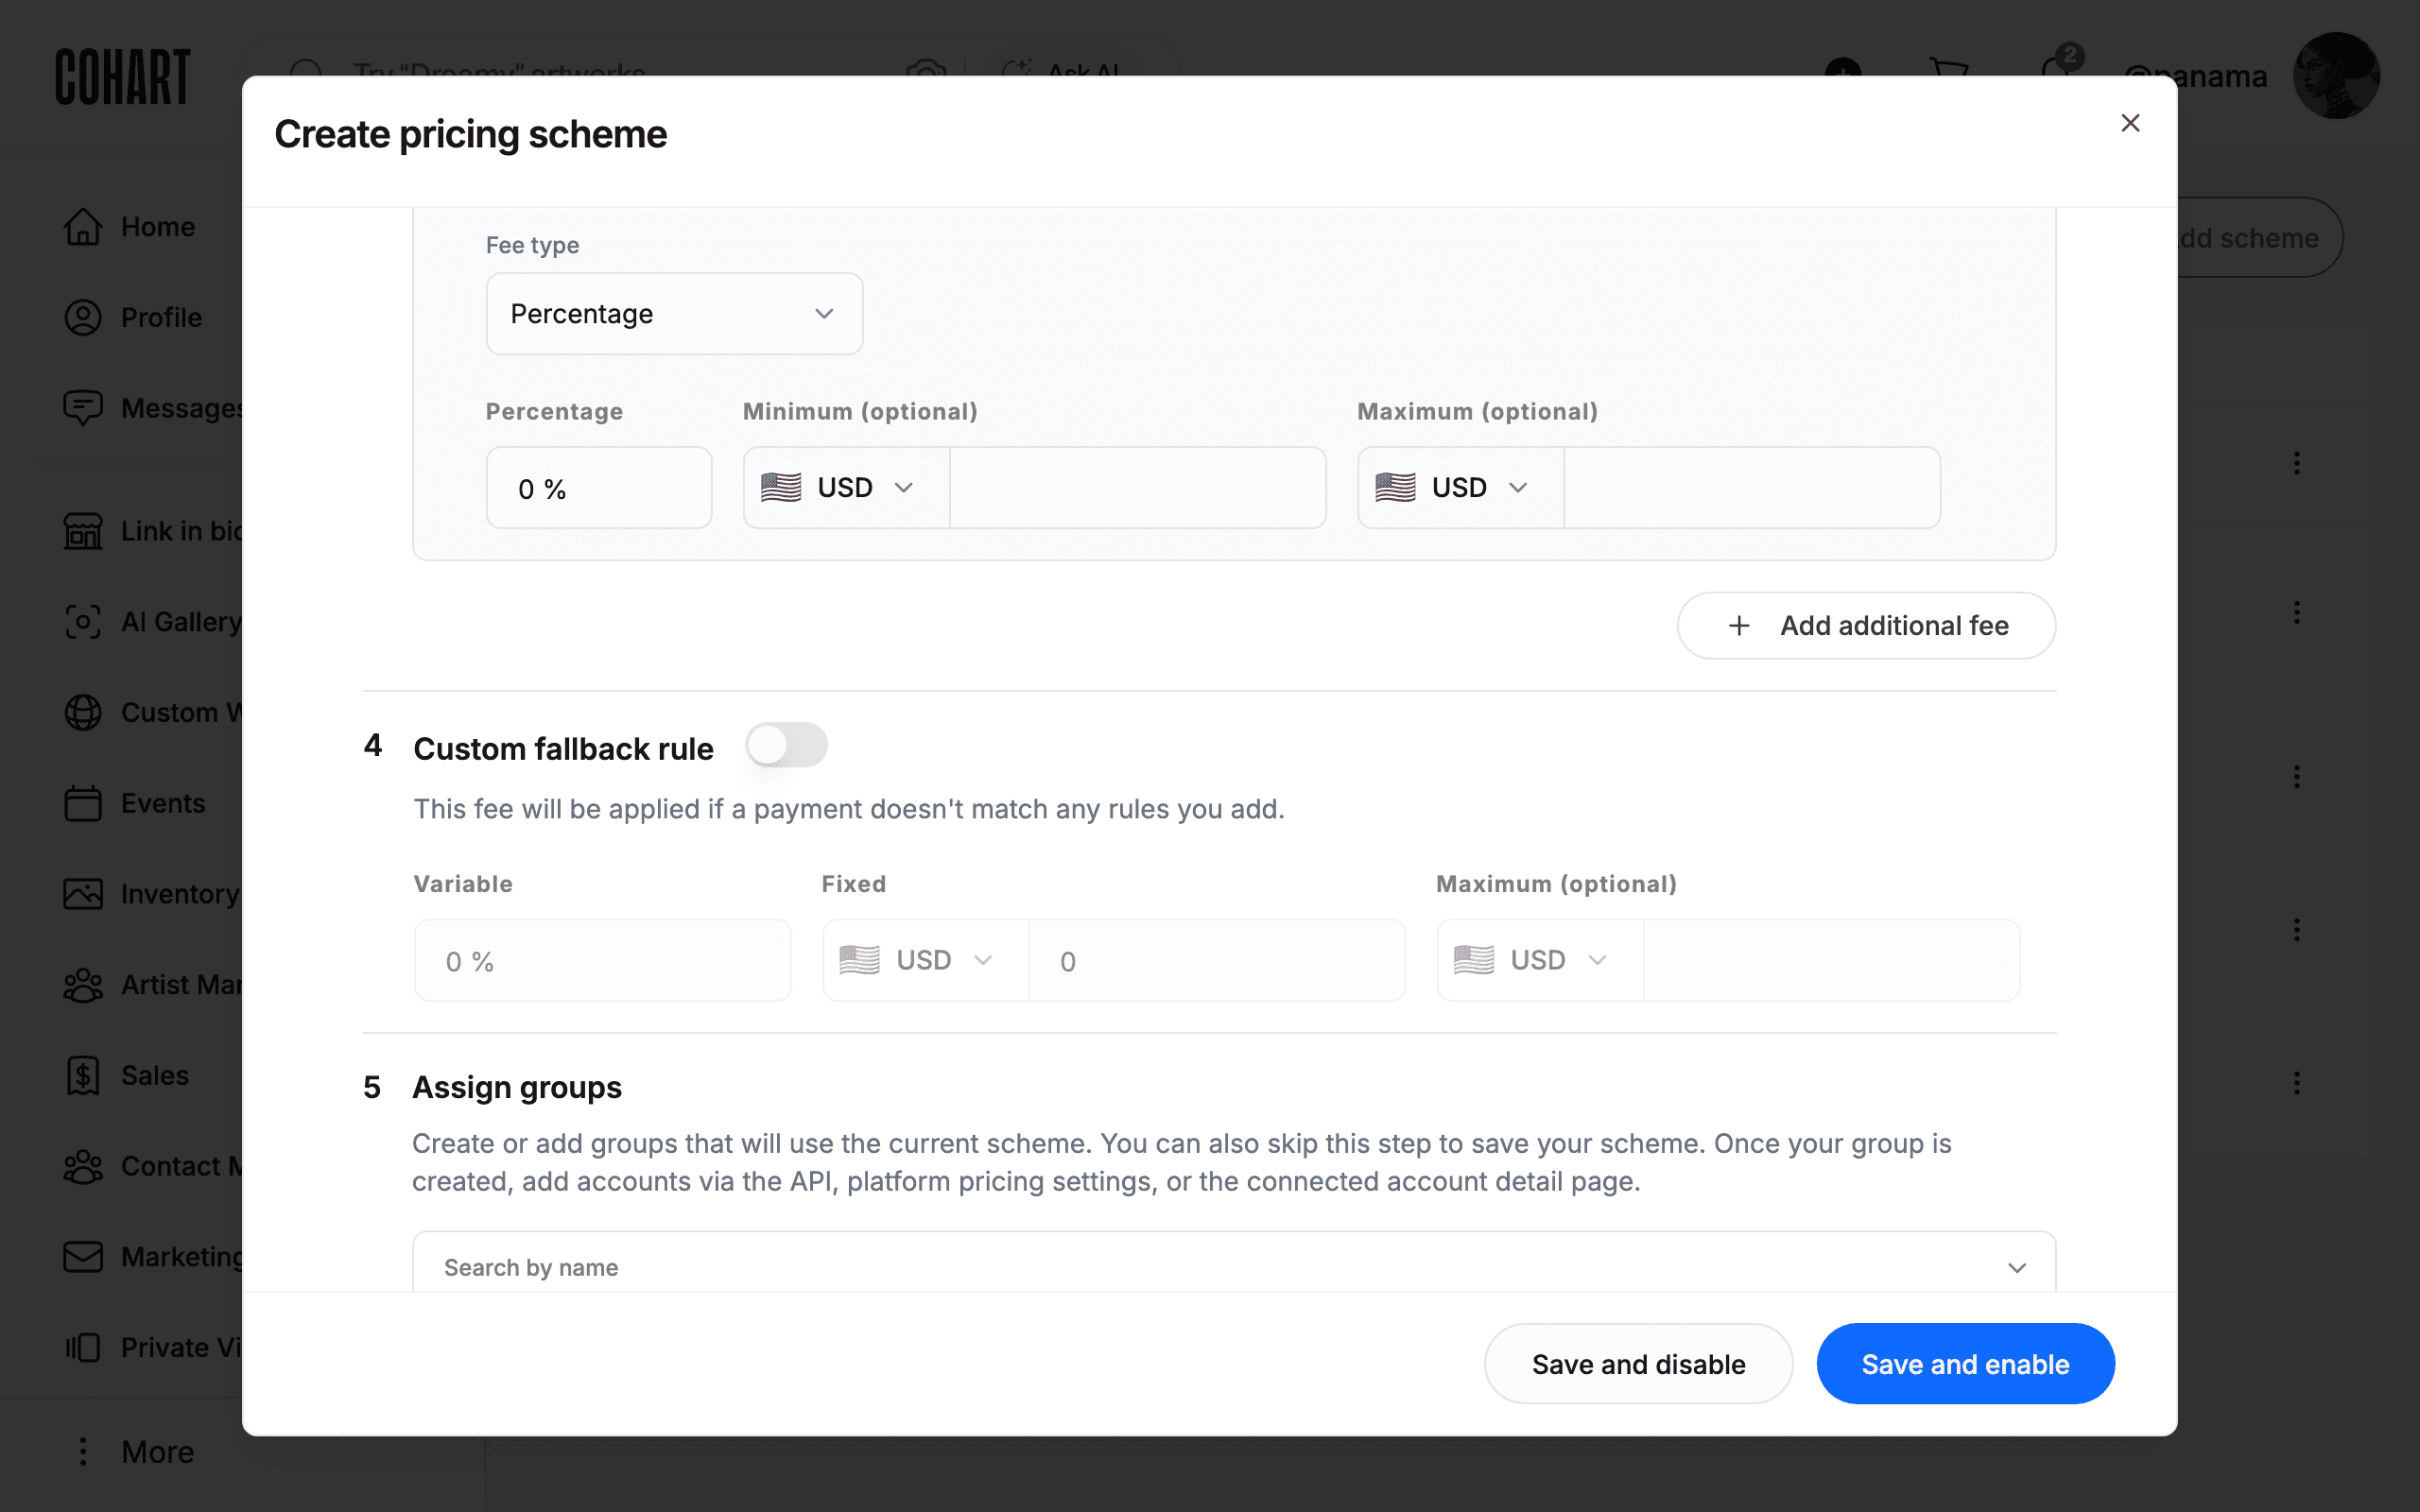
Under 4 Custom fallback rule, read the explanation: this fee applies when a payment matches none of your rules. Flip the switch next to the heading to enable it (it starts off, with the fields dimmed). Then fill in Variable (a 0 % percentage box), Fixed (a 🇺🇸 USD amount box starting at 0), and an optional cap in Maximum (optional).
19. Assign groups to the scheme
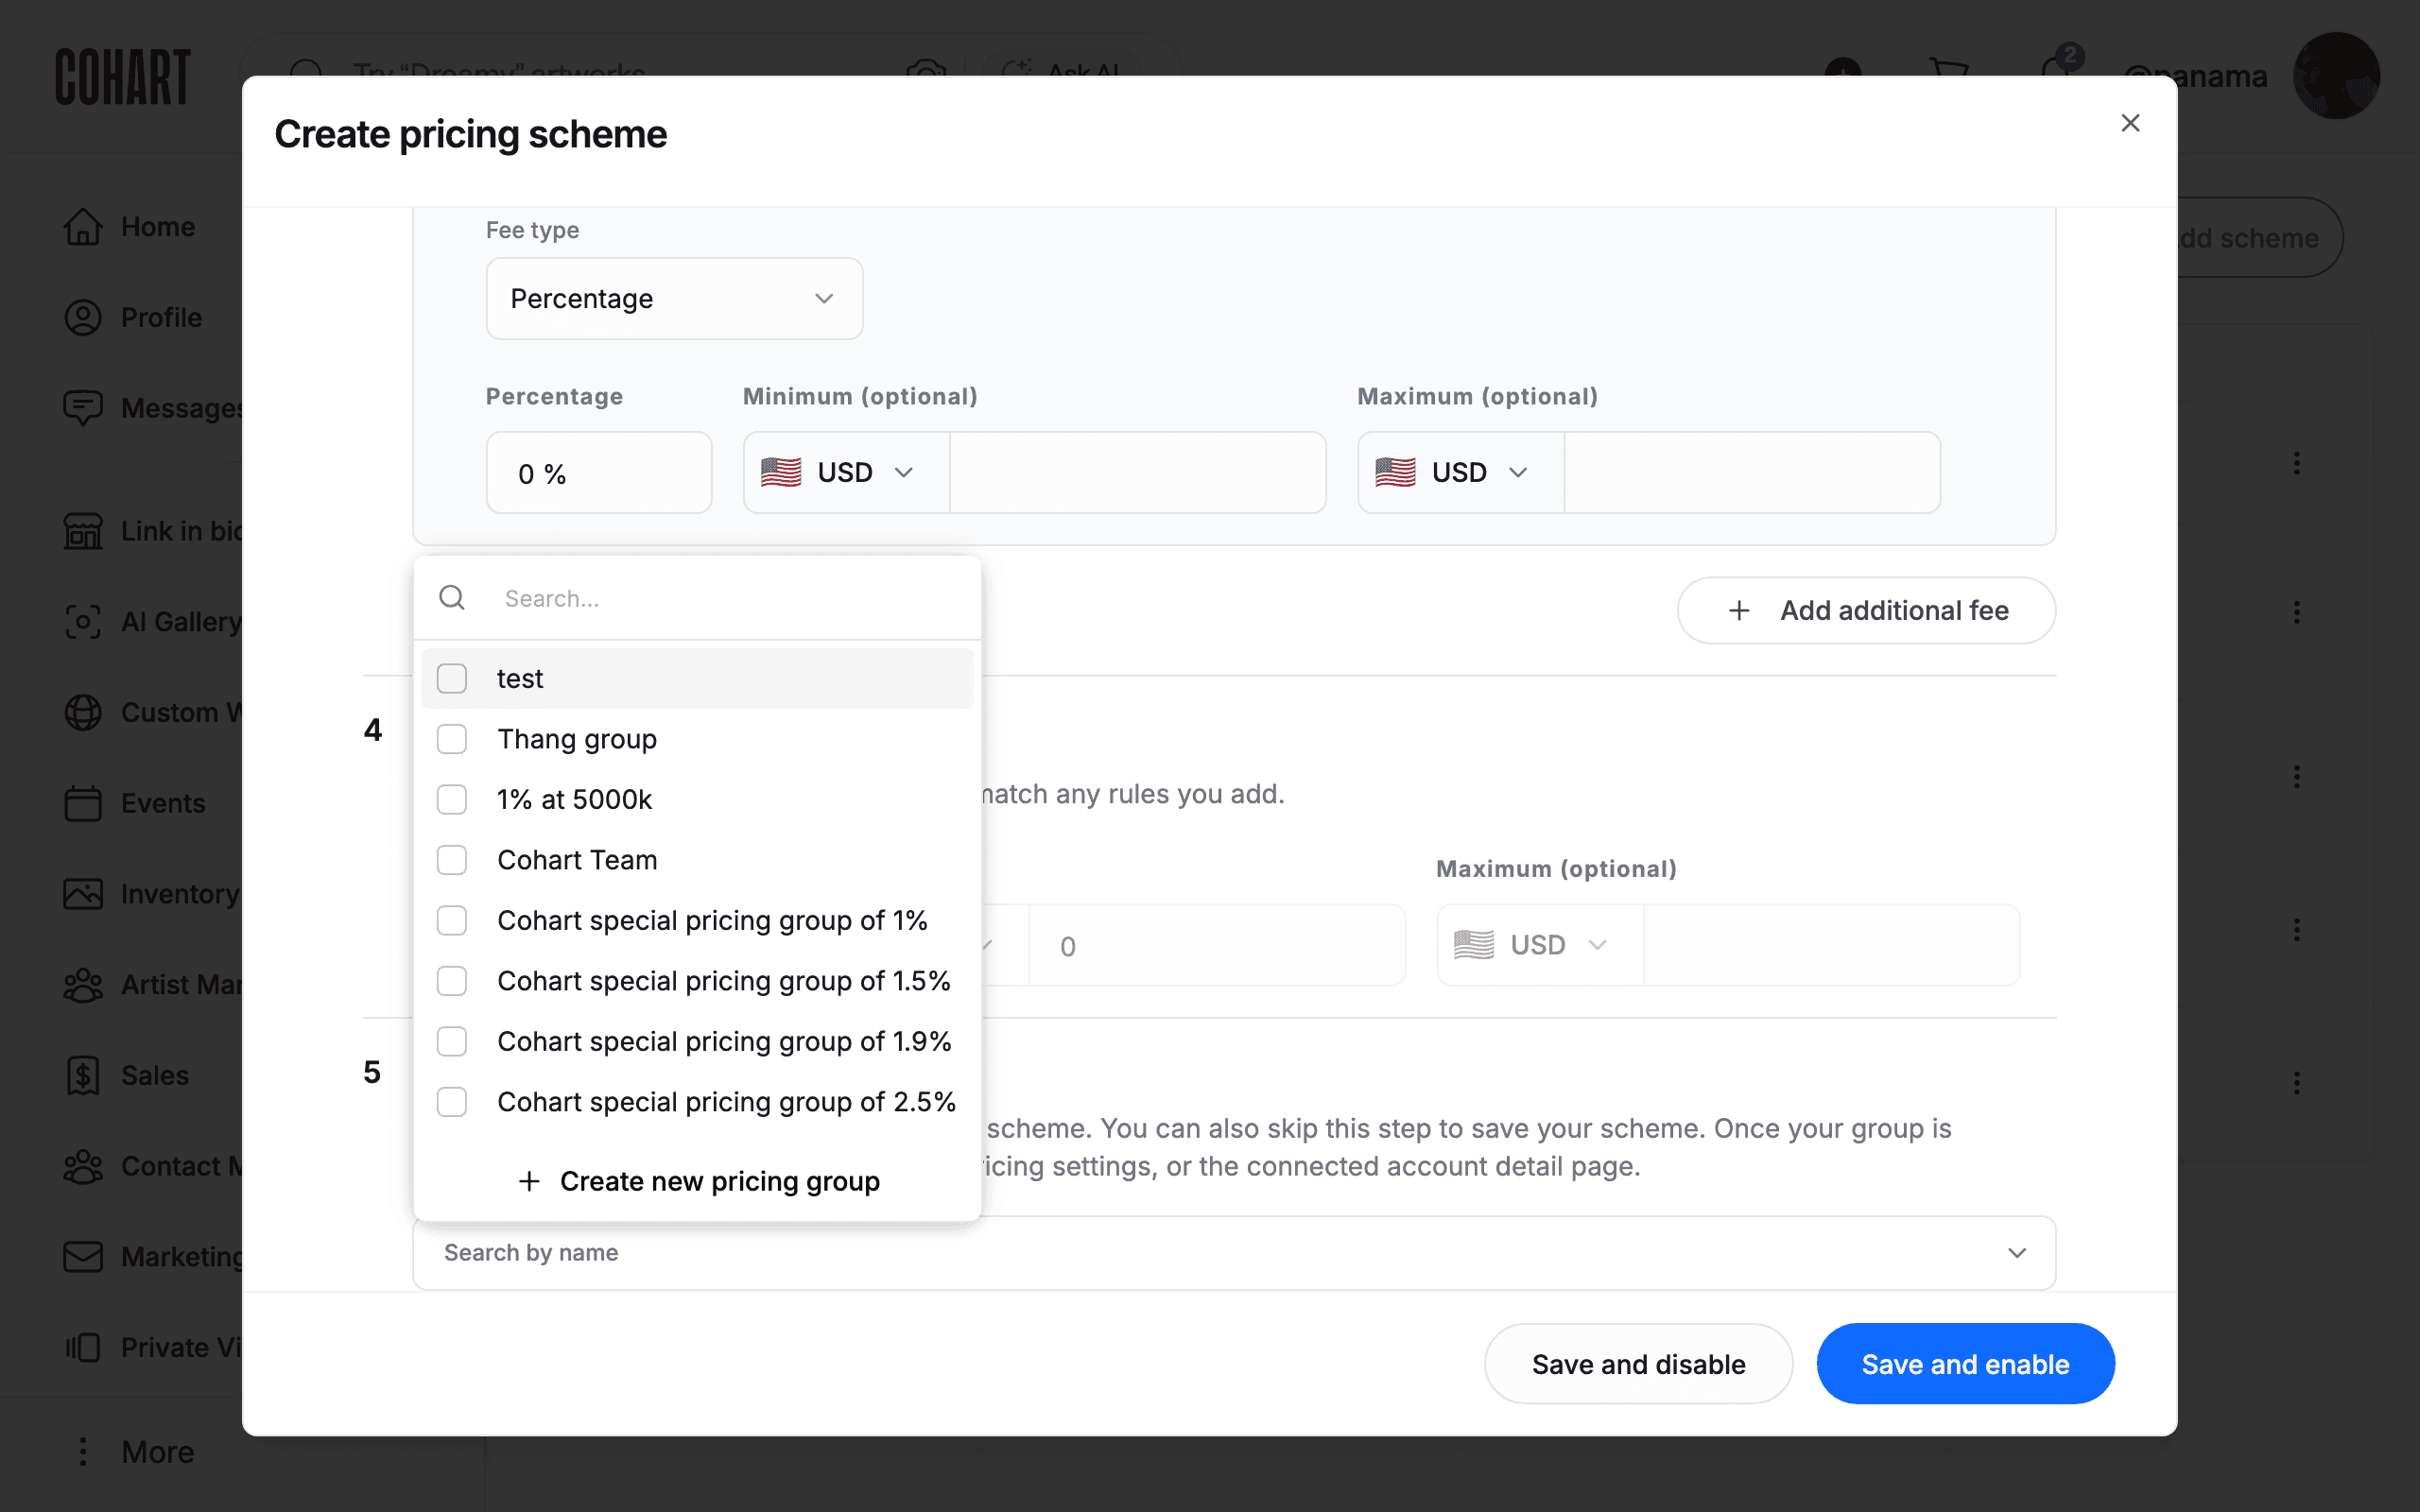
Under 5 Assign groups, read the explanation: groups use the scheme, this step can be skipped, and accounts join a group later via the API, platform pricing settings, or the connected account detail page. Click Search by name to open the group checklist. It has a Search… box, one checkbox per group (for example Cohart Team and the special pricing groups), and Create new pricing group at the bottom. Check the groups that should use this scheme.
20. Save or discard the scheme
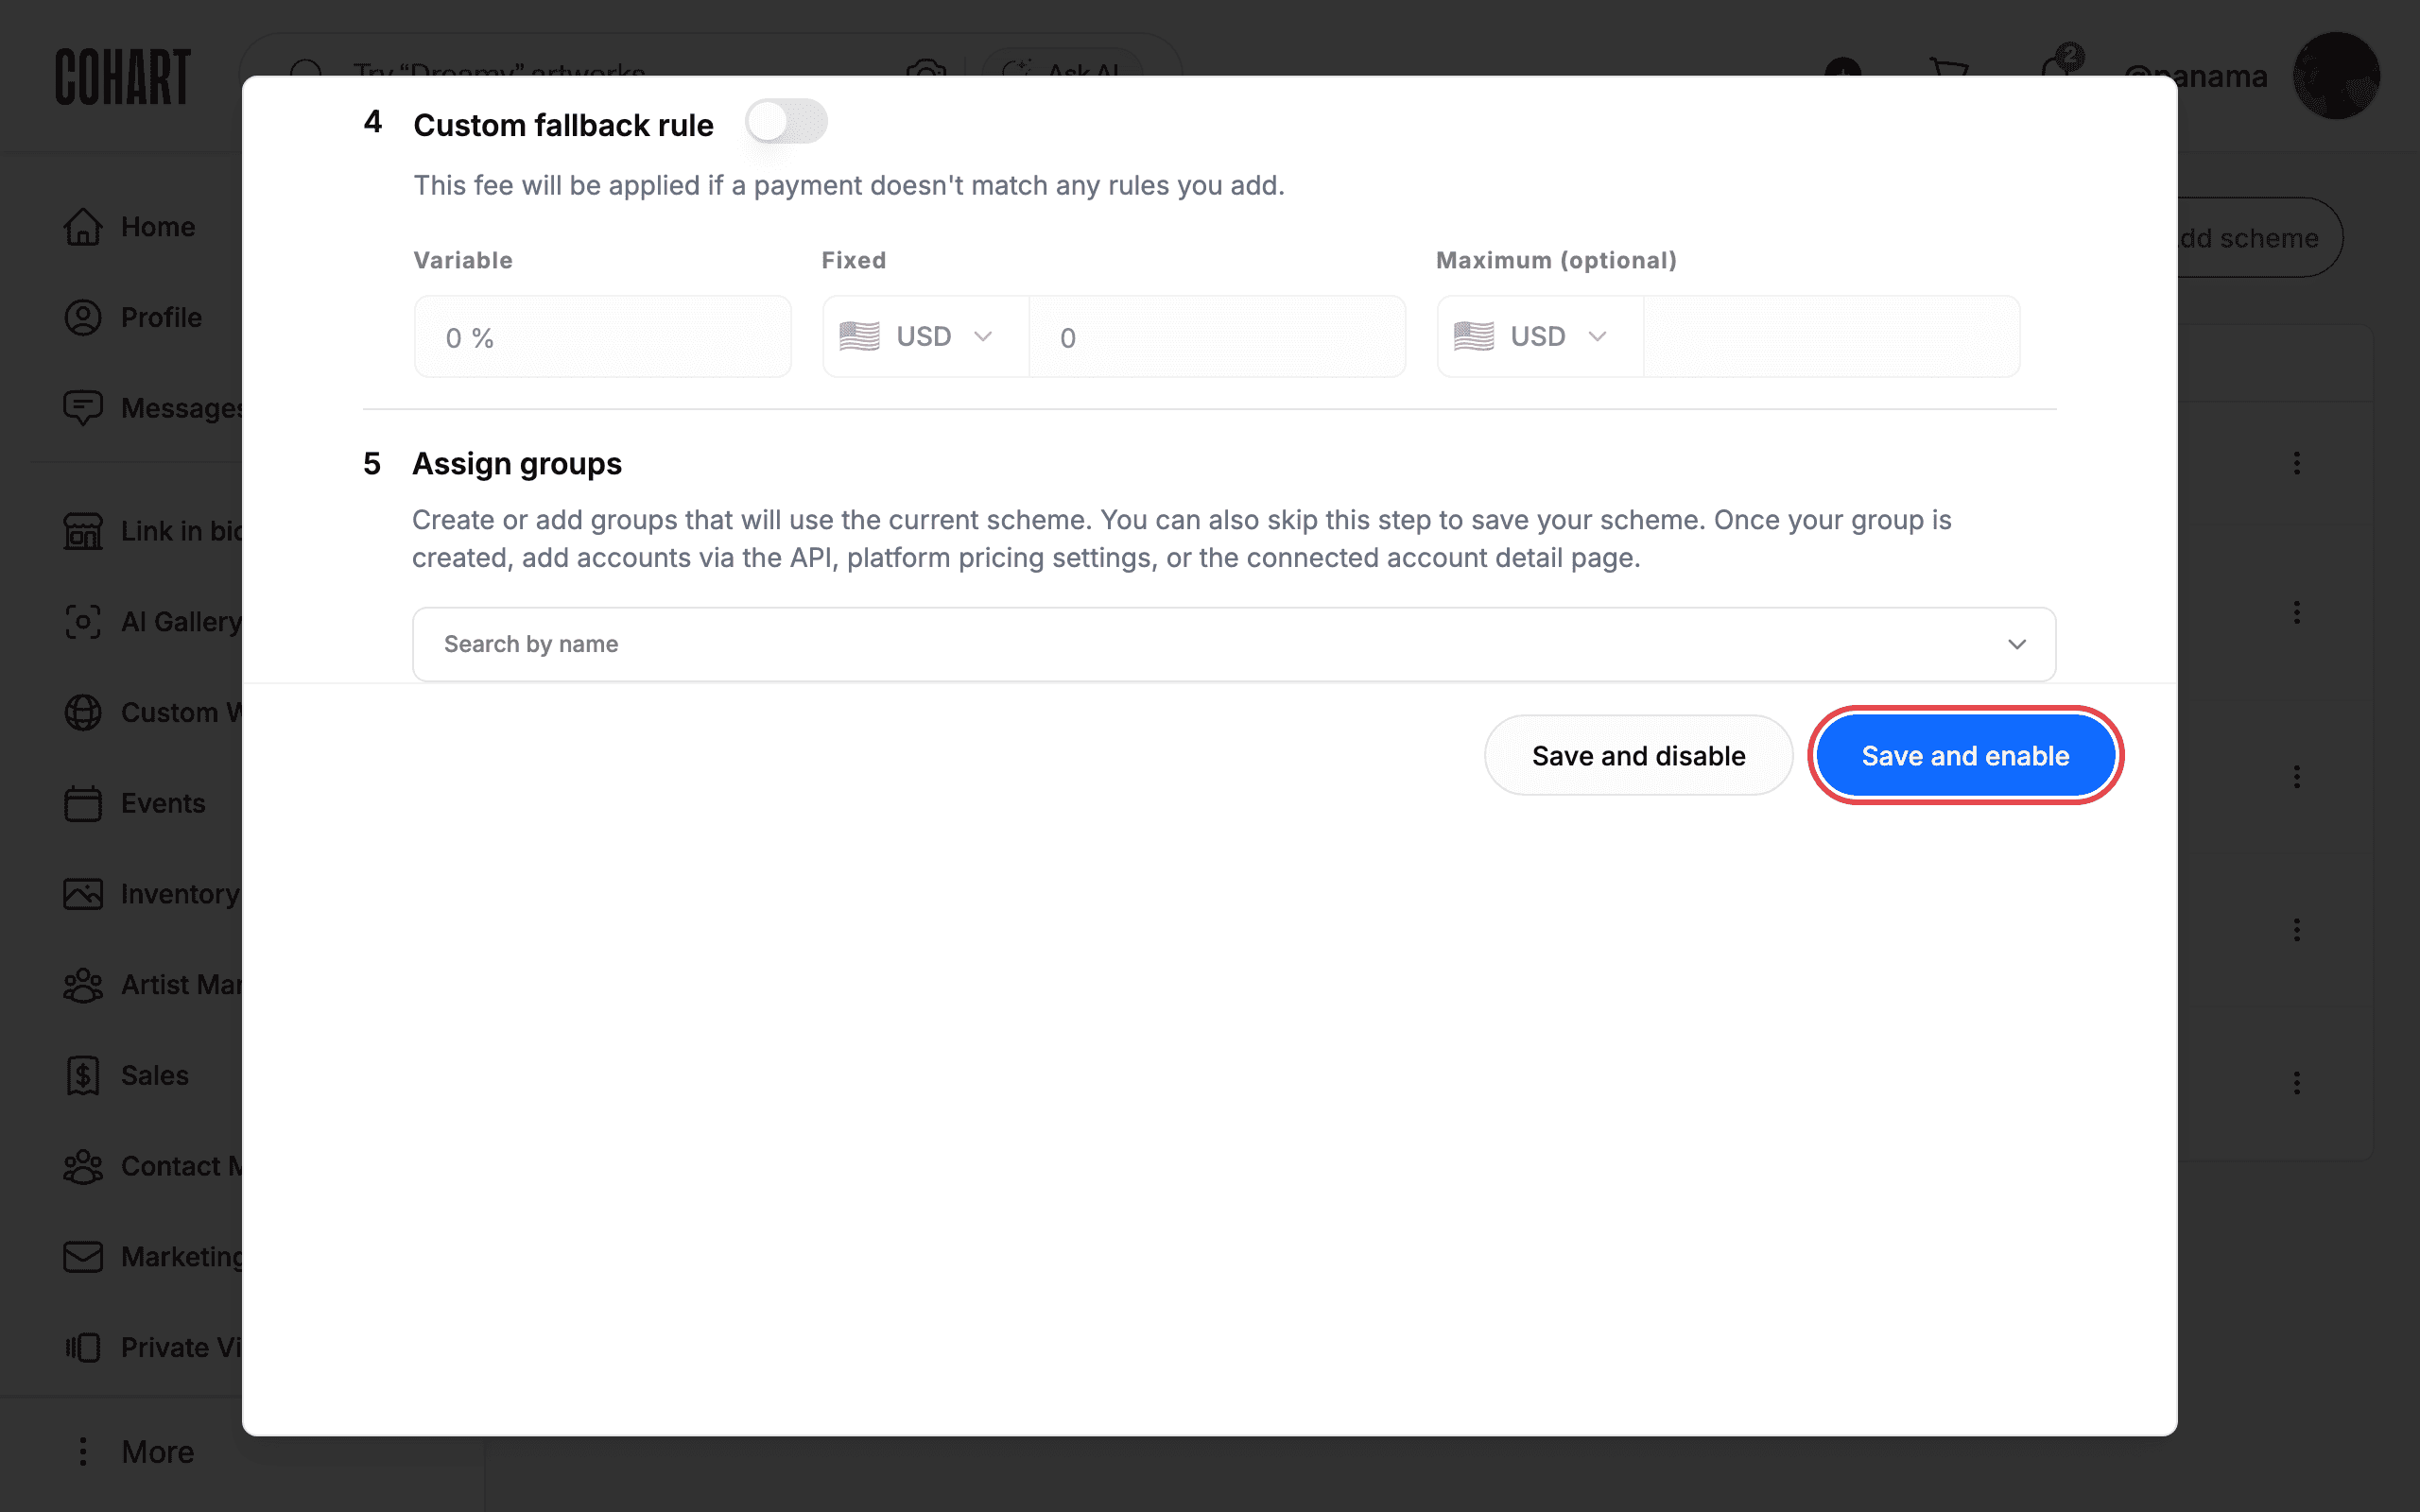
Finish with the buttons pinned at the bottom of the dialog. Click Save and disable to store the scheme without activating it, or Save and enable to activate it immediately. Click Close (or the × in the dialog’s top-right corner) to leave without saving anything.
Tips
- Rules run in order; first match wins. Put the most specific rule first and use the chevrons to reorder once you have more than one.
- Additional fees stack; conditional rules do not. Only the first matching conditional rule (or the fallback) sets the base fee, while every matching additional fee is added on top.
- The default scheme cannot be archived. Its row menu shows Cannot archive default scheme instead of an archive action.
- Use Clear to reset the tab filter. The Clear button next to the Active and Archived tabs resets the list view.
- There is no preview step. Save and enable activates a scheme immediately and changes fees on future matching payments, so use Save and disable (or Close) when experimenting.
Troubleshooting
- Page does not redirect after signing in → the redirect sometimes fails → check the top-right header for your profile handle (the @name shown there); if it is there, you are signed in and can navigate to Pricing Settings directly.